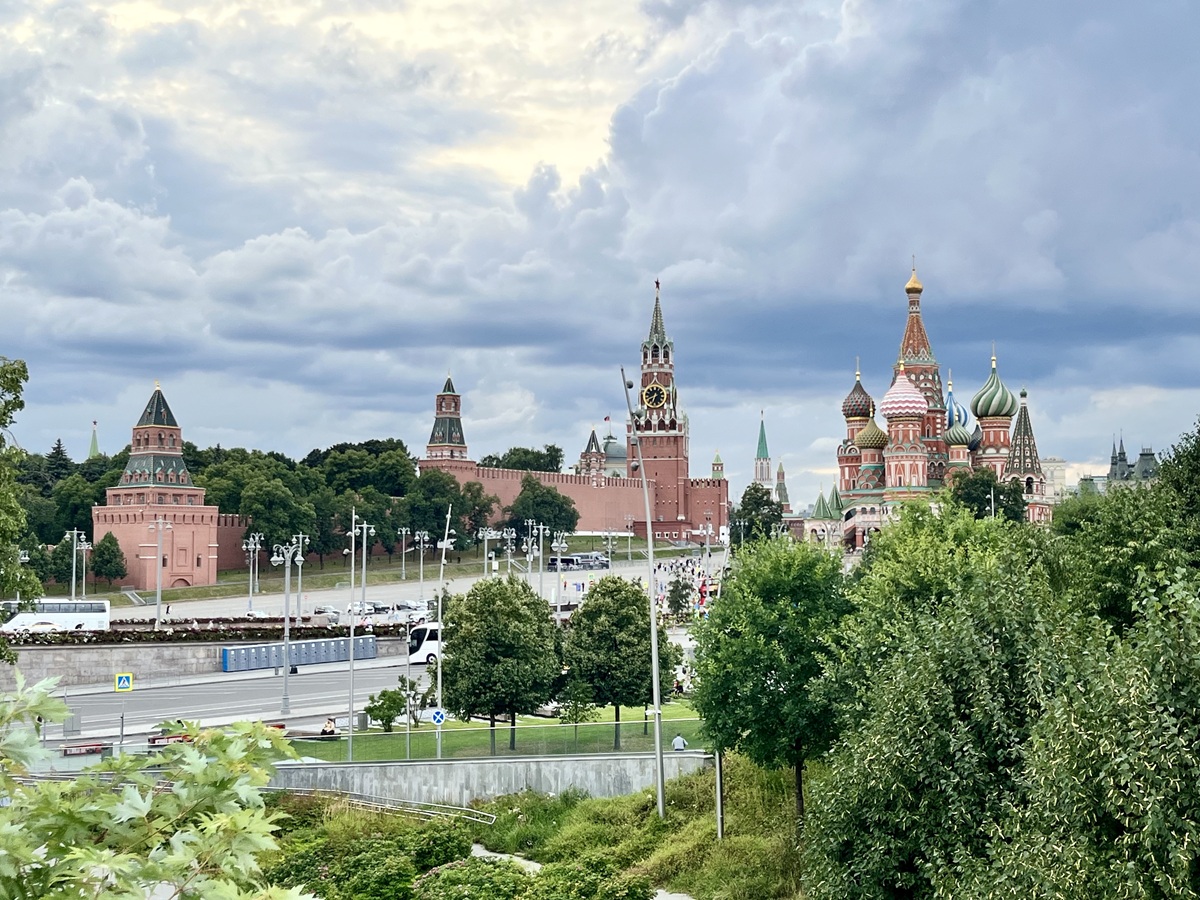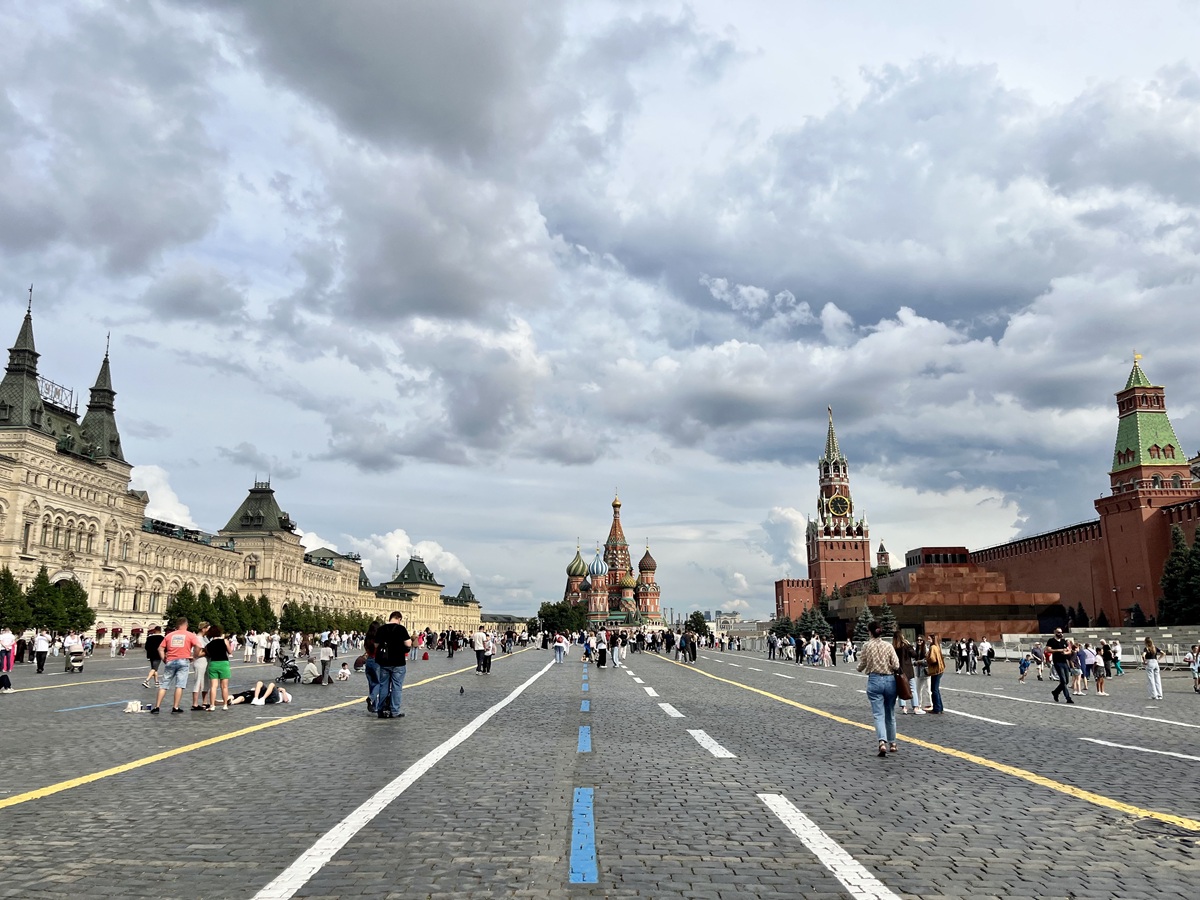
After my first visit to Russia back in 2024, I never imagined that I'd be able to travel there again so soon. What's even better is that for my second trip, I was able to apply for a Russian e-visa completely online, unlike the traditional tourist visa I applied for before.
The process was much more convenient, especially since I didn't have to visit a visa center to submit my application.
If you're planning a trip to Russia and wondering how to apply for the Russian e-visa for tourism, I'll walk you through the process step-by-step based on my own application experience in 2026.
What is the Russian E-Visa?
The Russian unified e-visa is an electronic visa available to citizens of eligible countries who want to travel to Russia for tourism, private or business visits, as well as certain scientific, cultural, economic, sporting and other events.
As of August 2026, the e-visa is valid for 120 days from the date it is issued, and you can stay in Russia for up to 30 days from the date of entry.
One important thing to remember is that you can only enter and leave Russia through approved border crossing points. This includes major airports such as Sheremetyevo, Domodedovo, Vnukovo and Zhukovsky in Moscow, as well as Pulkovo Airport in St. Petersburg and many other approved checkpoints.
🔗 If you're researching other visa or entry processes, you might find my other guides helpful:
- Applying for a Russian Tourist Visa as a Philippine Passport Holder in 2024
- Kyrgyzstan Tourist E-Visa – How to Apply Online (As of 2025)
- Kyrgyzstan Visa on Arrival (VoA) Experience for Philippine Passport Holders
- Israeli Entry Permit (FAQs about stamps and security checks)
- Uzbekistan E-Visa (Step-by-Step Application Process)
- Ugandan E-Visa Application Process & Visa Stamp in the Airport
- Applying for a Jordan Tourist Electronic Visa (for eligible Nationalities!)
- Sri Lanka ETA Application Guide: How to Apply Online for a Tourist Visa (Step-by-Step)
Are You Eligible for the Russian E-Visa?
As of August 2026, citizens of 64 countries are eligible to apply for the Russian E-Visa, including the Philippines, India, Indonesia, Malaysia, Singapore, China, Saudi Arabia, Bahrain, Kuwait, Oman, Japan, Turkey, and several European countries.
Since I applied using my Philippine passport, the application screenshots and experience I'll share below are based on my own application. However, the same unified e-visa system is used by other eligible nationalities.
However, visa rules and the list of eligible nationalities can change, so always check the official Russian Ministry of Foreign Affairs e-visa website before applying rather than relying solely on this list or any travel blog.
If your nationality isn't eligible for the Russian e-visa and you're applying from the UAE, you may need to apply for a traditional Russian visa instead. You can read about the process I followed here: Applying for a Russian Tourist Visa as a Philippine Passport Holder in the UAE
Russian E-Visa Requirements:
Similar to my Sri Lanka ETA application, I found the Russian E-Visa requirements surprisingly straightforward. During my application, I mainly had to provide my personal information and upload:
- A recent digital passport-style photo
- A copy/photo of my passport data page
You don't need an invitation or hotel booking confirmation to apply, which makes the process considerably simpler than applying for a traditional Russian tourist visa.
However, while you don't need to submit a hotel booking confirmation, the application still asks where you intend to stay in Russia. More on that below.
How to Apply for a Russian E-Visa: Step-by-Step Application Process
Once you open the Russian Ministry of Foreign Affairs e-visa website, you'll need to:
- Accept the terms and conditions.
- Register as a new user.
- Note down or save your e-visa application ID.
- Complete the application form.
- Review all the information you've entered.
- Pay the e-visa fee.
- Wait for your application to be processed.
The application form itself is divided into seven sections:
- Applicant Photo
- Personal Details
- Visit Details
- Marital Status & Relatives
- Contacts & Employment
- Additional Information
- Summary
Let's go through them one by one.
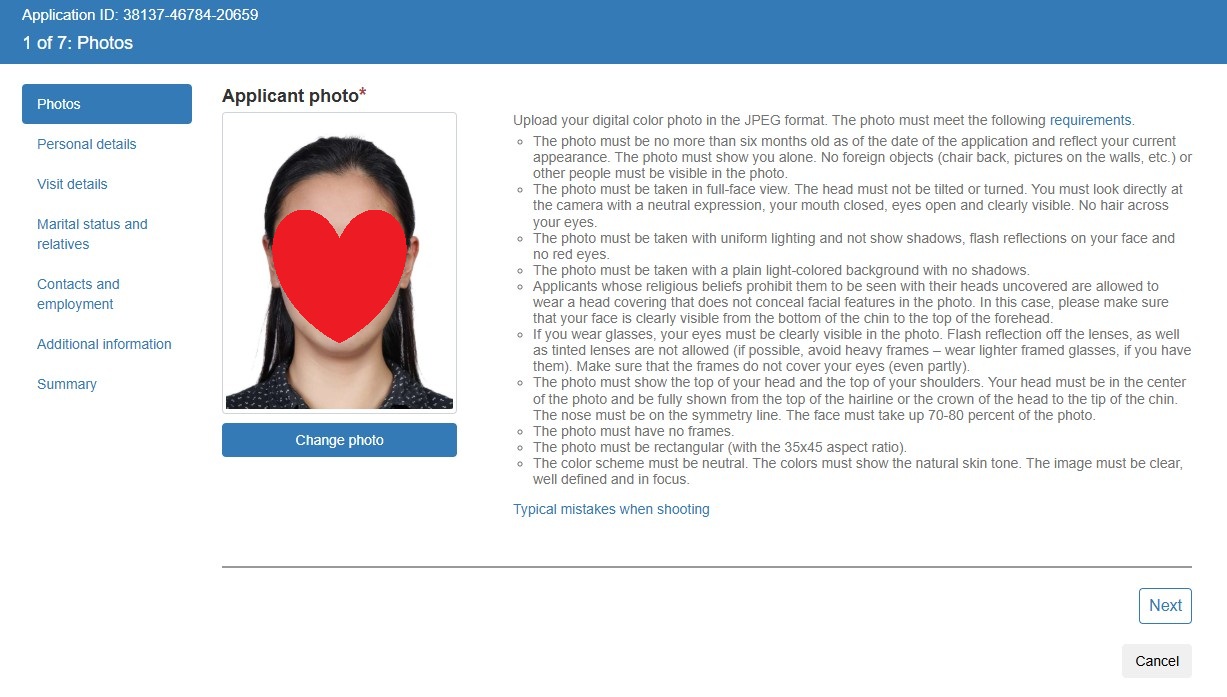
Step 1: Applicant Photo
First, upload your photo and carefully follow the requirements shown on the right side of the application page.
I've read about other applicants encountering errors when uploading their photos, so I'd recommend following the photo requirements as closely as possible.
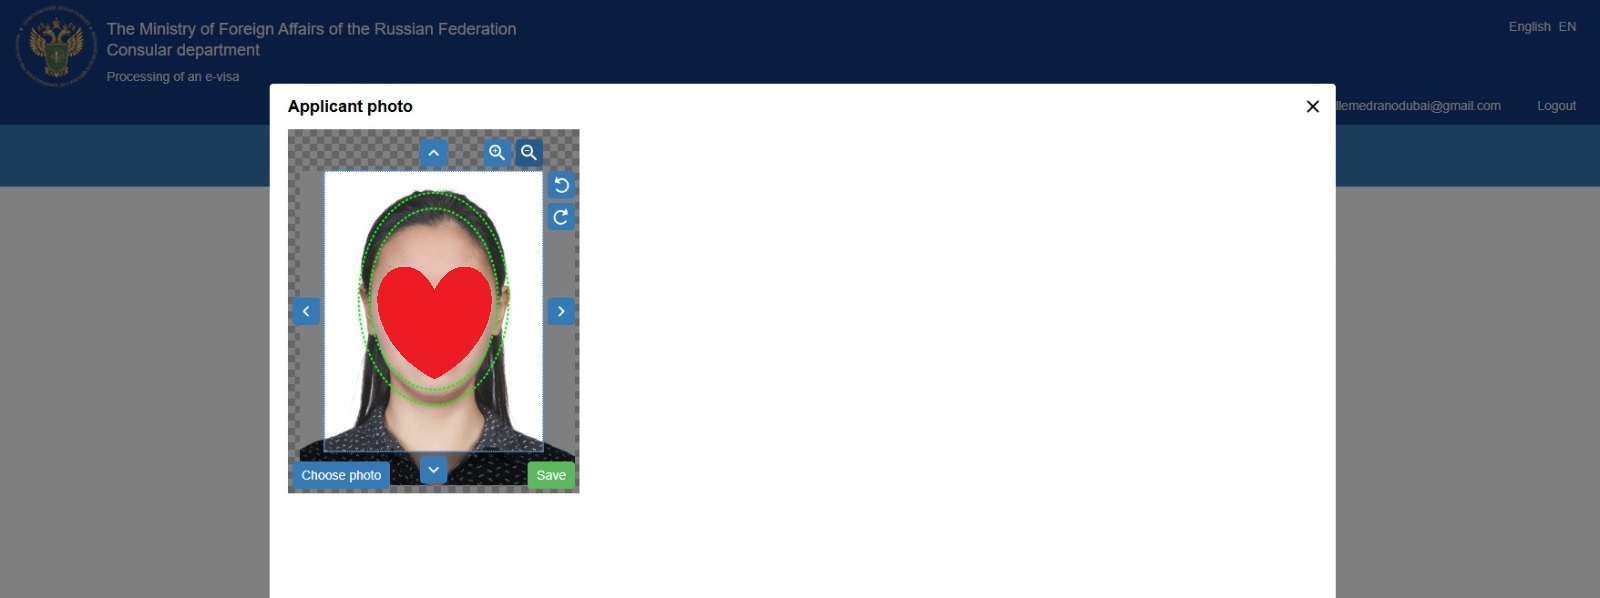
When you upload the photo, the website provides a circular guide that helps you position your face correctly in the center. You'll be able to adjust the photo before saving it.
Step 2. Personal Details
Next, you'll need to select your nationality and passport type and upload a photo of your passport data page.
Don't panic immediately if you see an error after uploading it.
As you can see from my screenshot, I received a warning saying: "The machine readable data in your passport is not recognized."
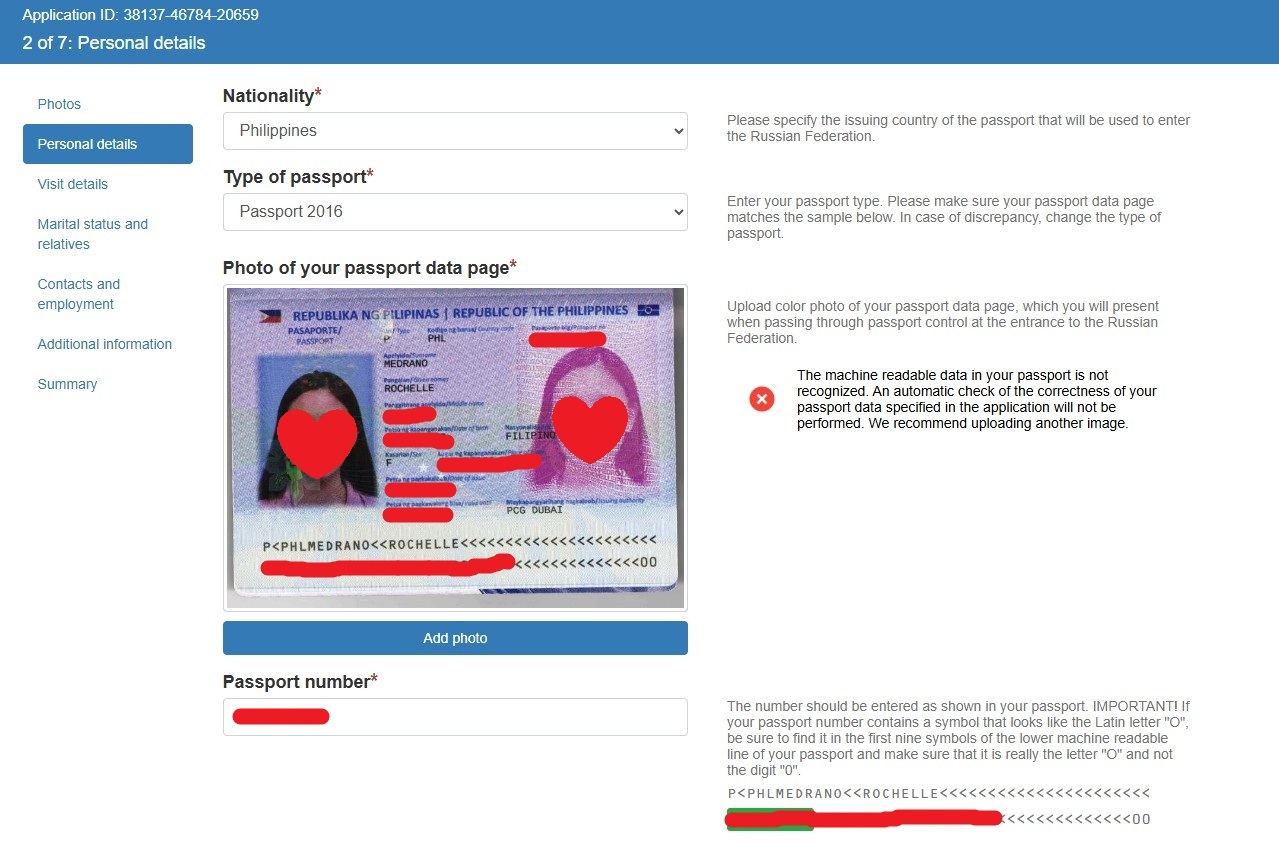
In my case, this simply meant that the system couldn't automatically read all the information from my passport.
I checked the fields below, manually filled in the information that was missing, and continued with my application. Despite the warning, I was still able to use the same passport image and proceed to the next step.
Step 3: Visit Details
This section asks about the purpose and details of your trip to Russia.
Since I was traveling for sightseeing, I selected Tourism as the purpose of my visit and entered my intended arrival date.
One part that confused me a little was: "Which organization or which person are you going to visit?"
If you're visiting someone in Russia, you can provide that person's details.
In my case, I wasn't visiting a particular person, so you can see from my screenshot how I completed this section. For the telephone number, I used the number of the hostel where I intended to stay.
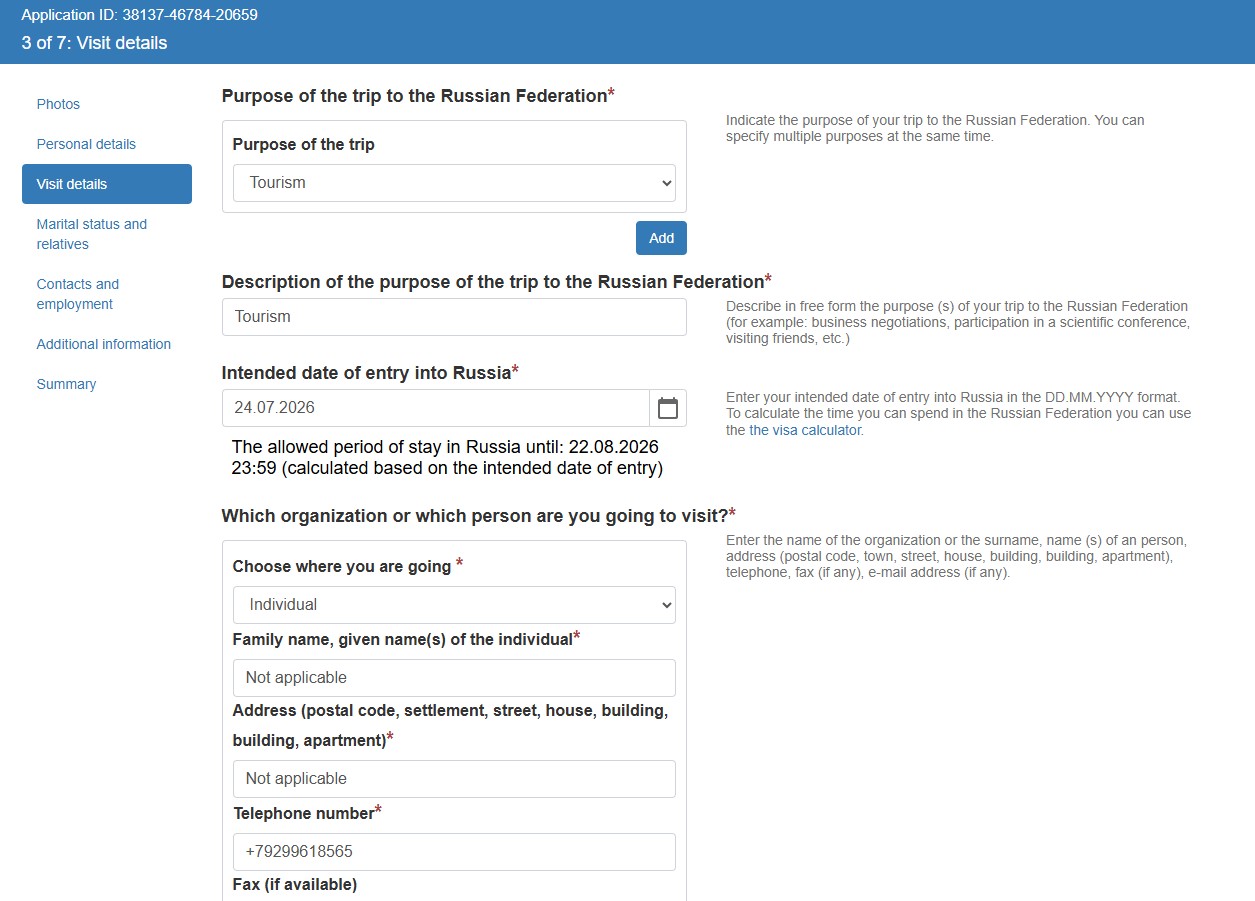
The application also asks for your accommodation details. But you don't need to provide a hotel booking confirmation. During my application, I hadn't booked my accommodation yet, so I entered the details of Baraban Hostel, where I had previously stayed in Moscow during my 2024 trip.
Important: I wouldn't recommend simply copying the accommodation details I used. Enter the hotel, hostel or other accommodation where you genuinely intend to stay, even if you haven't made the reservation yet.
I was also asked whether I had a health insurance policy valid in Russia. I selected "No" during my application and was still able to submit it successfully.
Step 4: Marital Status and Relatives
The next section asks about your marital status, your parents and whether you currently have relatives living in Russia. This part was mostly straightforward, although one question actually made me stop for a moment.
I was asked whether I "have a father." My father passed away years ago, so I selected "No" — although I'll admit I spent a few seconds wondering whether I was interpreting the question correctly. 😅
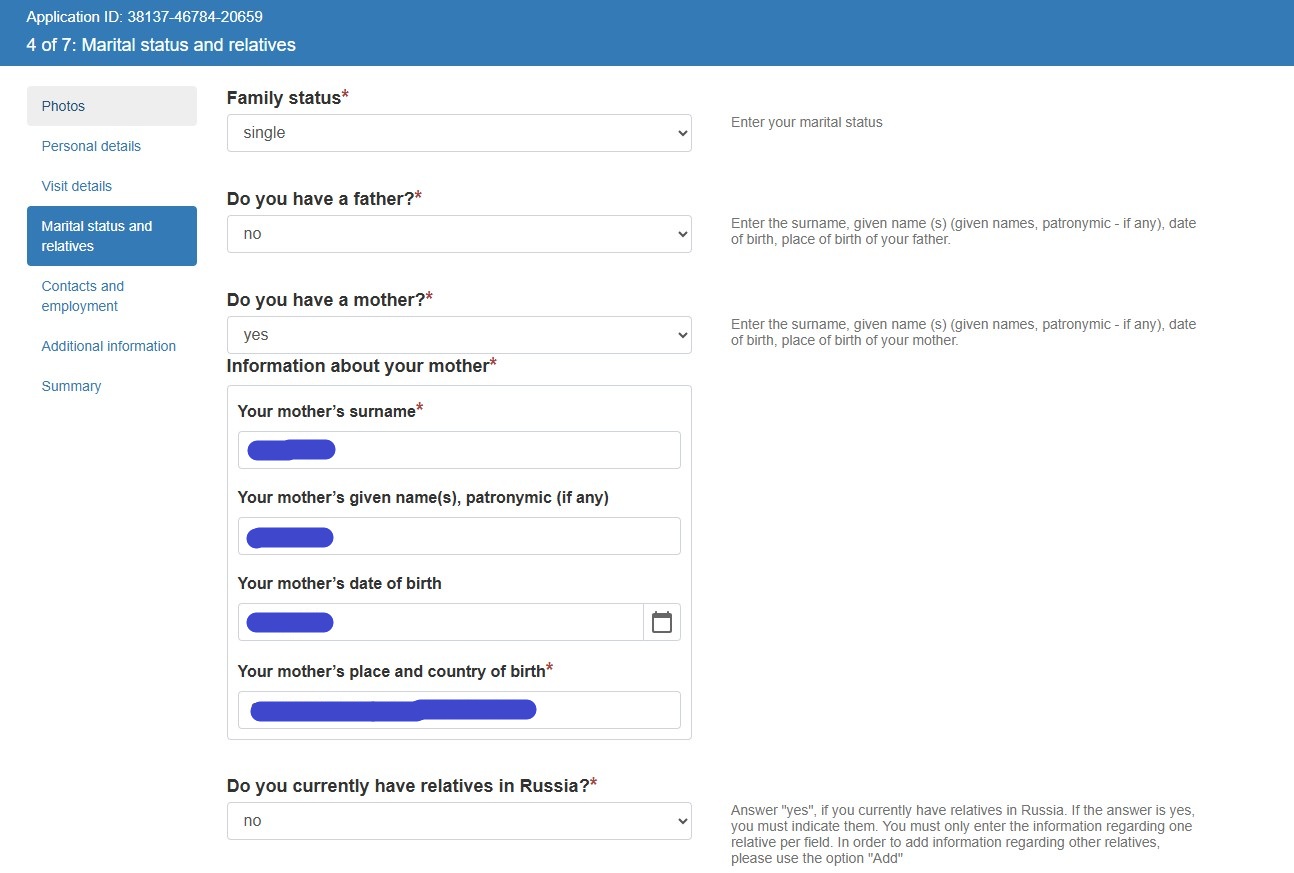
If you answer "Yes" to the questions about your parents or relatives, additional fields will appear asking for their details.
Step 5. Contacts and Employment
This section asks for information about your current residence and employment.
Since I'm currently based in the UAE, I entered my UAE residential details together with my contact information.
The application also asked whether I use social networks or messaging platforms. I selected the platforms I currently use, but I was not asked for links to my profile.
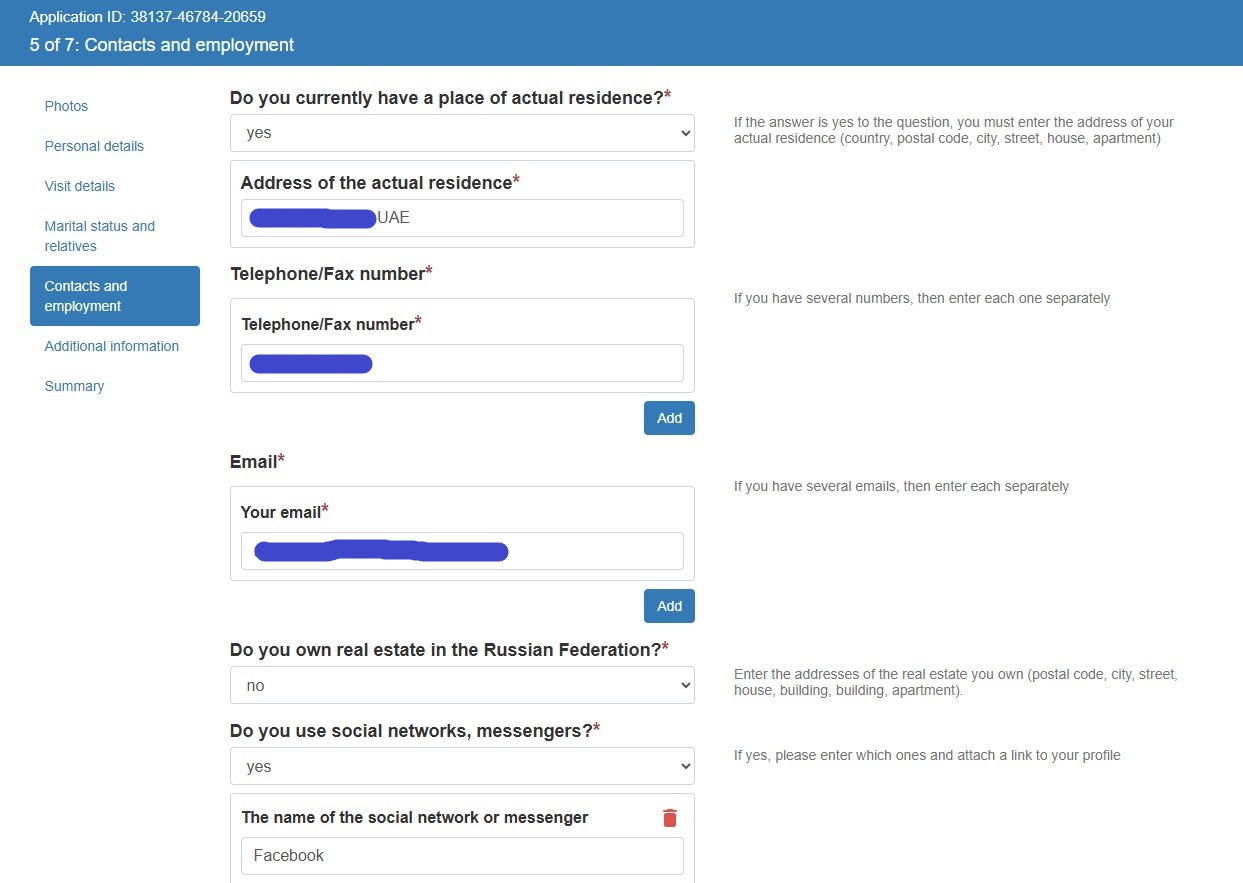
Further down the page, I was asked about my education after high school, so I entered the details of the college I attended.
Overall, this section was fairly straightforward — just a little longer because of the amount of personal information required.
Step 6. Additional Information
The second-to-last section contains several background questions.
These include questions about military service, involvement in armed conflicts, criminal prosecution, political activities and specialized training involving weapons or certain hazardous substances.
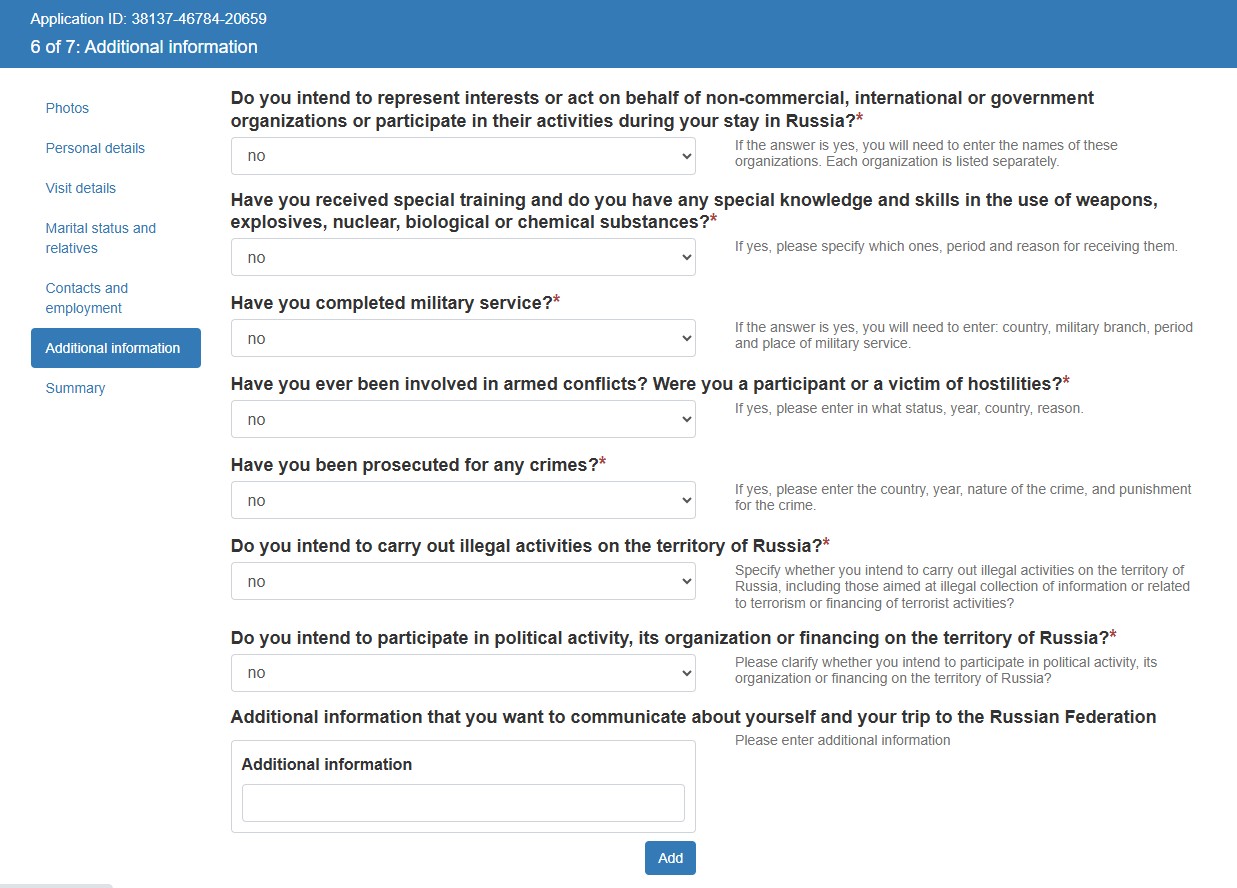
I answered "No" to all of these questions based on my own circumstances. Of course, answer every question truthfully according to your own situation.
Step 7: Summary
Finally!
The last page gives you a summary of all the information you've entered. Take your time reviewing this page.
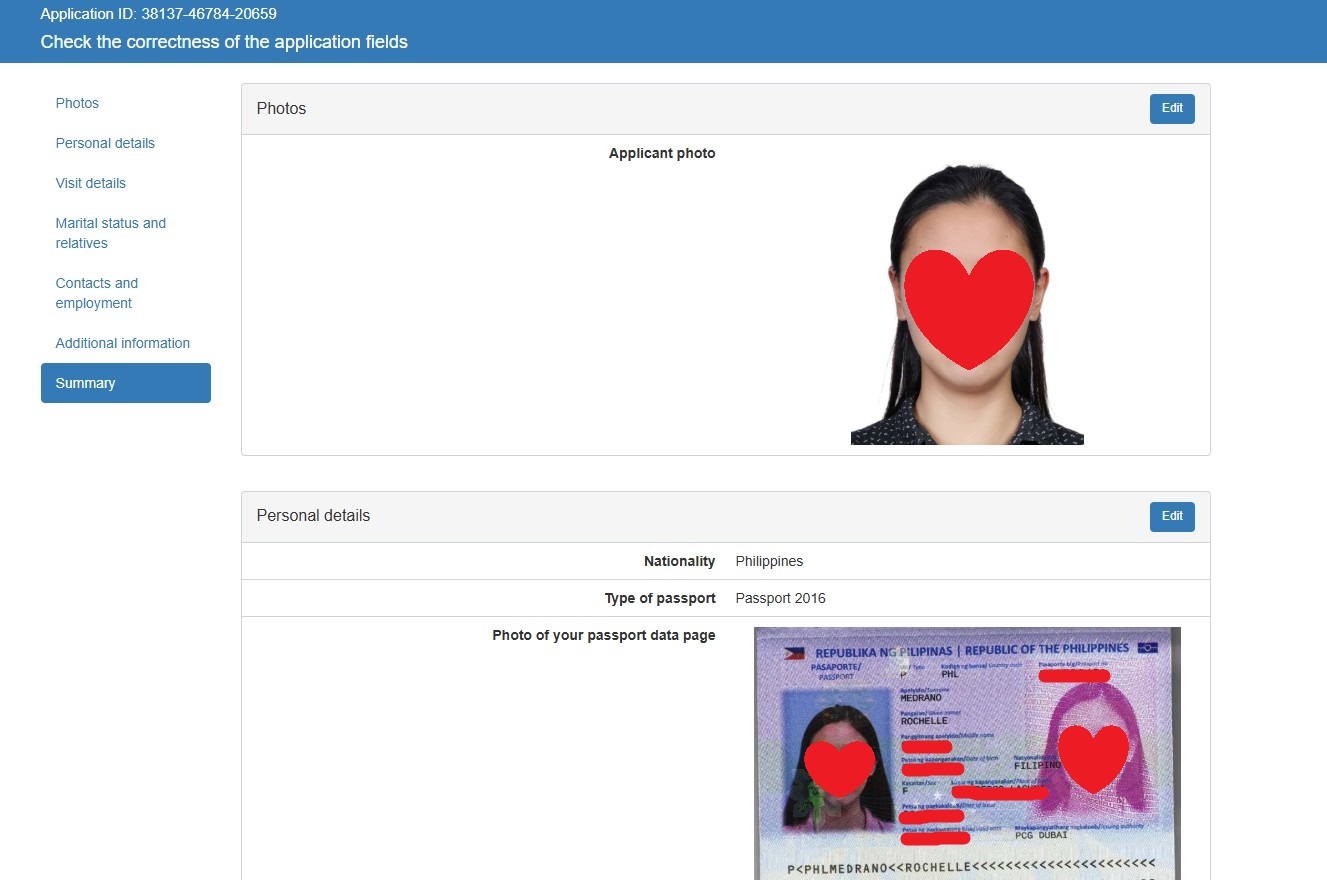
Double-check your name, passport details, dates, and the rest of your information before submitting the application. If you notice anything incorrect, go back and edit it before proceeding.
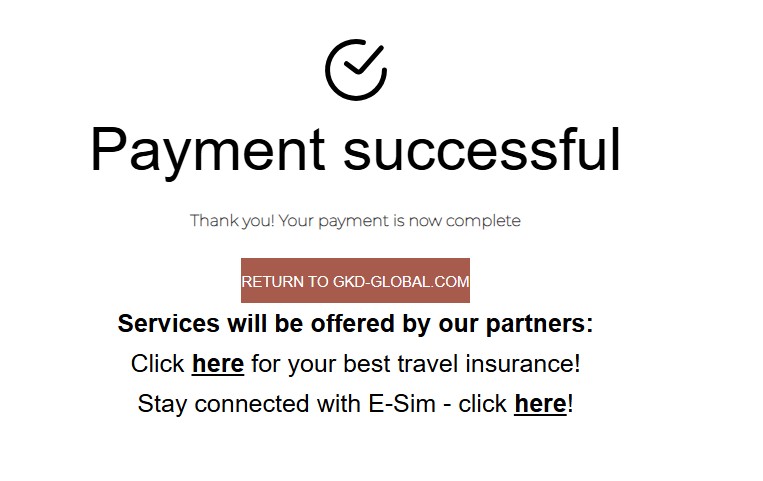
After completing the payment, I was also shown optional offers from their partners for travel insurance and an eSIM. These aren't part of the e-visa itself, so you don't have to purchase them just because they appear after payment.
Russian E-Visa Processing Fee and Processing Time
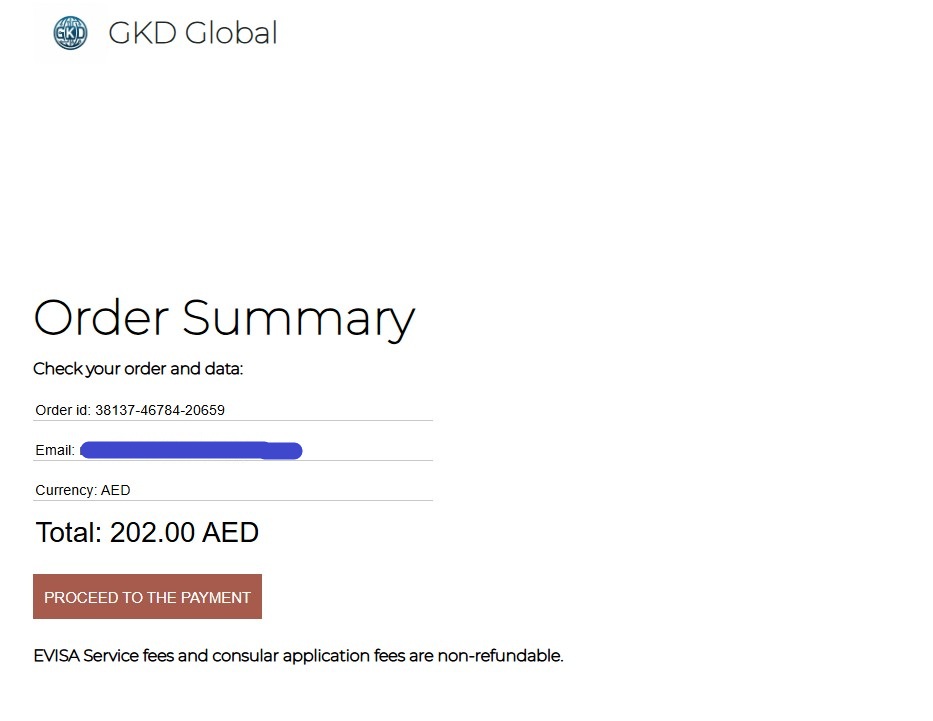
When I applied for my Russian E-Visa in July 2026, I paid a total of AED 202 (around USD 55), which included the visa and service fees.
As for the processing time, mine was pretty quick. I received an email notification that my Russian E-Visa had been approved after around three days.
Officially, e-visa applications are processed within four calendar days from the date of submission, so I'd still recommend applying ahead of your trip rather than leaving it until the last minute.
Once my e-visa was approved, I simply logged back into the website, downloaded and printed my e-visa notification. I also kept a digital copy on my phone while traveling, just in case. And that was it!
Russian E-Visa or Standard Tourist Visa?
Having gone through both processes, the difference for me was huge.
If your nationality is eligible for the Russian unified e-visa and your trip meets its conditions, I would definitely choose the e-visa over the standard tourist visa.
The e-visa application was done completely online. I didn't need to visit a visa center, prepare an invitation or submit a pile of documents. It saved me time, effort and, in my case, money that I'd rather spend on the actual trip.
That wasn't the case during my first trip to Russia in 2024.
At the time, the e-visa allowed a much shorter stay of up to 16 days and had other limitations that made me hesitant to use it for my trip. I also couldn't get a timely clarification from the Russian consular office in Dubai regarding my planned border crossing, and I didn't want to take the risk.
In the end, I applied for a standard Russian tourist visa instead. You can read about my previous experience here: Applying for a Russian Tourist Visa as a Philippine Passport Holder in the UAE
Final Thought
After experiencing both the traditional Russian tourist visa application and the e-visa, I definitely found the e-visa much easier.
The application form looks long because it asks for quite a lot of personal information, but the process itself was straightforward. I completed everything online, paid with my UAE-issued card, and received my approved e-visa a few days later.
My biggest advice is simply to take your time when filling out the application. Check your passport details carefully, make sure your photo follows the requirements, and review everything again before submitting it.
And remember that visa rules can change. My experience above is based on my application in July 2026, so always check the official Russian Ministry of Foreign Affairs e-visa website for the latest requirements, fees and eligible nationalities before applying.
Once that's done, you can finally move on to the much more exciting part: actually planning your trip to Russia. 🙂
Planning your trip after getting your visa? Read my 11 Days in Moscow in Summer 2026 itinerary for ideas on what to do, including a few things that didn't exactly go according to plan.
Got your Russian E-Visa? Check flights to Russia: