After going through all the ups and downs of this phase called adulthood, I finally managed to visit home this year! But since my vacation only allowed for a mere 8 working days of leave, I couldn’t go too far. Of course, hiking was the main priority while still revisiting provinces for my #OFWProject82. So, this year’s hiking spot was just a simple day hike at the nearby Masungi Georeserve via its Discovery Trail.
Planning to do this hike? Look no further! In this post, I will tell you what to expect, how to get to the trailhead, the trail sections and highlights, as well as my personal thoughts on this hiking trail. Let's go!
💡 Ready for more hiking adventures in the Philippines? Start exploring these trails now:
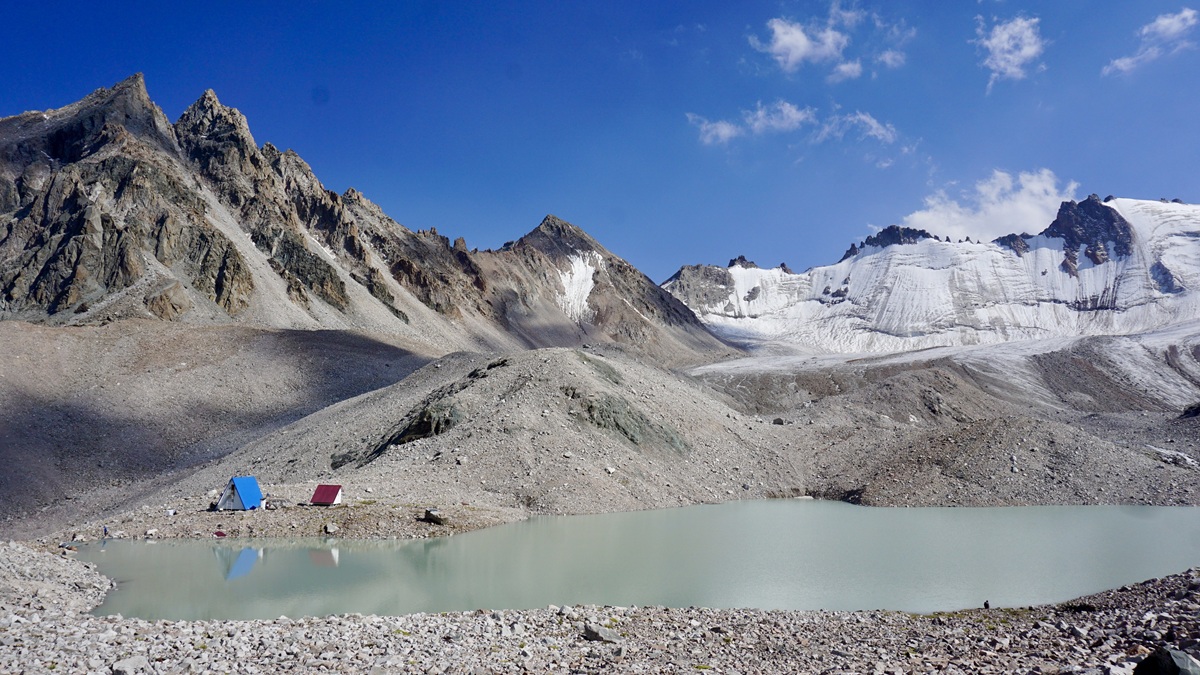
- Country's Highest Mountain: Mount Apo via Santa Cruz Circuit Trail (3D2N)
Masungi Georeserve Discovery Trail Hike Overview:
- Route: Discovery Trail (Loop Trail)
- Distance: 5.49 km
- Elevation Gain: ±283 m
- Highest Point: 598 MASL
- Difficulty: Easy (1/5), but the rope courses may feel challenging if you have a fear of heights
- Time Taken: 4:53:58, including snack breaks and a light lunch
- Best Season: November to May
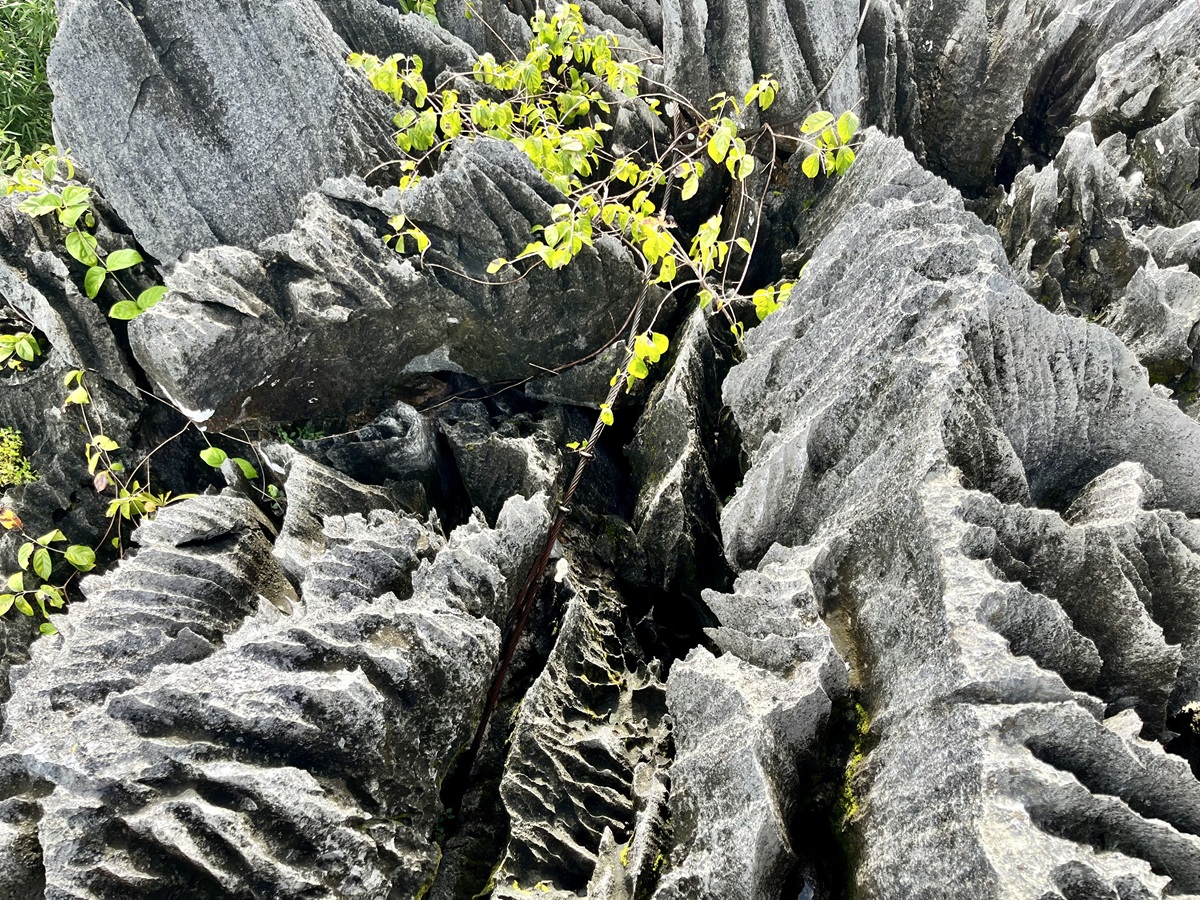
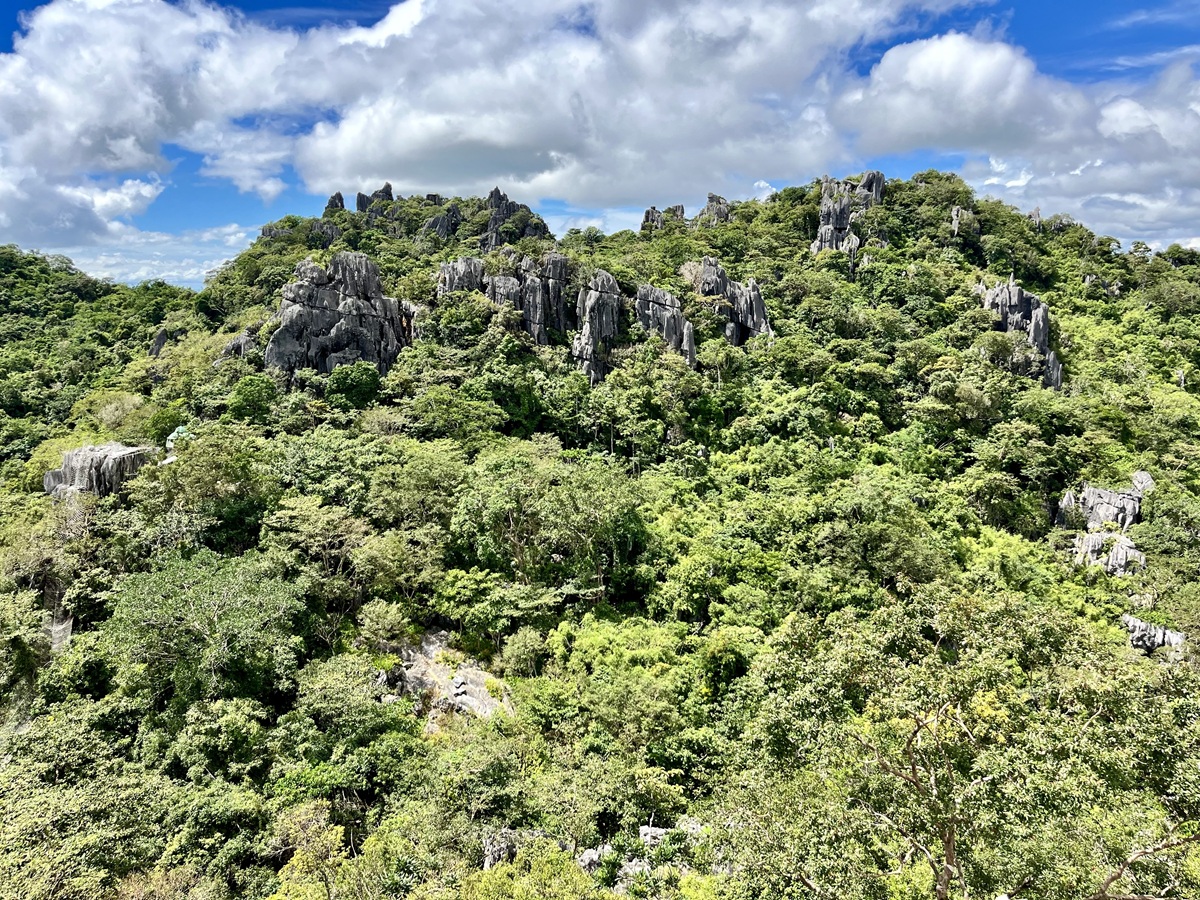
- Highlights: Jagged limestone rock formations, Sapot ni Ric, Ditse–Patak–Duyan (giant hammock), Tatay & Nanay viewpoints, Yungib ni Ruben, Bird Sightings & Wildlife such as the Microsnails (if you're lucky!)
How to Get There and How to Get Out:
Located at Kilometer 47 in Baras, Rizal, Masungi Georeserve is accessible by private vehicles via Marcos Highway or by public transportation through Tanay or Cogeo. While jeepneys start operating as early as 5:30 AM, Masungi notes that they’re usually full by the time they pass the area (especially on the way back) and can be unpredictable in terms of schedule.

Since we didn’t have a private vehicle, we opted for a mix of Grab + tricycle. From Muntinlupa, we booked a Grab to avoid the stress of transferring between a bus and a jeepney early in the morning. Our Grab cost us Php 2,310.00—likely higher due to the rain and surge pricing—but split among the four of us, it came down to Php 577.50 each.
Going back was a bit trickier. There was zero mobile signal near the exit, so we couldn't book a Grab right away. When we finally got a signal, no drivers seemed to be nearby as our booking wasn’t picked up. As advised by the staff, we waited for a jeepney, but none arrived. Thankfully, a tricycle driver offered to take us to the nearest jeepney terminal for Php 300.00 total for the four of us.
Once we reached the terminal, we were finally able to book a Grab back to Muntinlupa for Php 1,278.23—much cheaper—so we skipped the jeepney option altogether.
If you prefer to take public transportation all the way to reduce costs, that’s completely doable. But based on our experience, booking a Grab (or splitting one with a group) saves you from unpredictable waits and constant transfers.
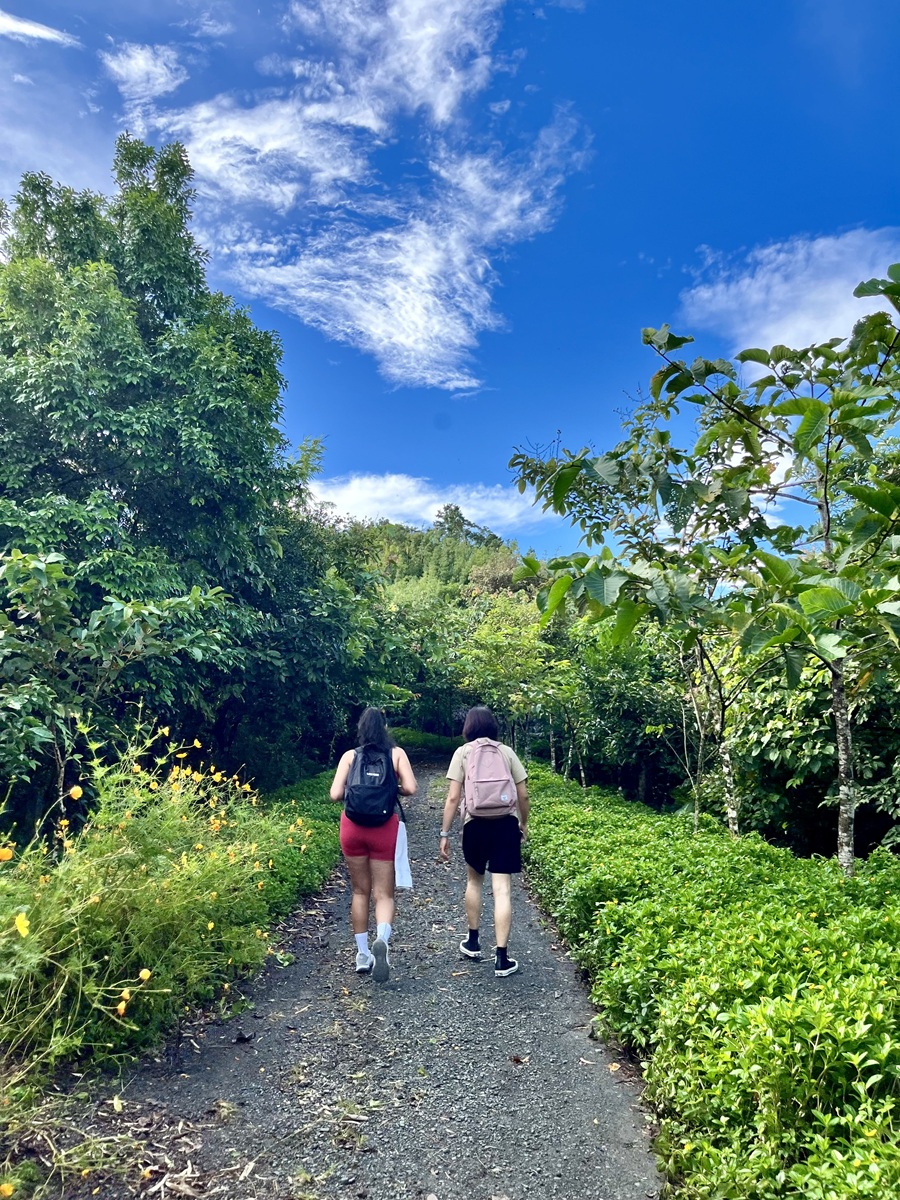
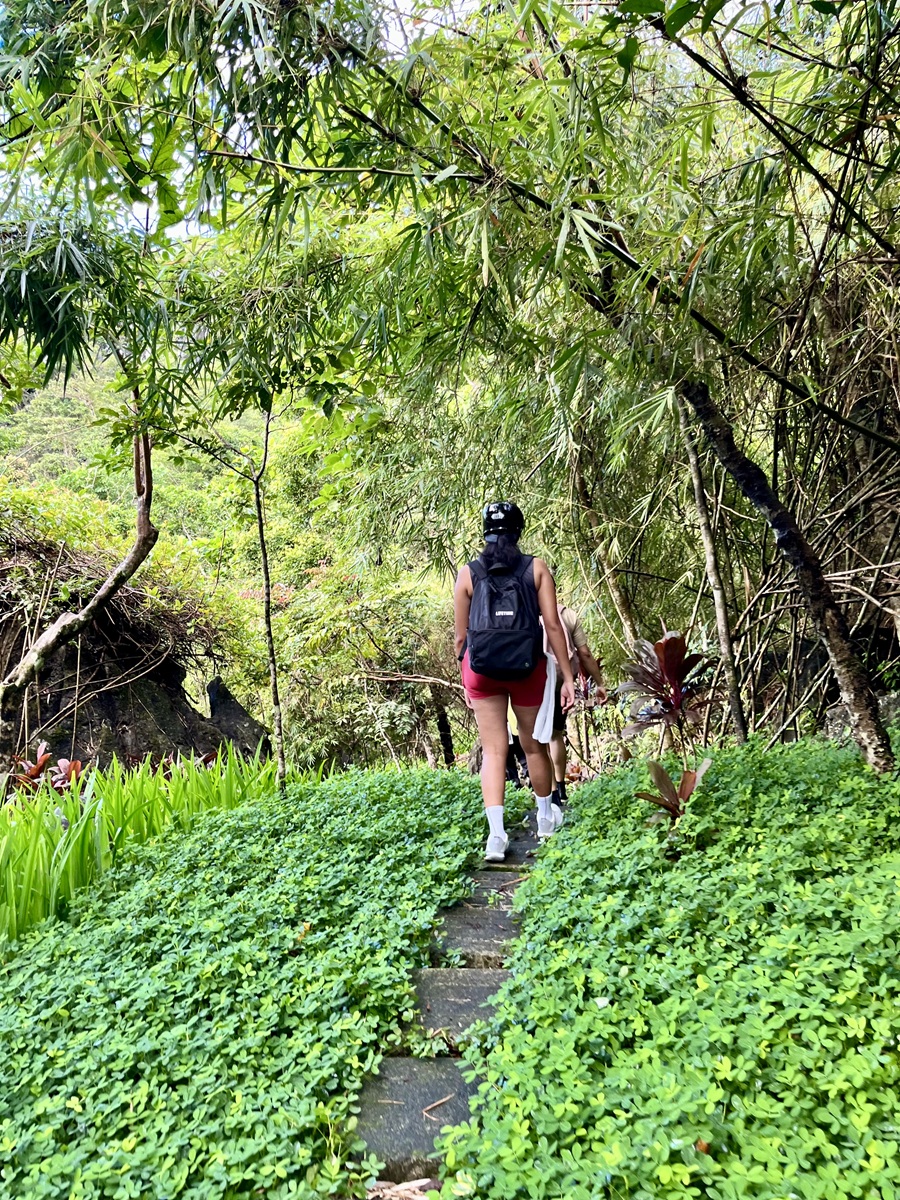
Discovery Trail Hike Starting Point:
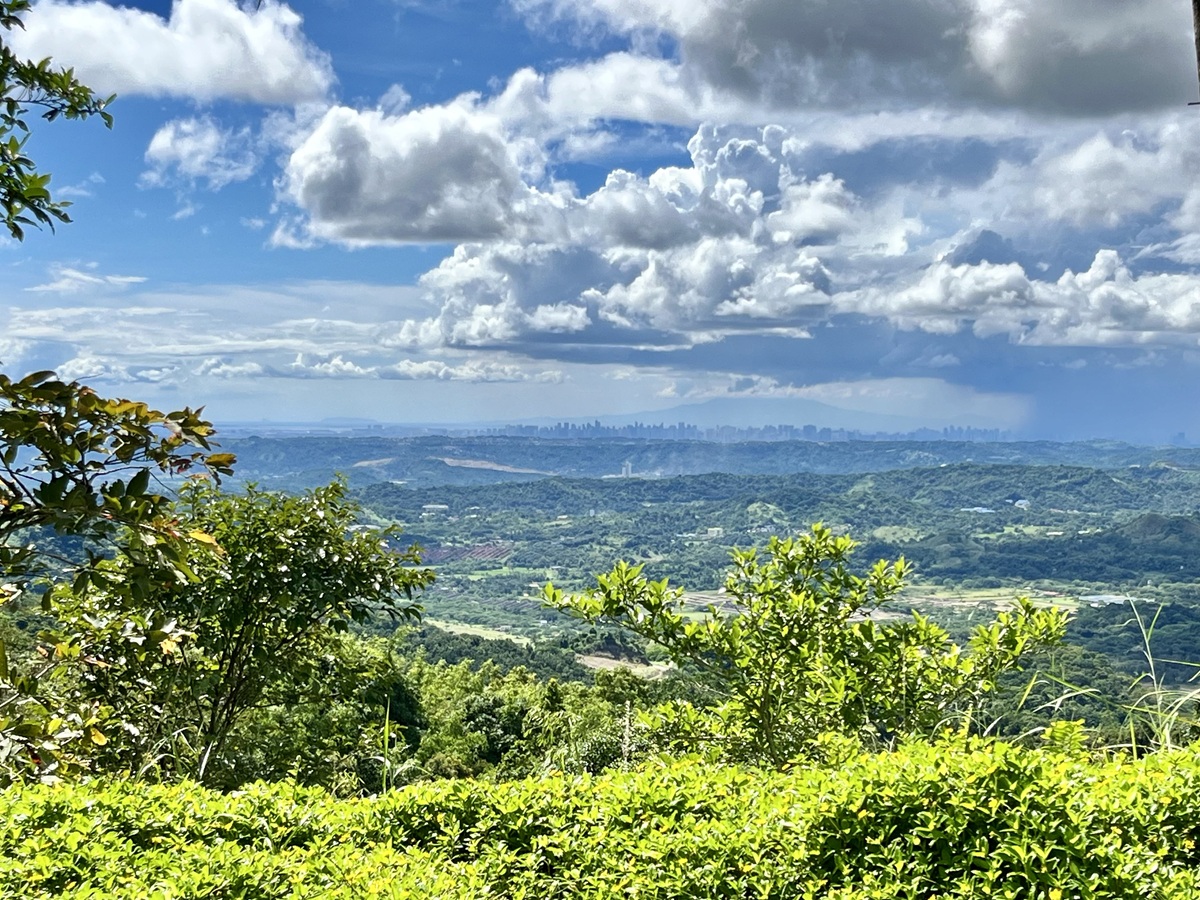
From the simple signage at the entrance, we were asked to walk further inside. Along the way, we passed a nice viewpoint overlooking Metro Manila, a few jagged karsts, and a short flight of stairs.
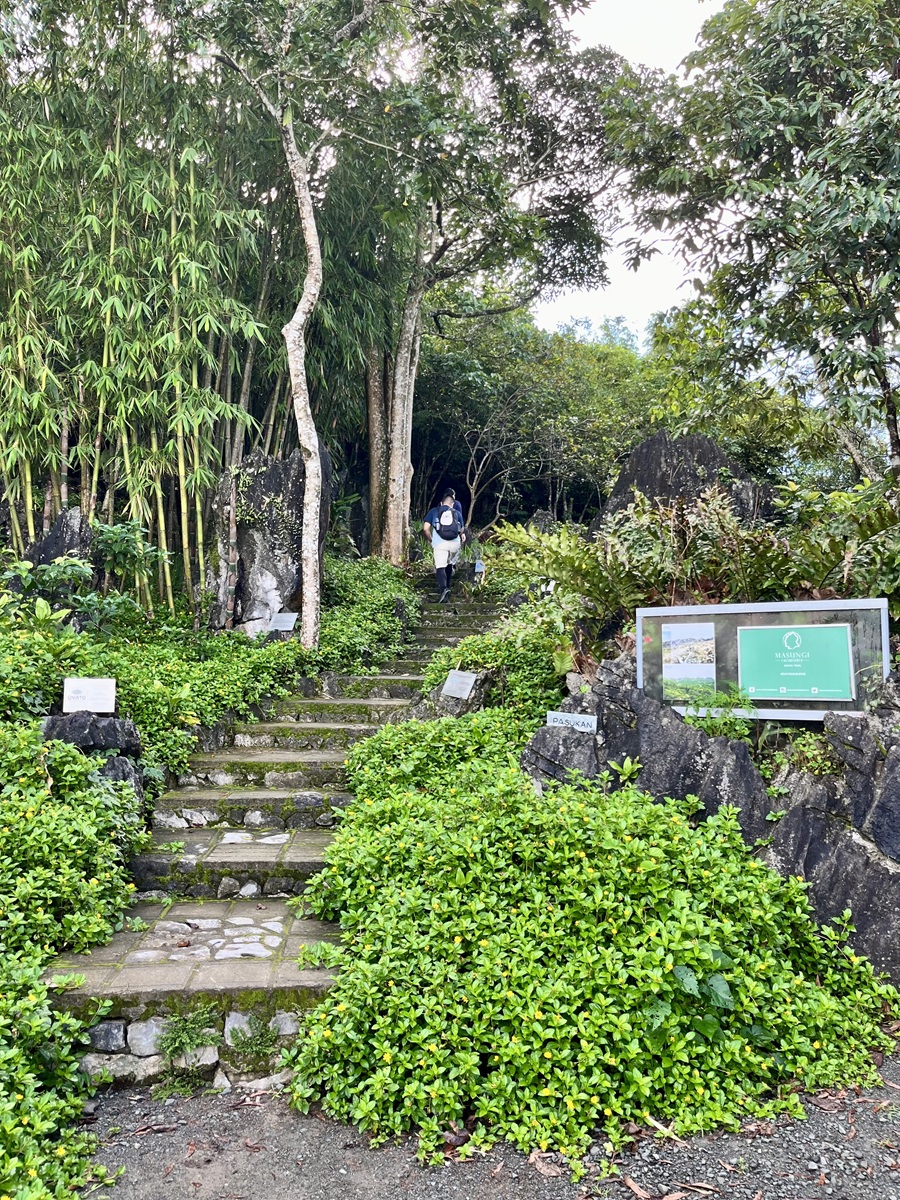
We eventually reached the holding area called Silungan, where the pre-hike orientation takes place. During the briefing, we were given in-depth information about Masungi’s history, its conservation and land-restoration initiatives, and its unique role as part of the southern tip of the Sierra Madre. The Discovery Trail is also a loop trail, meaning the hike starts and ends at the Silungan area.
Unlike the few trail orientations I’ve attended in the Philippines, Masungi puts a strong emphasis on strict park regulations to minimize environmental impact. With a controlled number of visitors per day, they ensure that guests enjoy the trail without compromising the integrity of the ecosystem—sustainable tourism at its core.
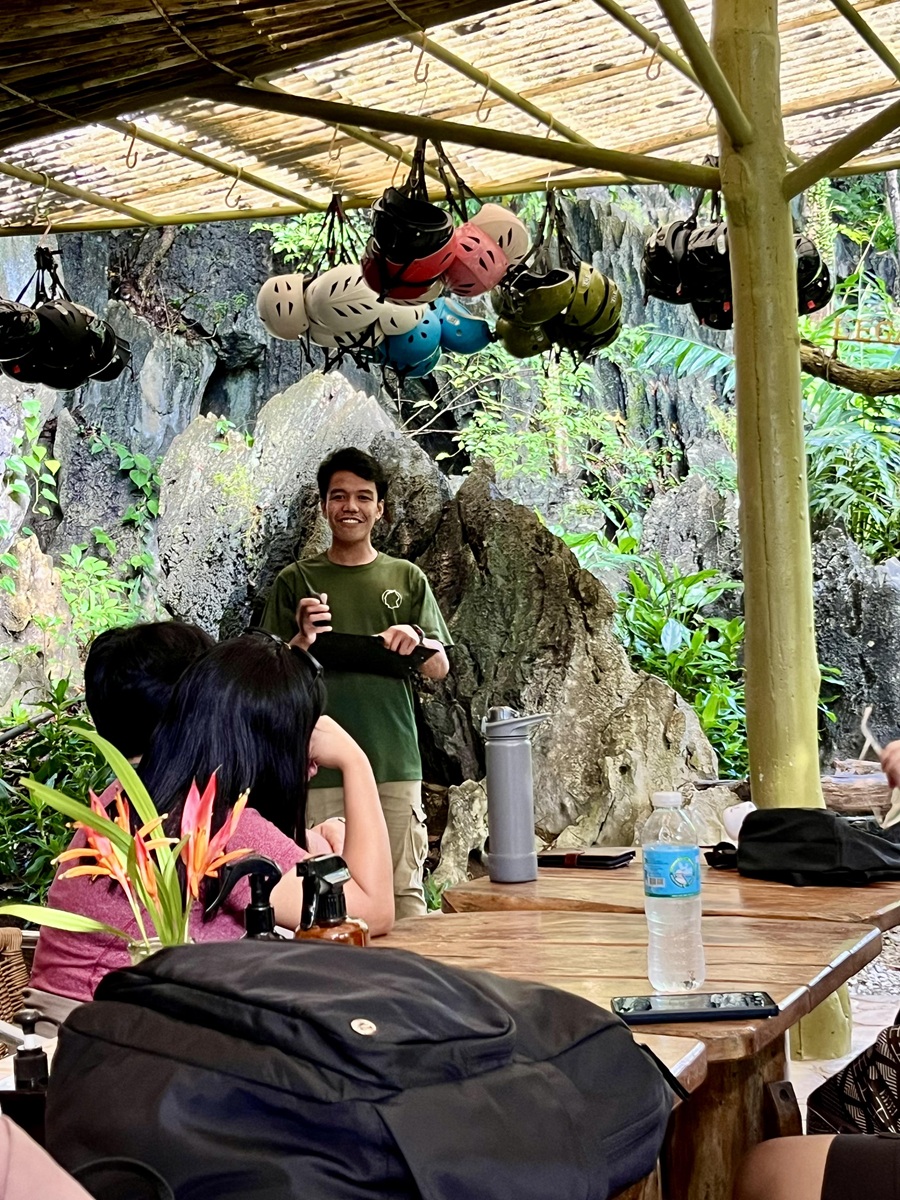
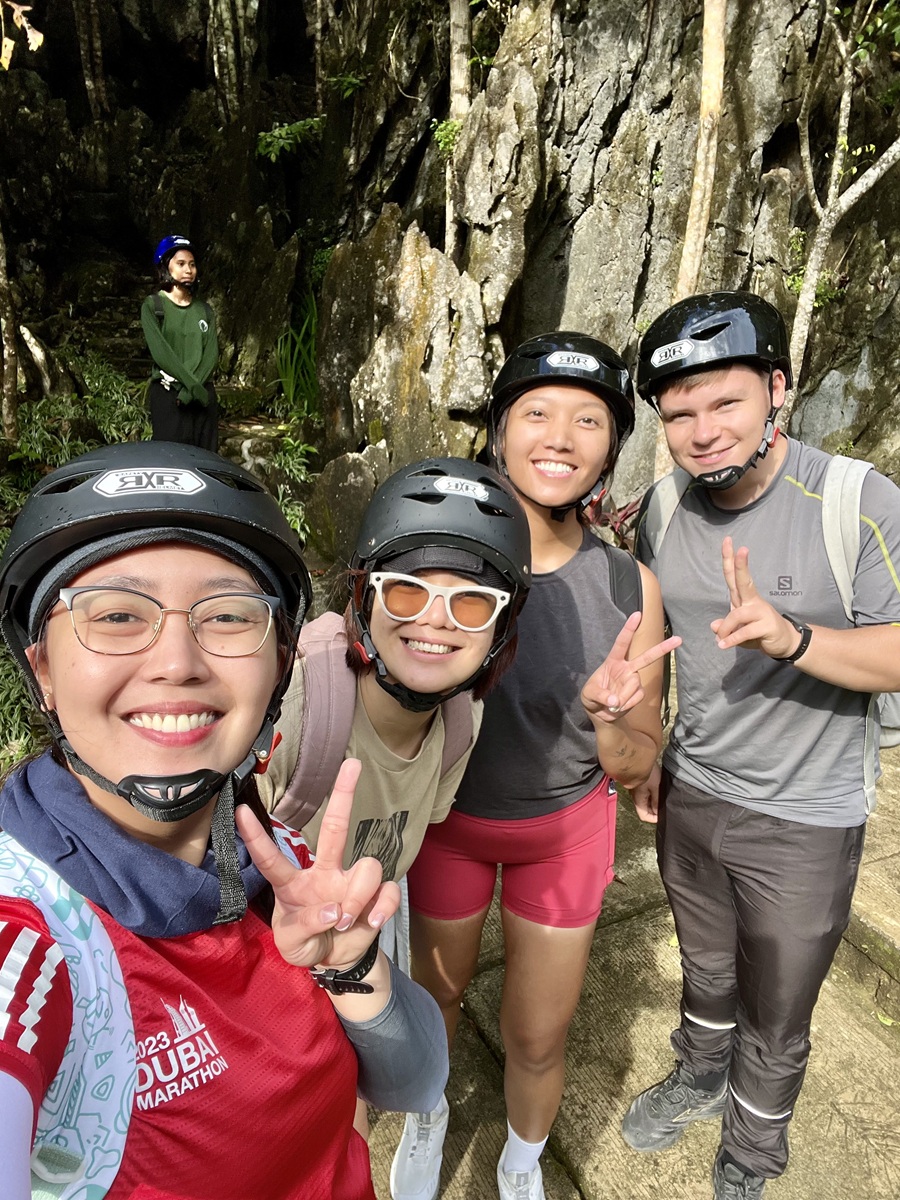
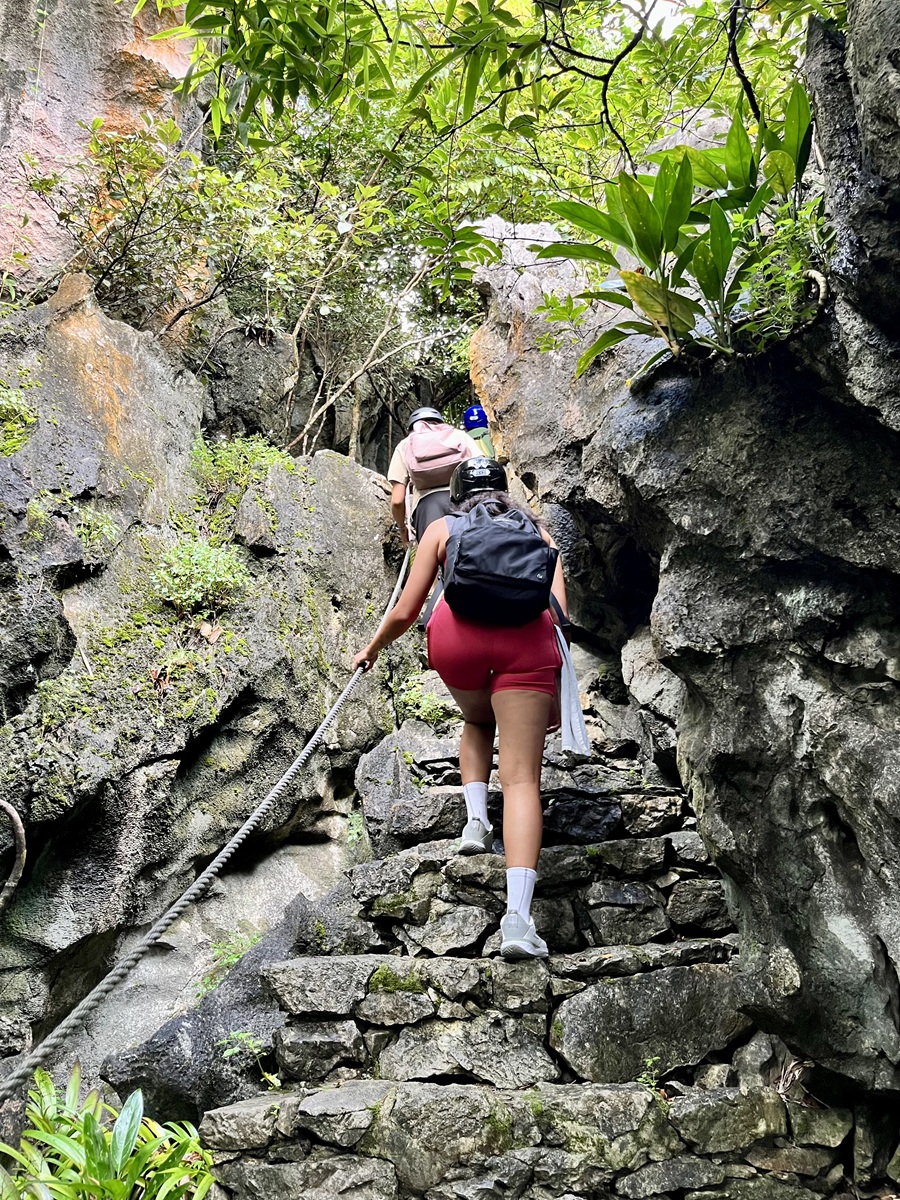
After the orientation, helmets were distributed to protect our heads when passing through tight or rocky areas. Wearing them during the hike is mandatory, though you're free to take them off during breaks. Gloves aren’t required, but they’re definitely helpful if you want extra protection when navigating sharp limestone formations.
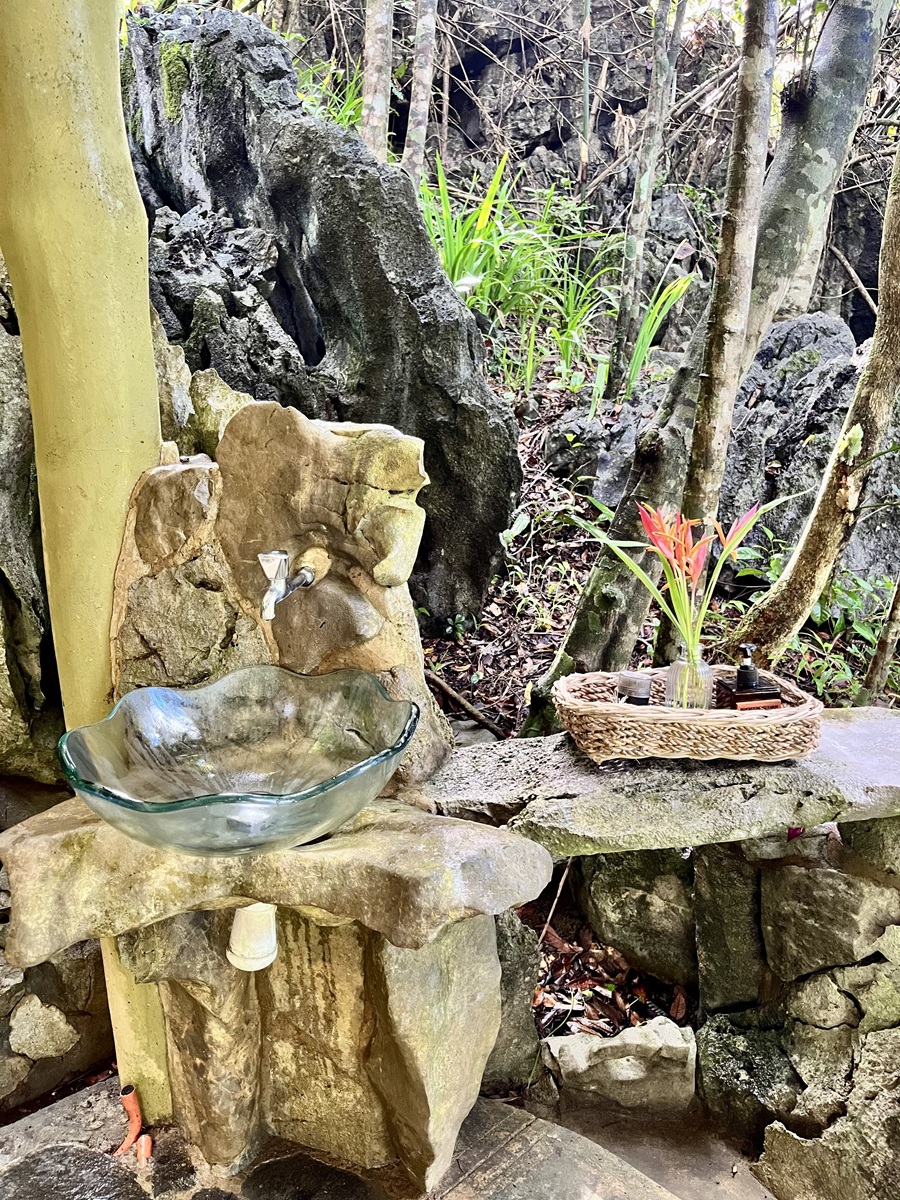
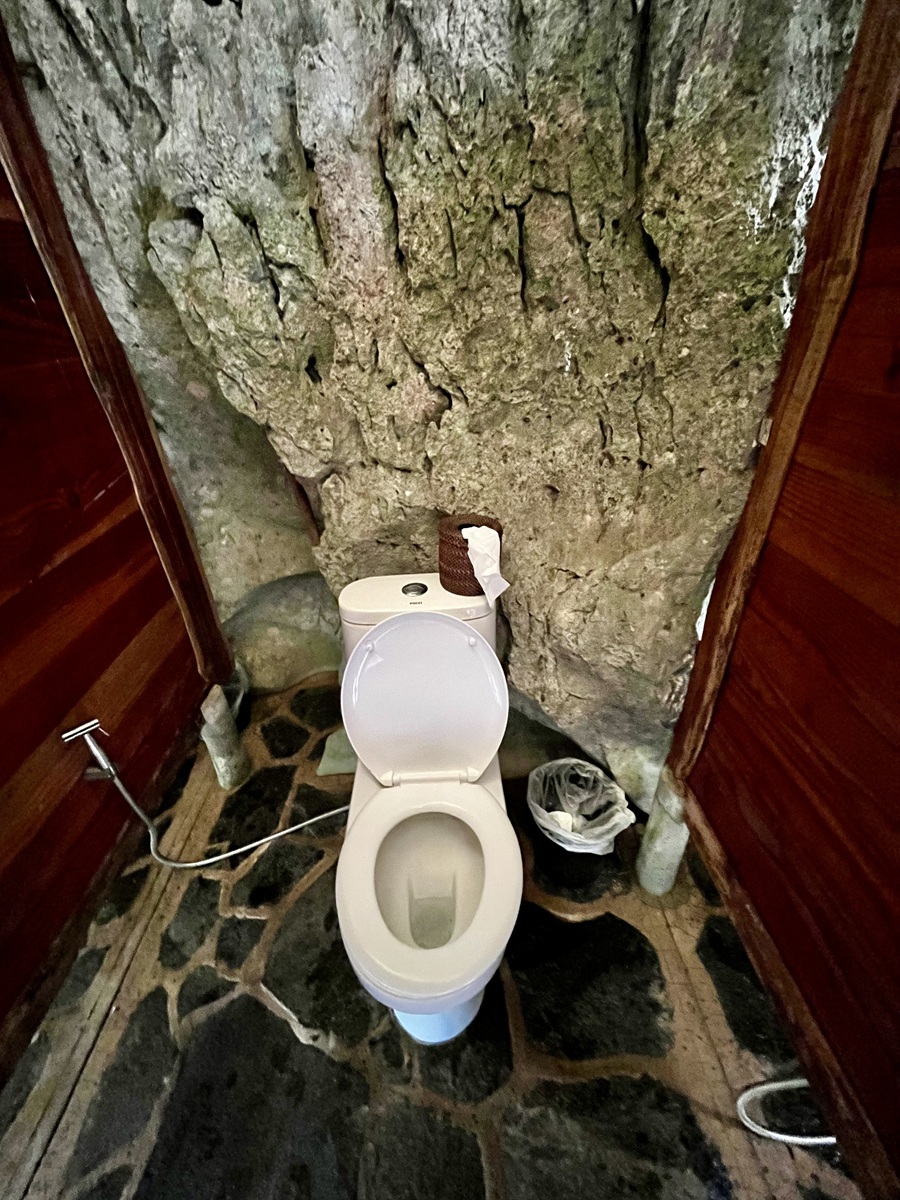
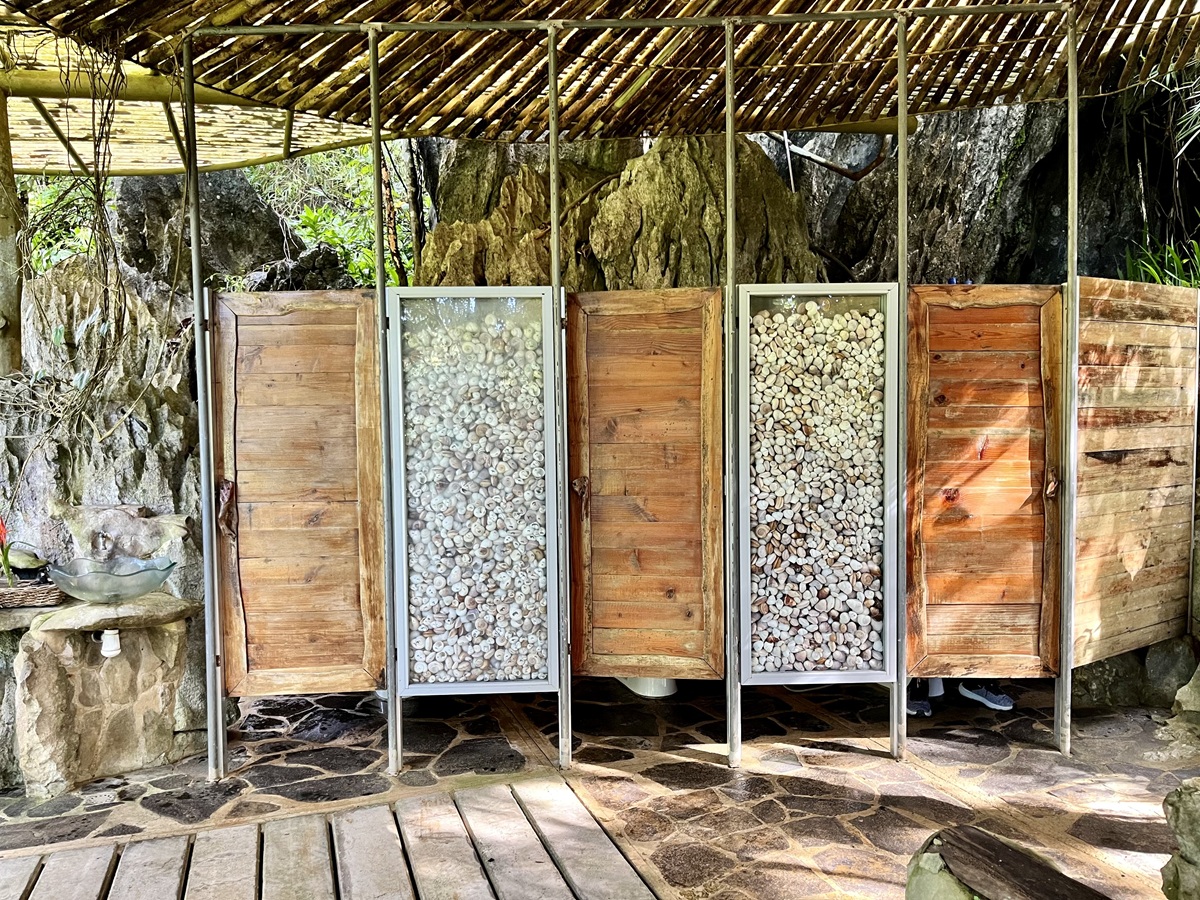
Right across from Silungan, there’s an eco-friendly, aesthetically pleasing toilet facility that blends seamlessly with the natural surroundings — perfect for freshening up before or after the hike. There’s no shower facility yet, so it’s a good idea to bring a change of clothes and some wet wipes just in case.
Discovery Trail Sections & Masungi Georeserve Highlights:
While I usually cover trails in chronological sections, the Discovery Trail is a bit short, so there’s not much to divide. Instead, I’ll share the highlights in the order you’ll encounter them during your hike.
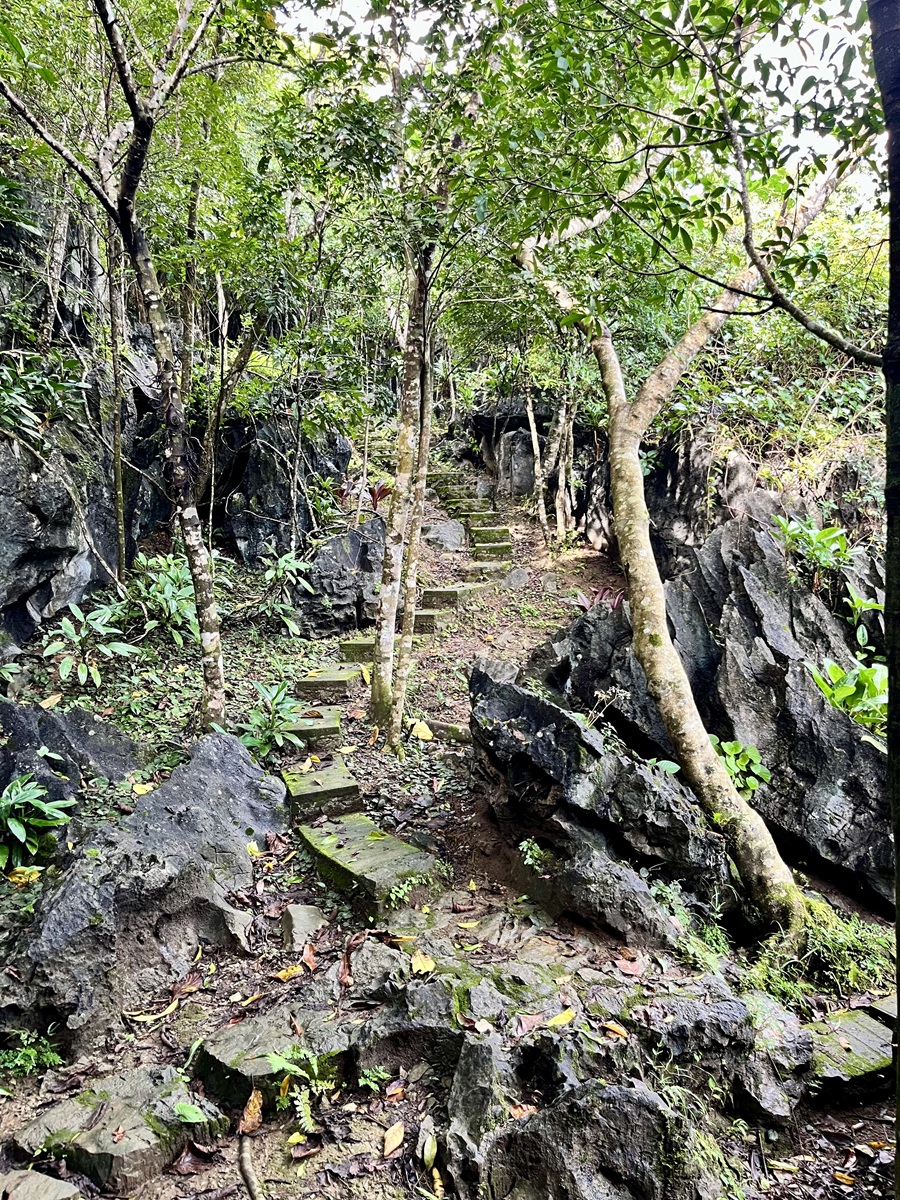
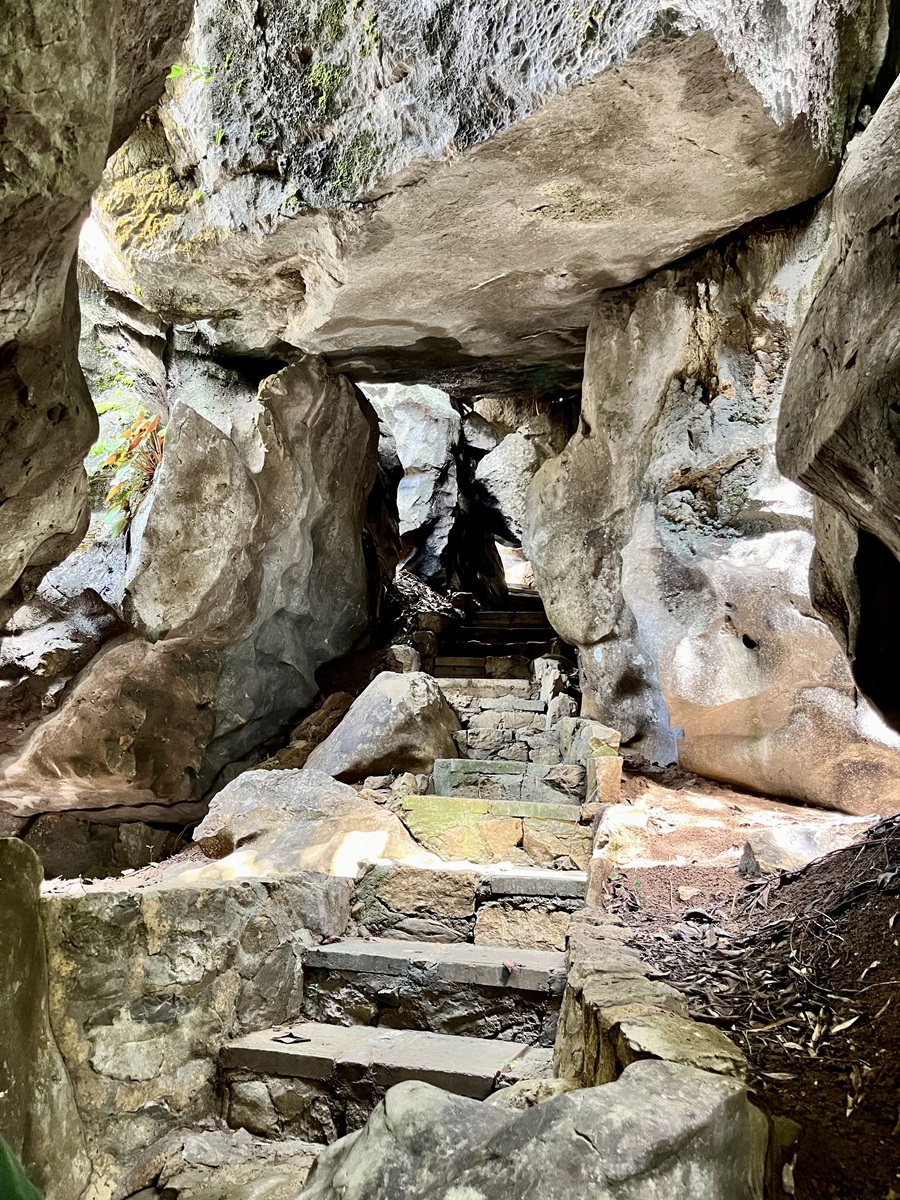
At the start, the trail feels like walking through a lush garden. Misty plants, a moist carved path, and towering trees make it feel like you’re truly entering a forest. A few narrow stairs gradually pick up the elevation, giving you a gentle warm-up.
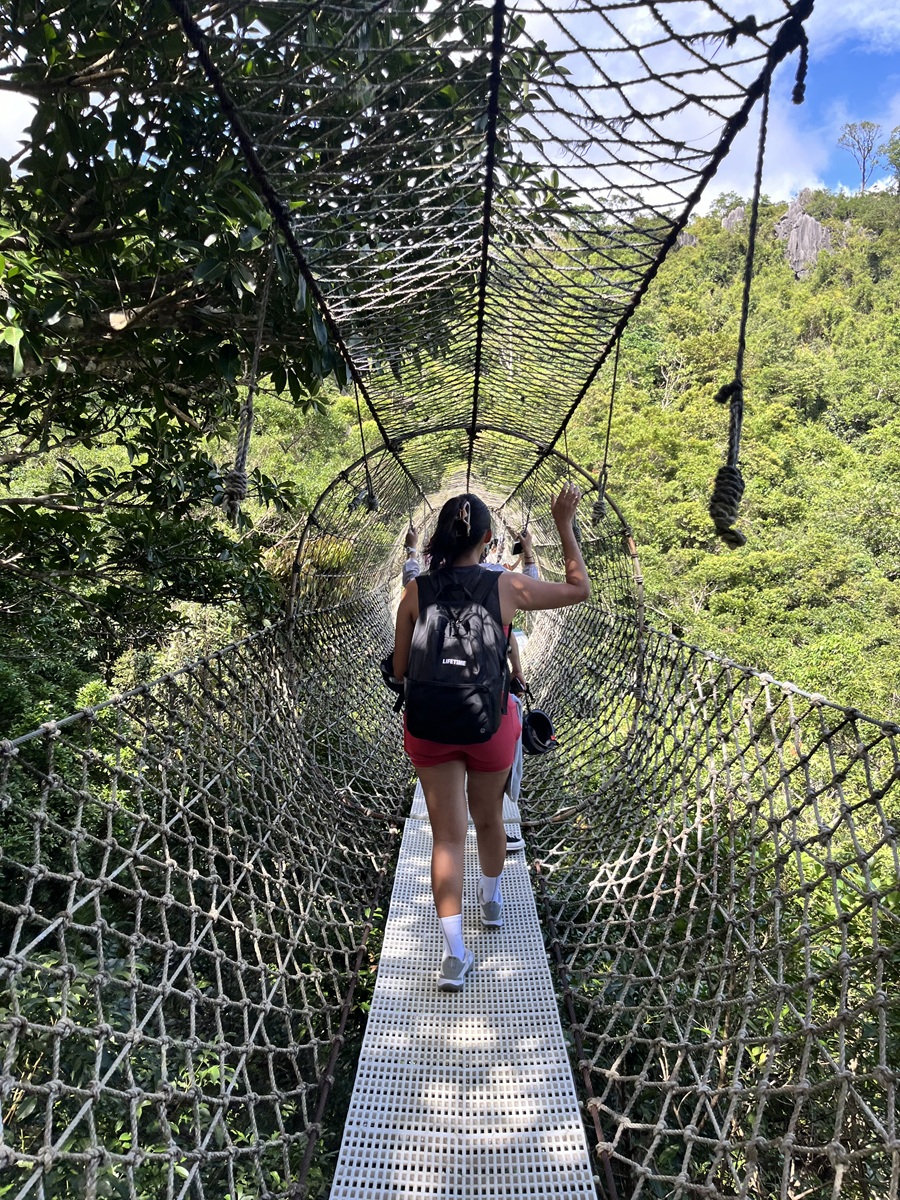
Lambat
The first rope course is called Lambat, which means “net” in Tagalog. It’s a short climb to the top of a limestone wall, where the hike continues.
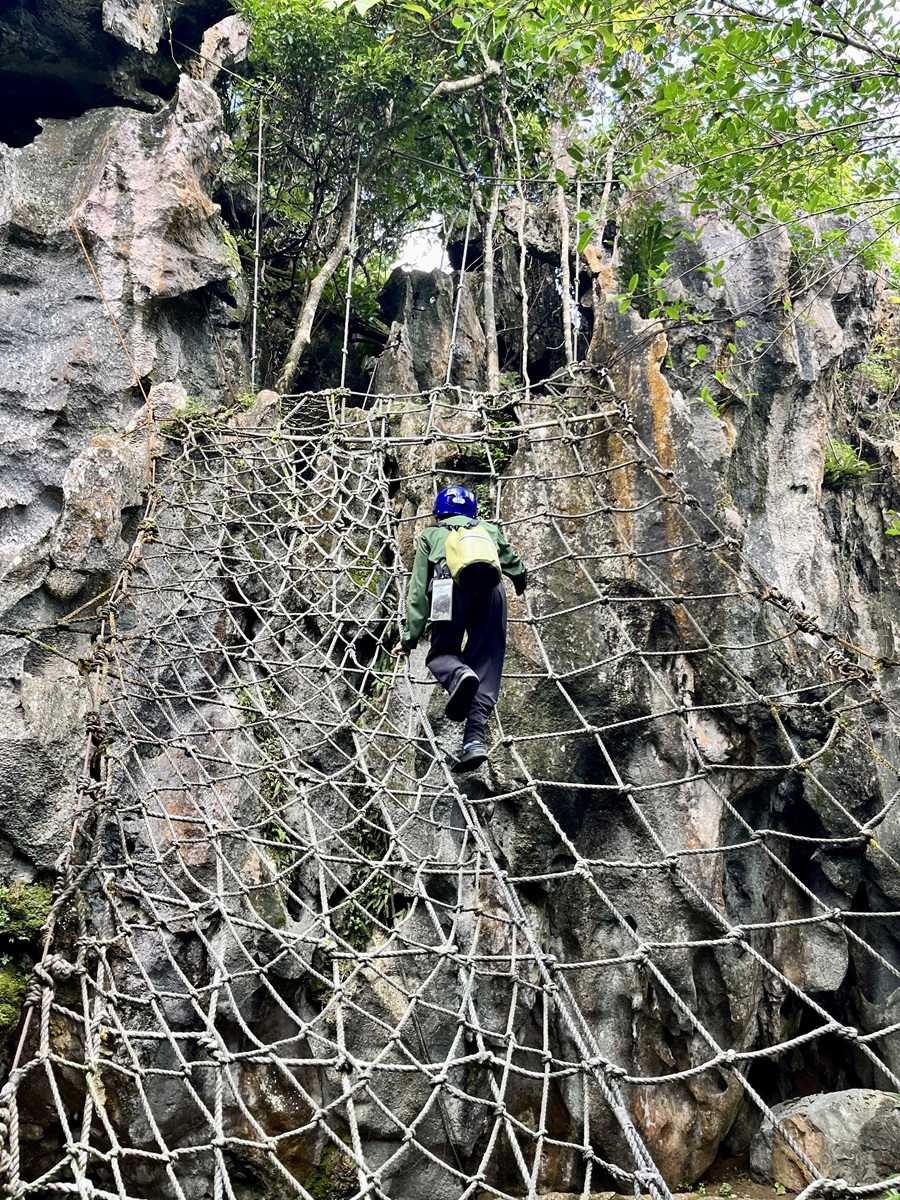
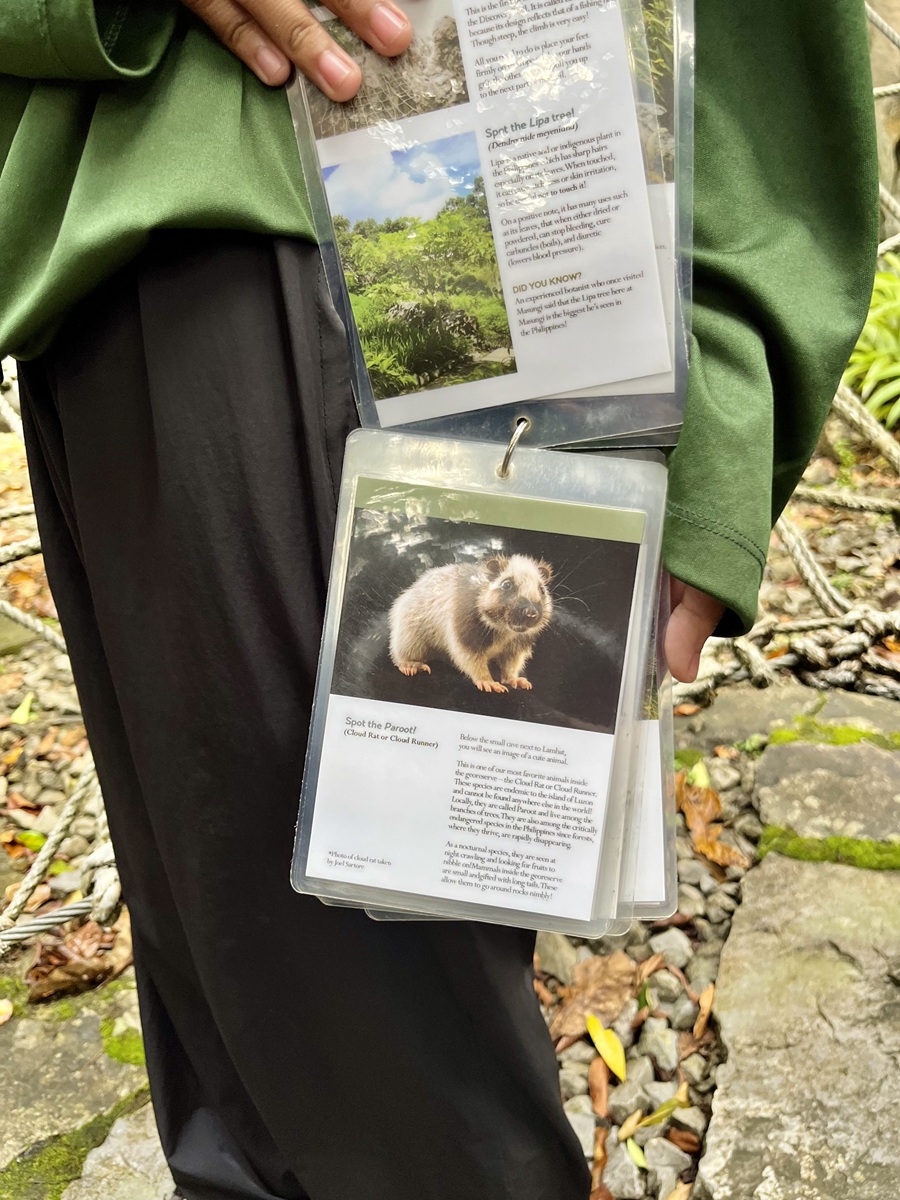
Here, our park ranger introduced us to the Paroot, a local name for cloud rats — small nocturnal rodents often found in this part of the reserve.
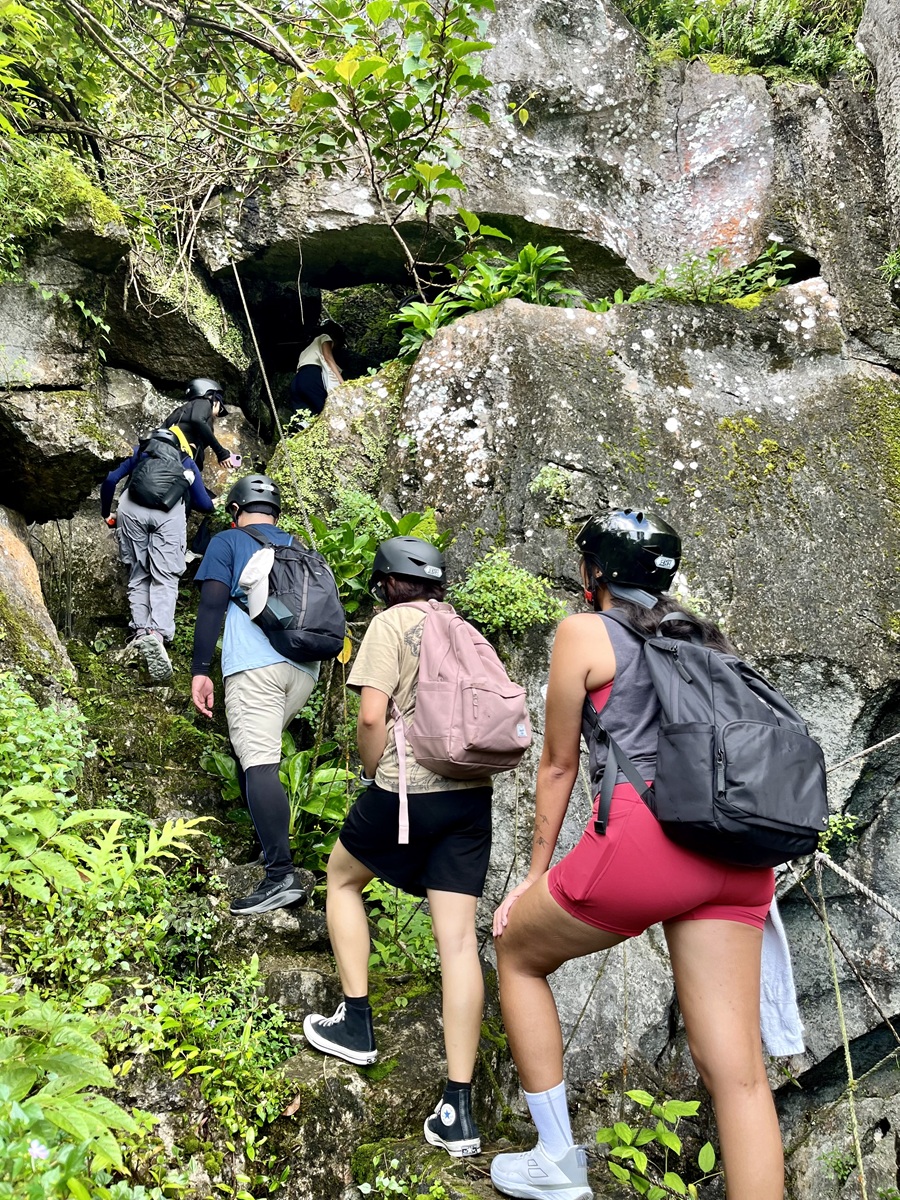
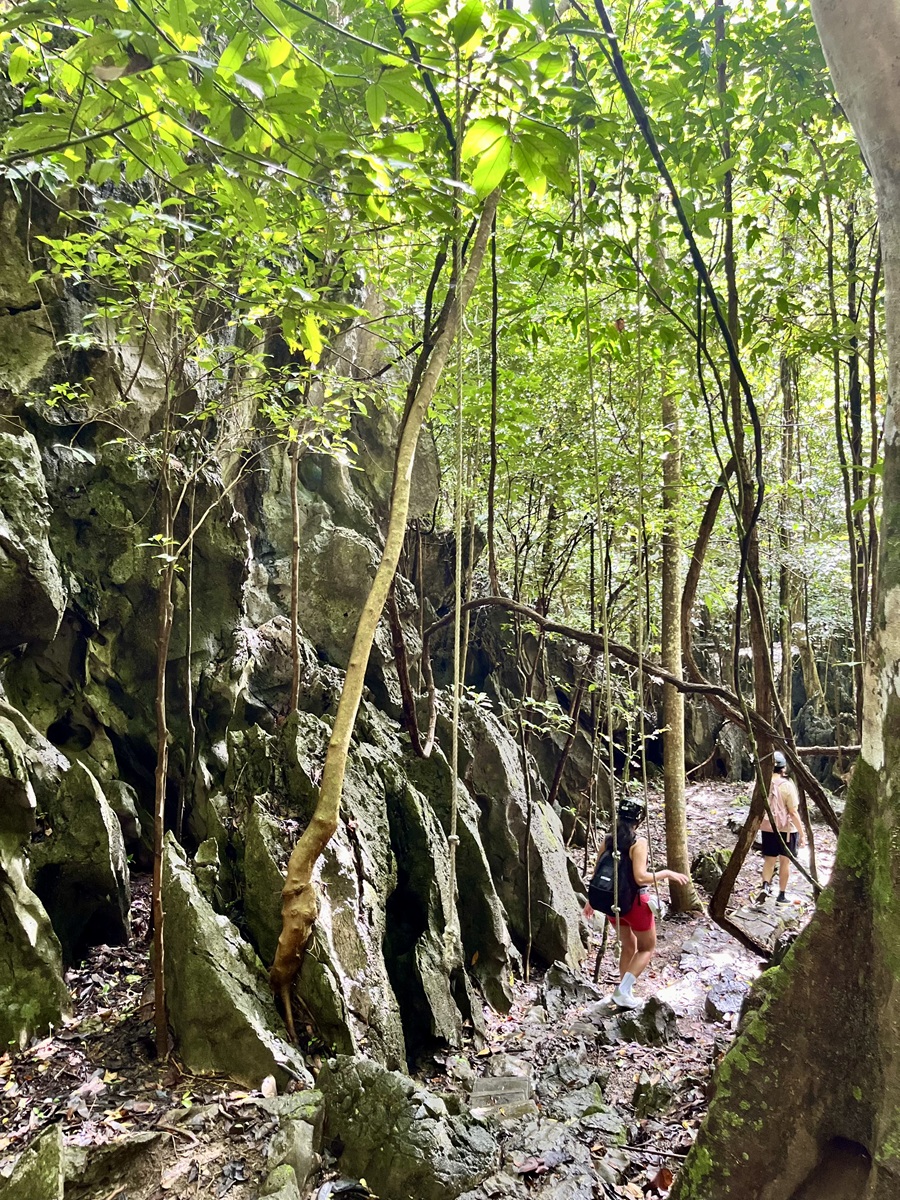
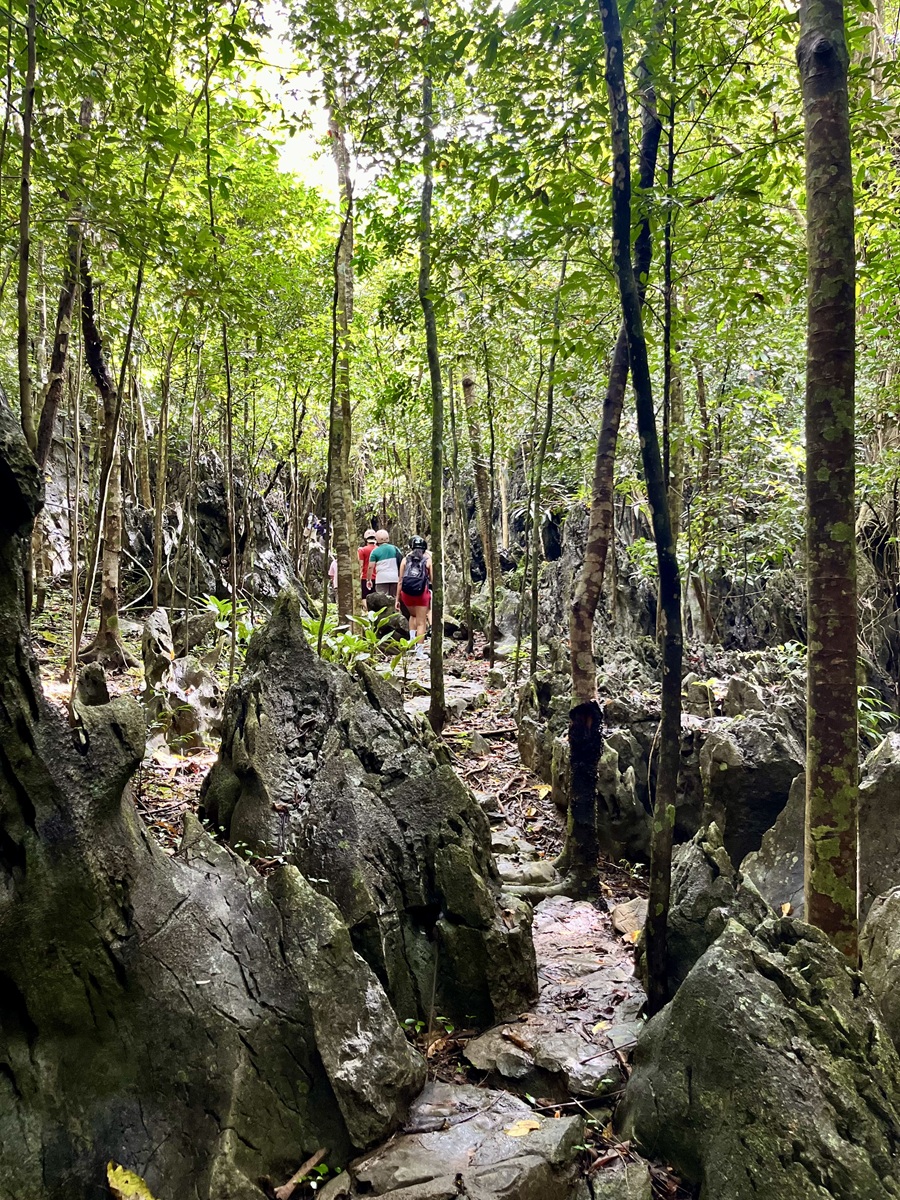
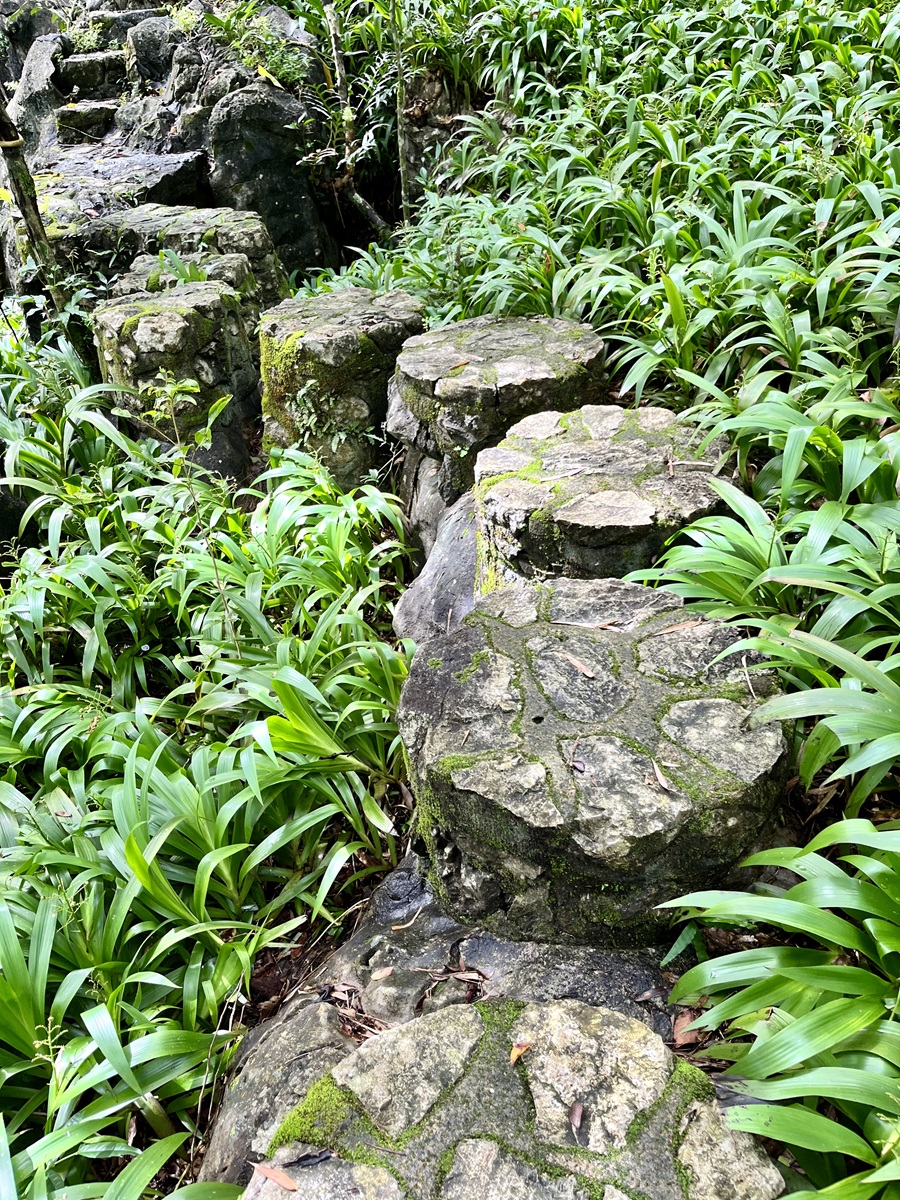
The trail then leads through narrow passageways, carefully marked stones, and well-defined paths to prevent hikers from straying off-trail.
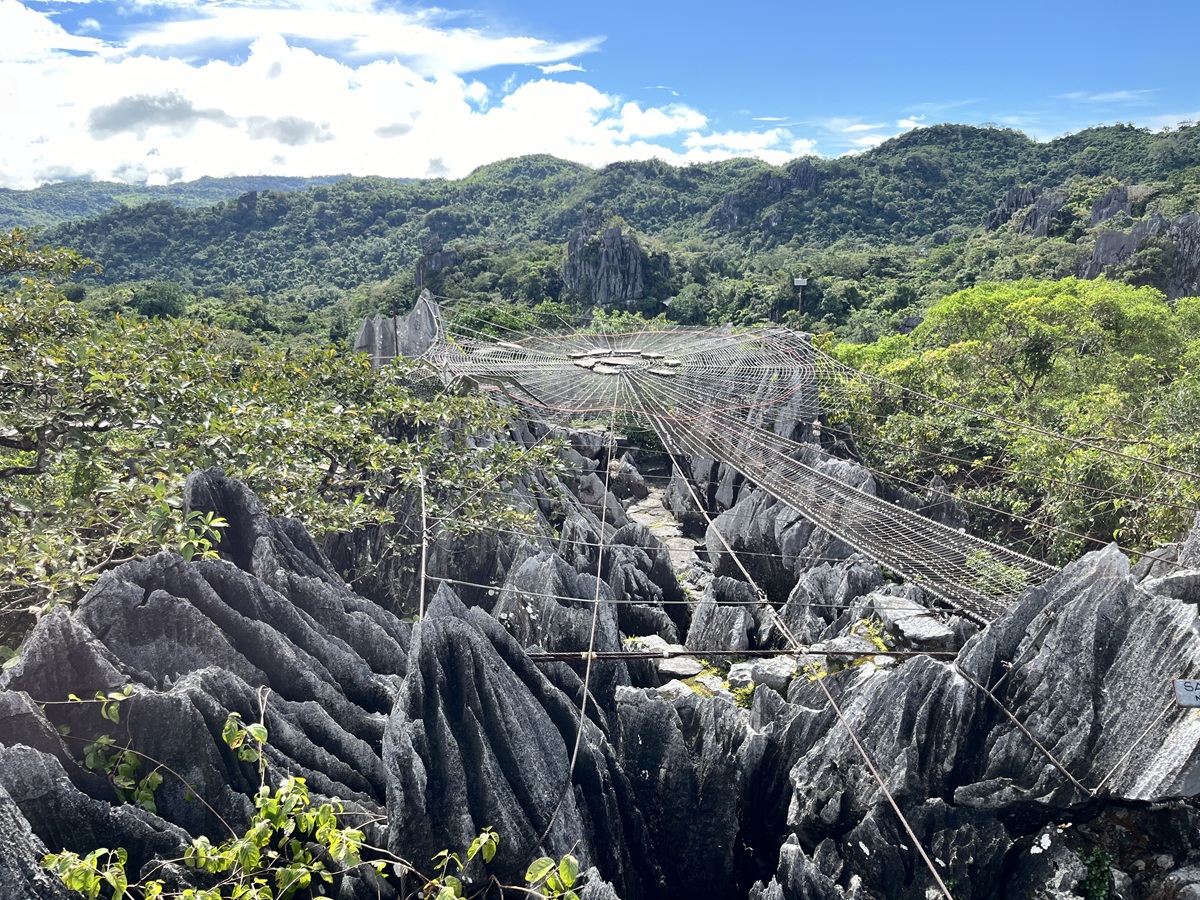
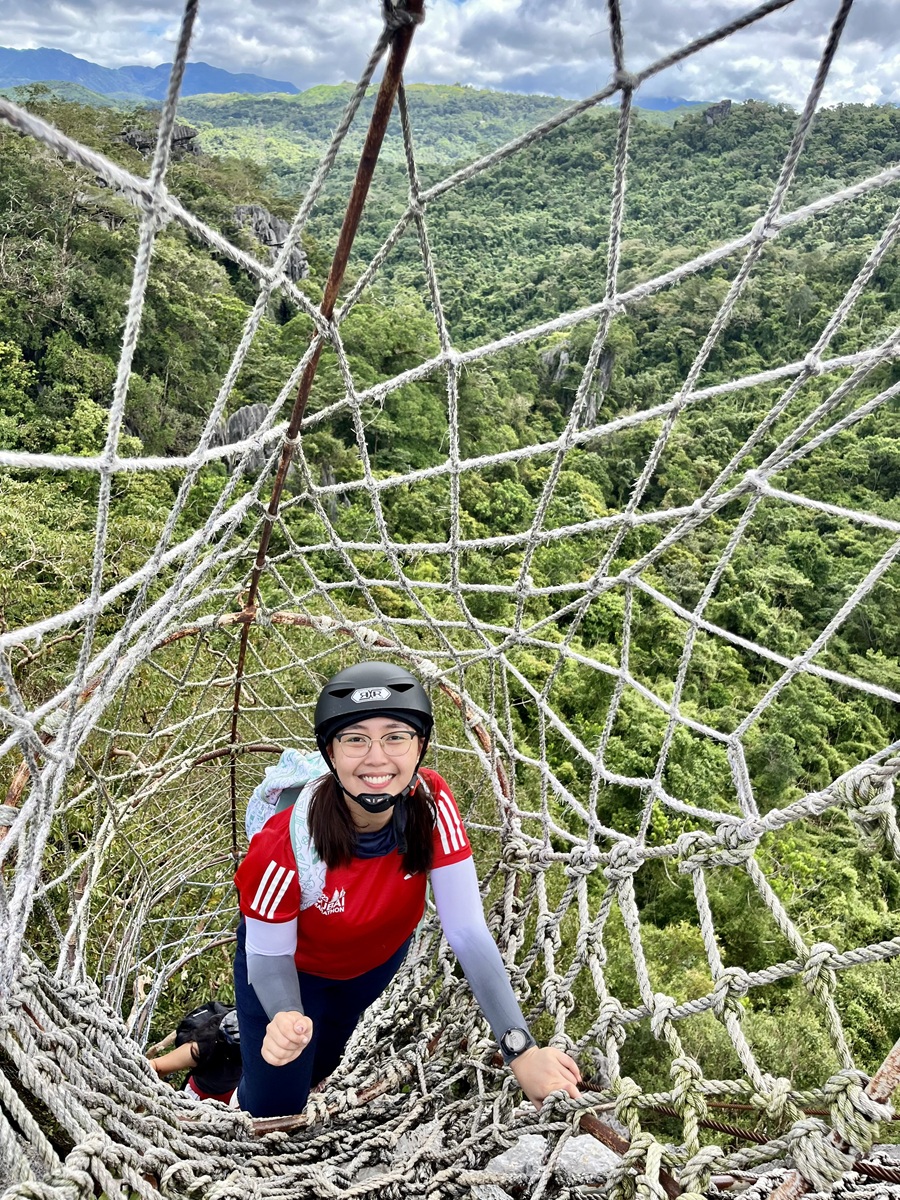
Sapot ni Ric
Soon, we reached Masungi’s most Instagrammable spot: Sapot ni Ric, or “Ric’s cobweb.” Named after a ranger who discovered it, this giant hammock mimics a cobweb pattern and hangs above limestone formations to avoid damaging them.
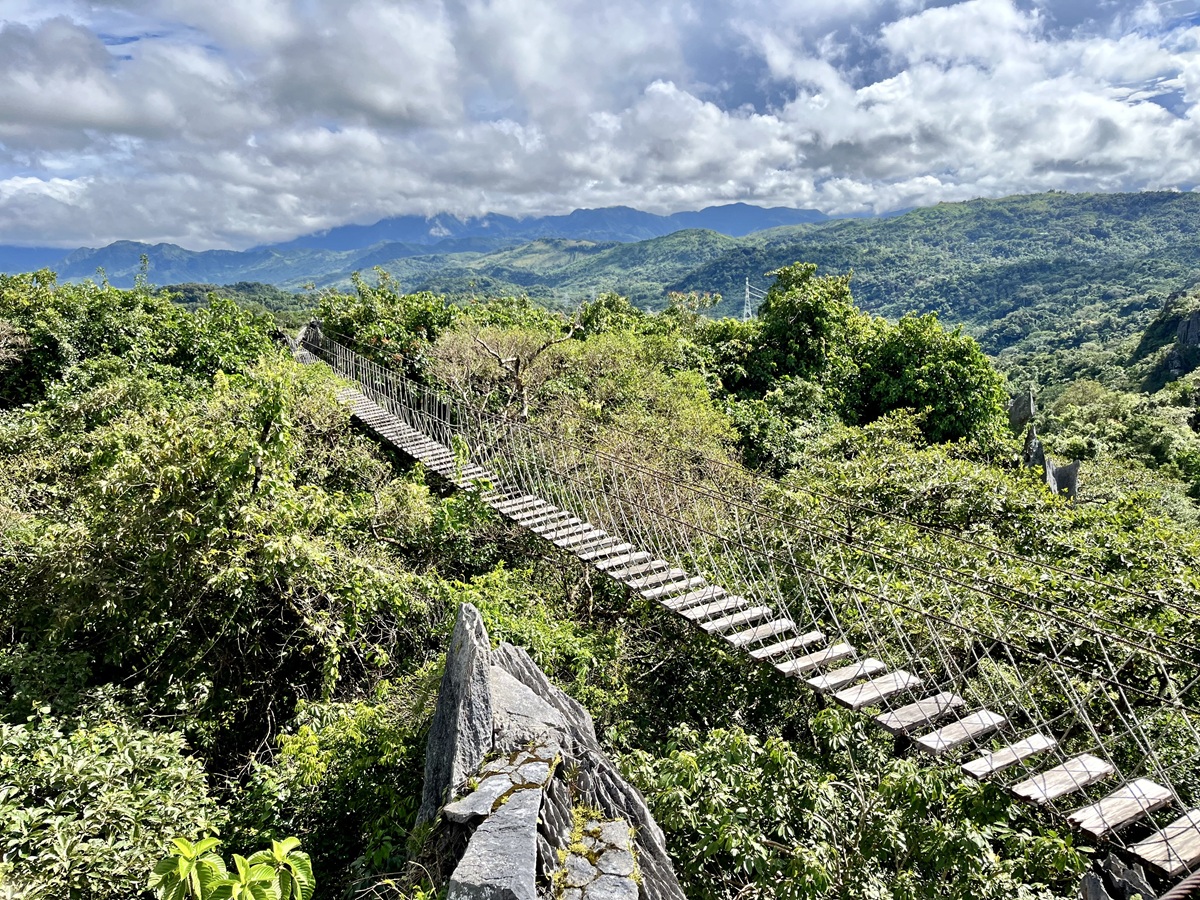
A hanging bridge followed, and led us down to the spot where Ulong Hari (“King’s Head”) is visible — a rock formation that inspired Masungi’s logo. The chainsaw installed there represents the ongoing efforts to combat illegal logging in the area.
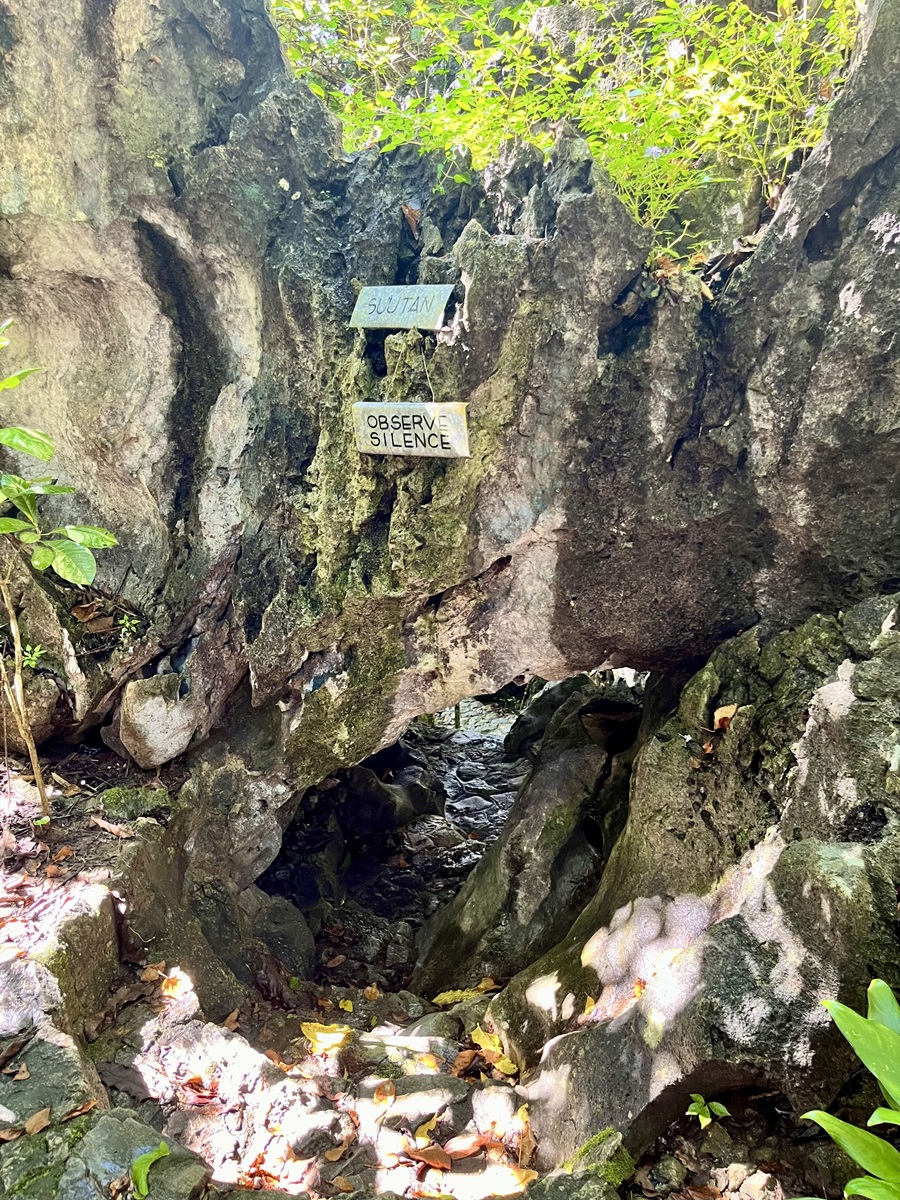
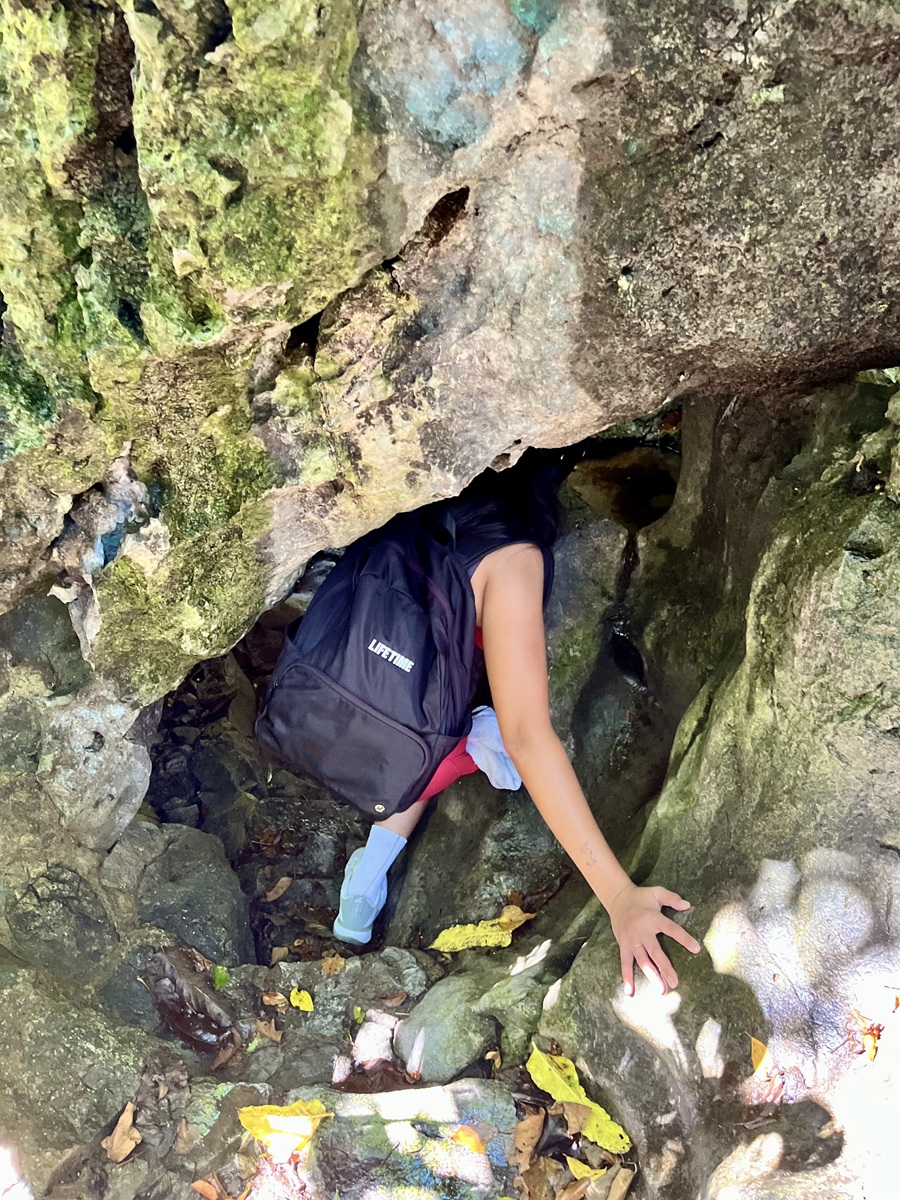
Suutan & Kwago
Next, we entered a quieter, meditative section. We refrained from talking loudly and just enjoyed the walk while navigating Suutan. While I couldn't think of a literal translation of the word Suutan, it could mean small cave-like passageways that forced us to duck and squeeze through with extreme mindfulness.
The walk in the lush forest followed, and I noticed some ropes were subtly integrated to assist hikers on wet paths, blending naturally with the environment.
Then came Kwago (“owl”), a giant hammock that may represent an owl’s nesting place — though my memory might be wrong, so bear with me!
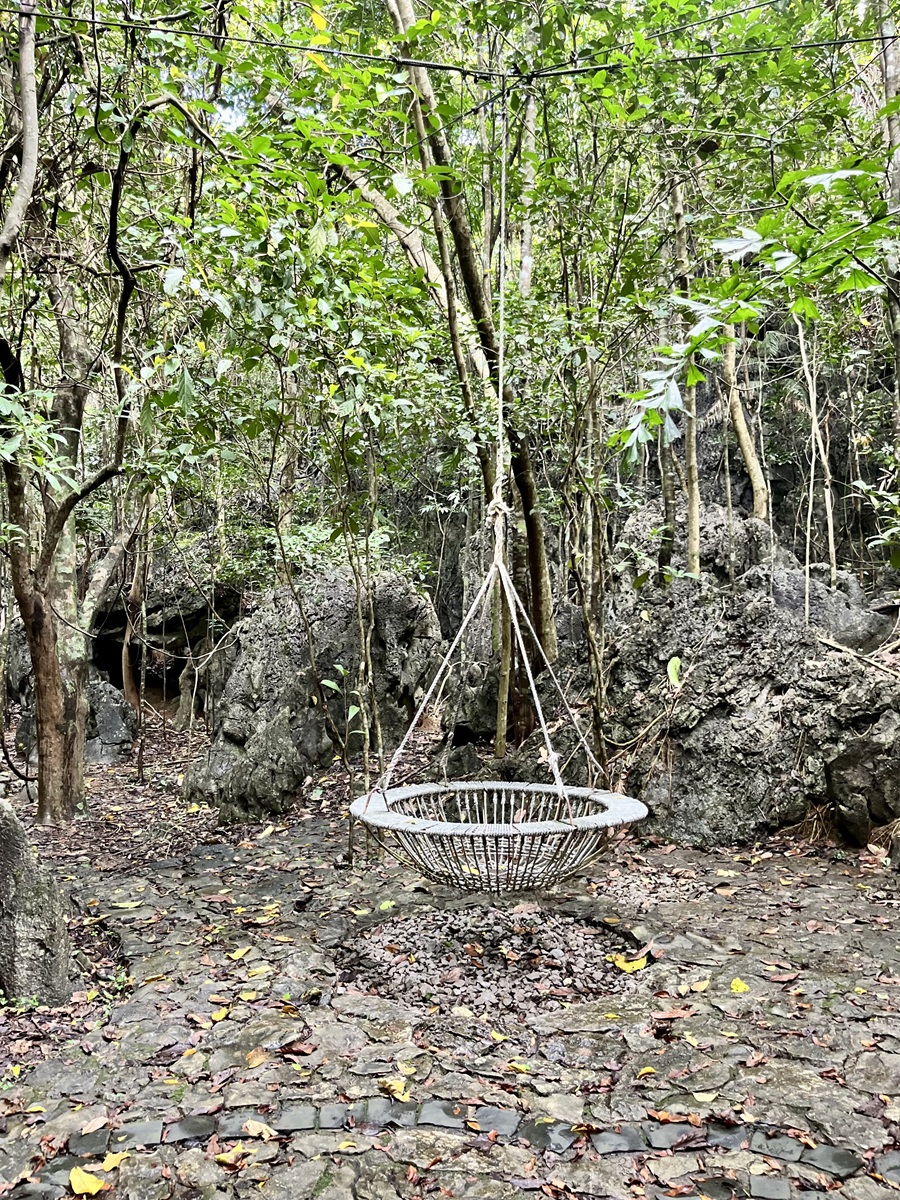

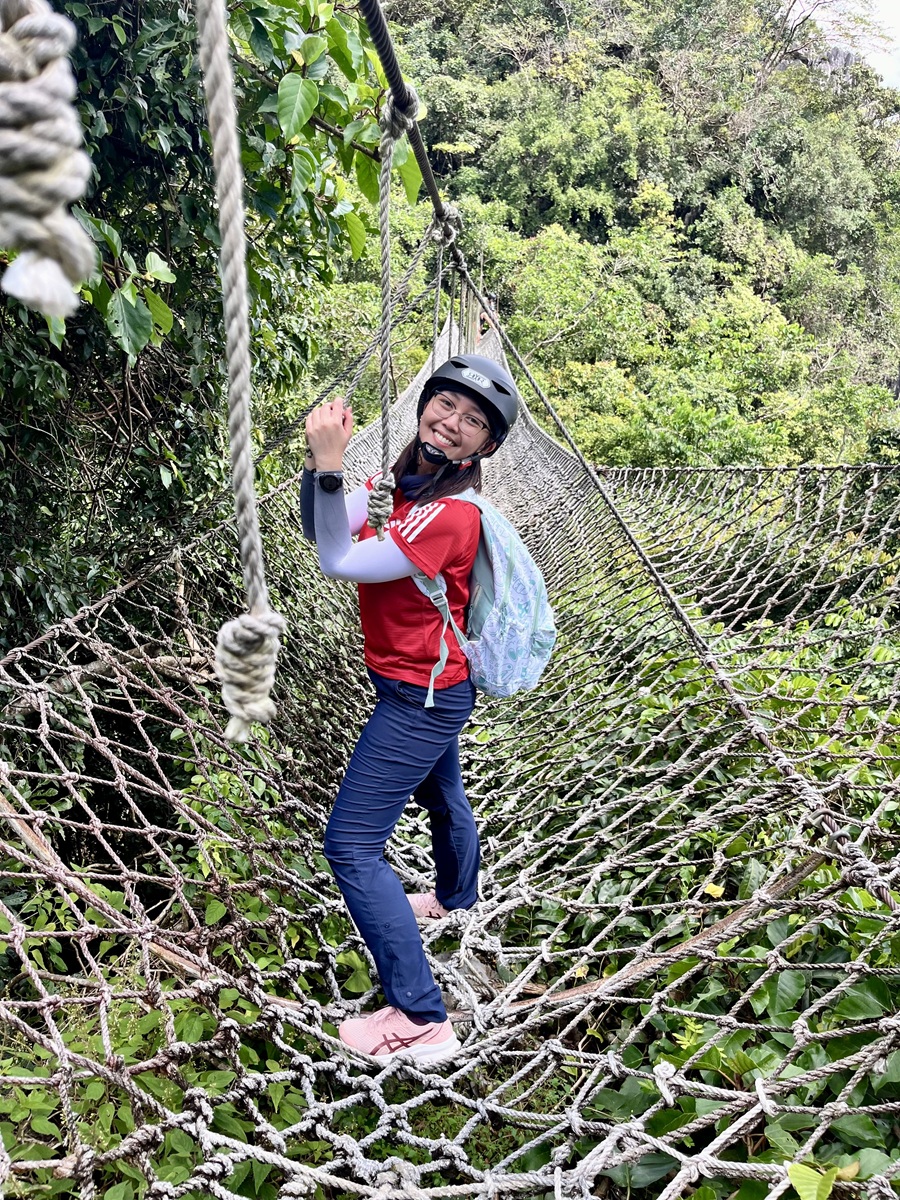
Patak, Ditse & Duyan
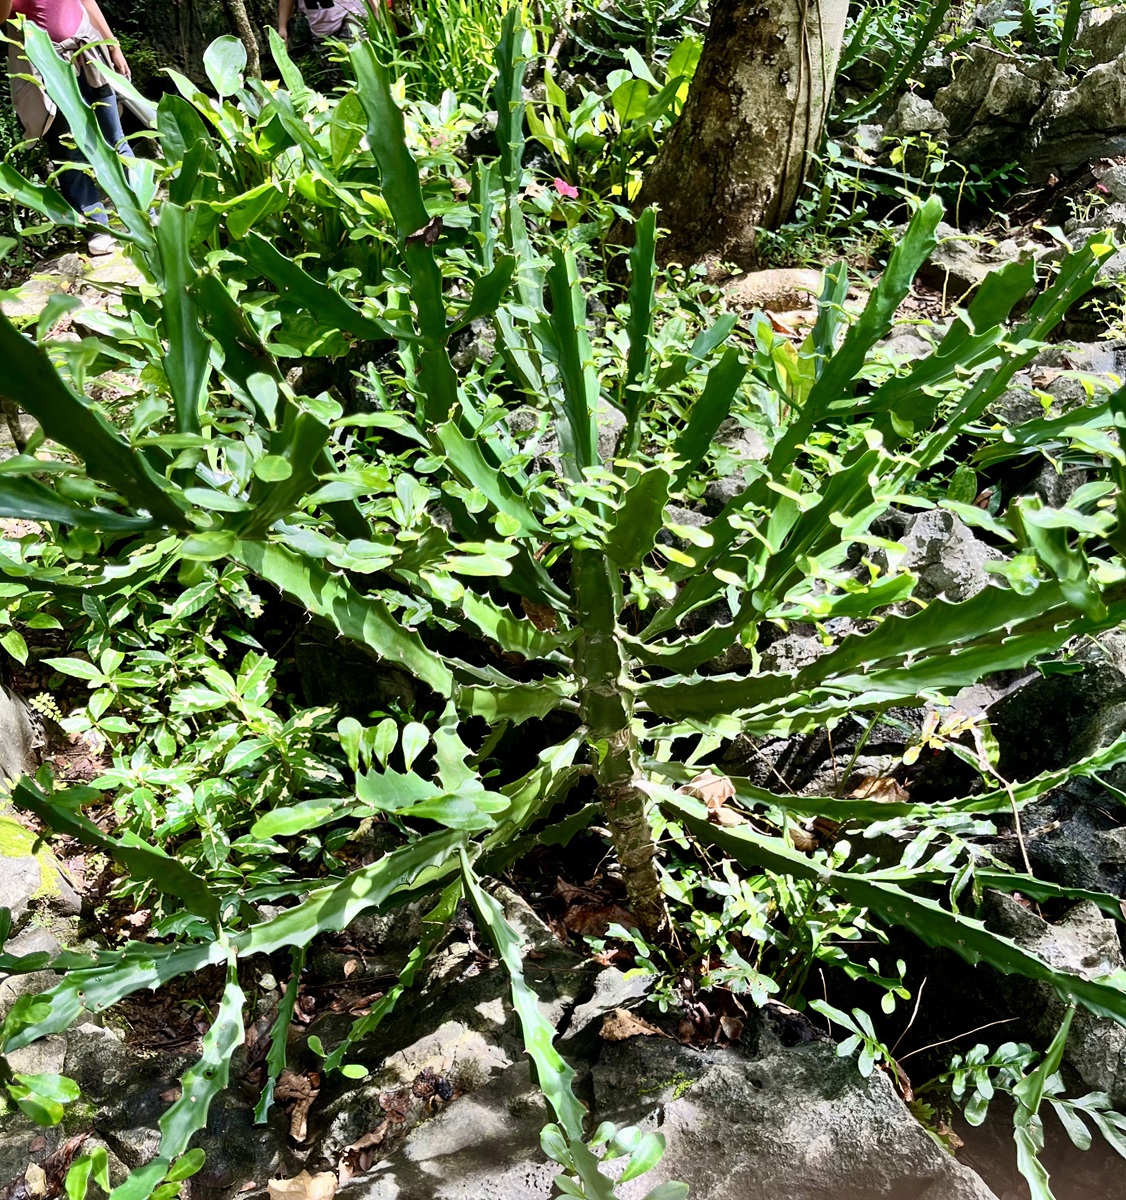
At one point, we passed by a well-manicured garden that I forgot I was hiking. There's also a section with cactus and several more plants that I am not familiar with.
Right after, the next highlight was waiting for us. The first one is called Patak, a Tagalog word for water droplet.
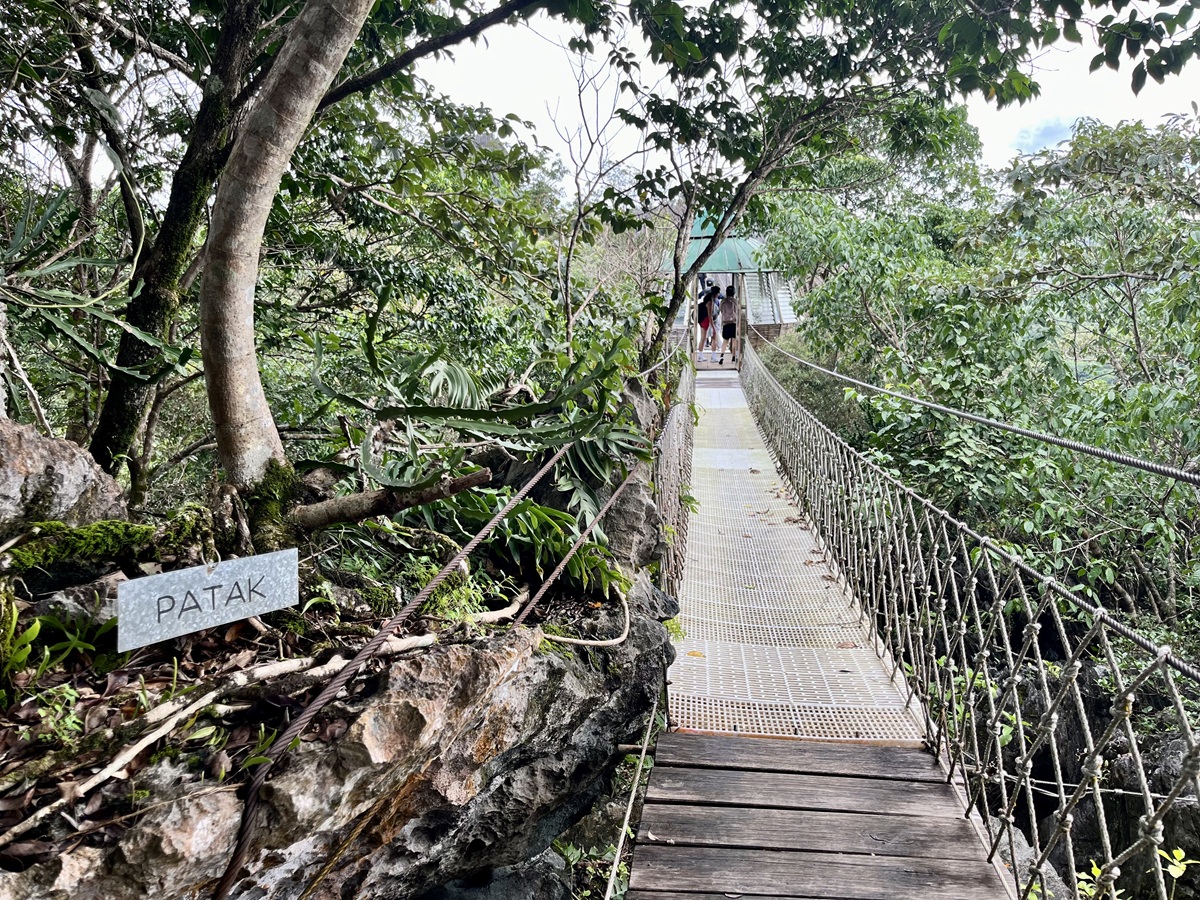
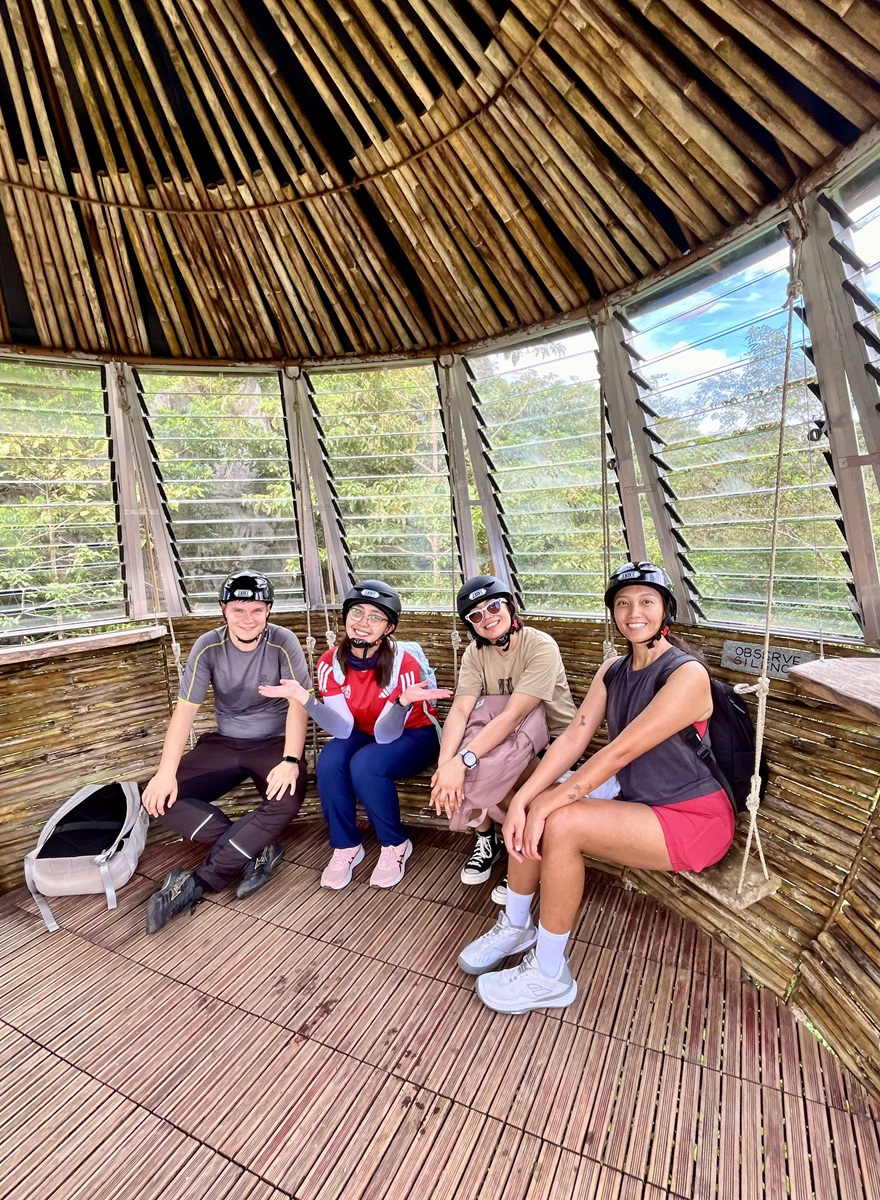
Patak is a bamboo airhouse suspended between two limestone peaks and connected by hanging bridges. Don’t forget to look back for a perfect view with the limestone peaks in the background.
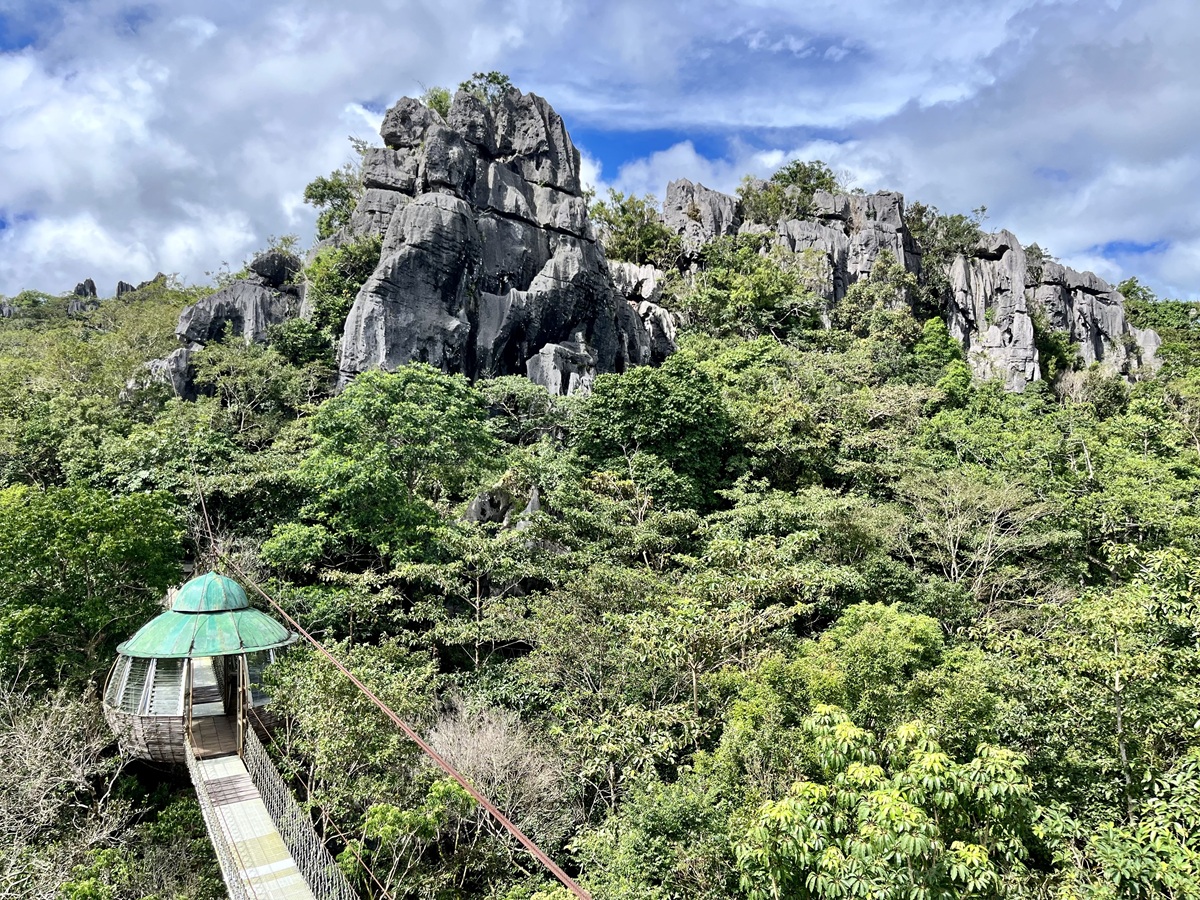
Next was Ditse (“second-oldest sister”), a climb that rewards you with a 360-degree panorama of the surrounding limestone peaks, including the nearby Tatay & Nanay viewpoints.
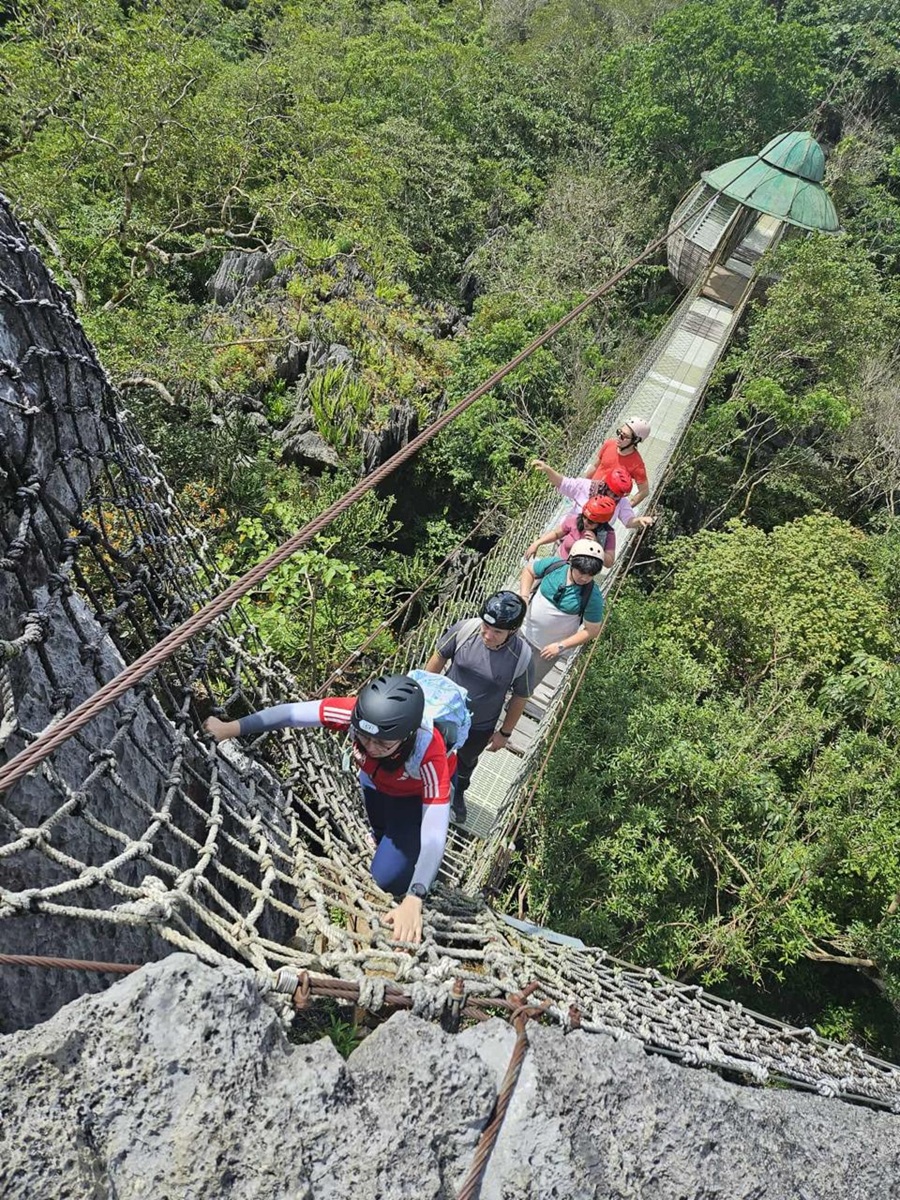
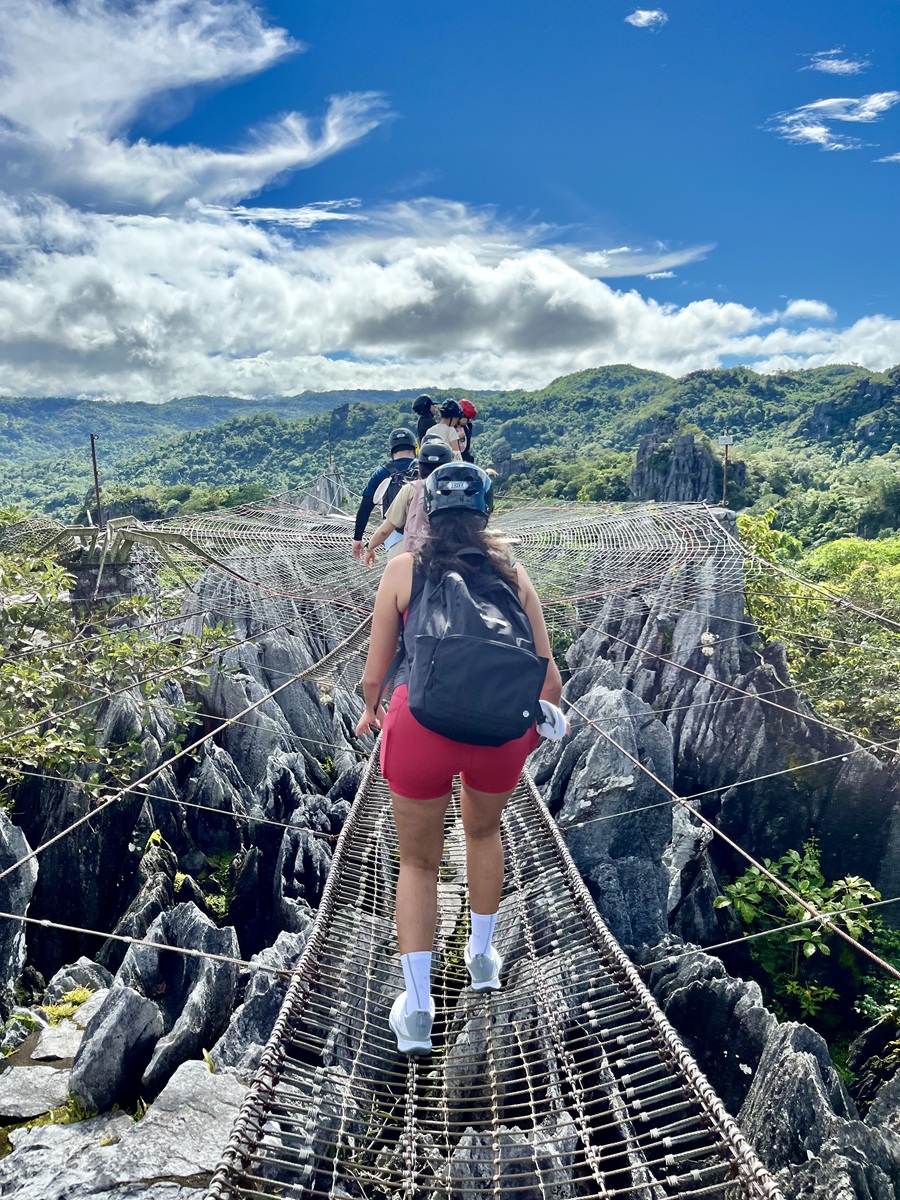
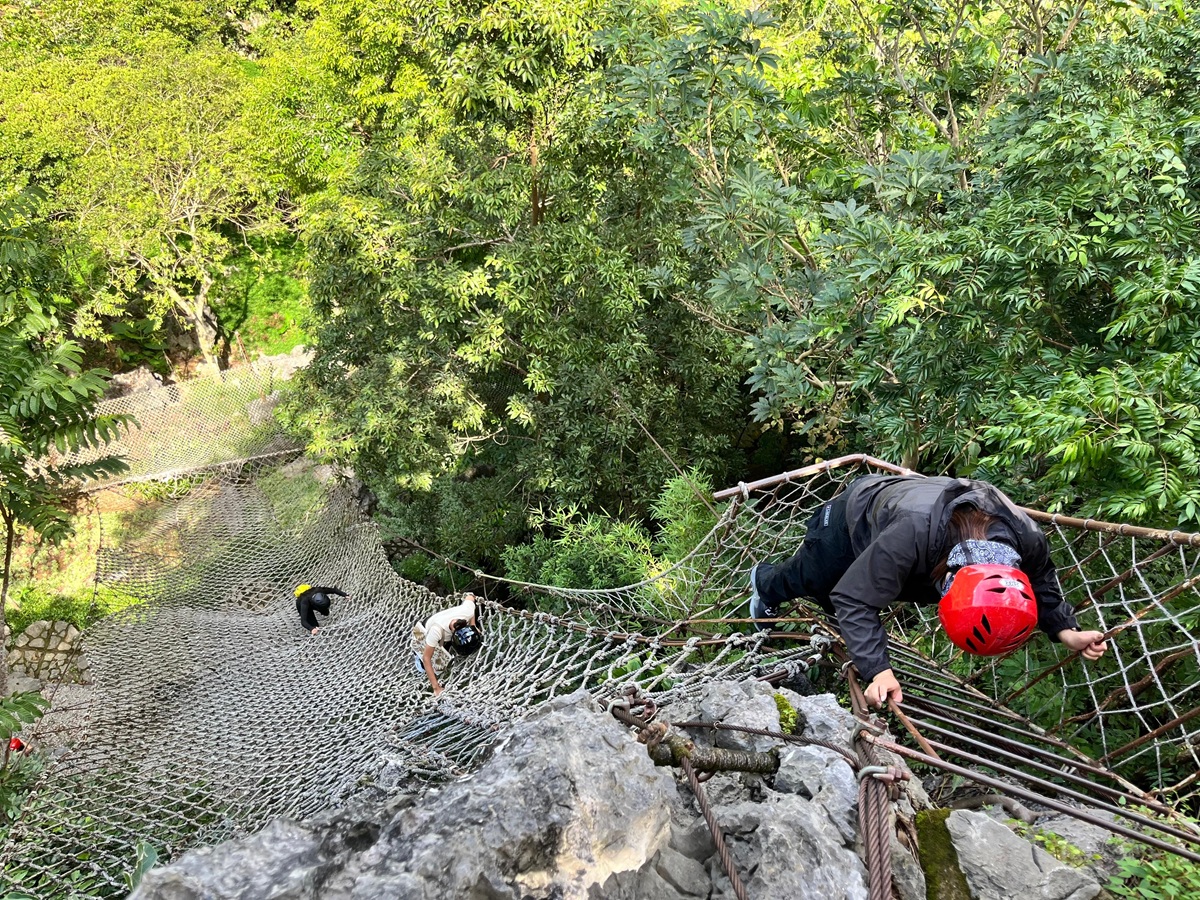
After the climb up, it's time to go down through another rope course, which felt like the longest rope course. We finally arrived at Duyan (“hammock”), a long canopy hammock — one of Masungi’s iconic spots.
Ropes assist your steps here, but be careful with phones: once dropped, they’re likely gone for good!
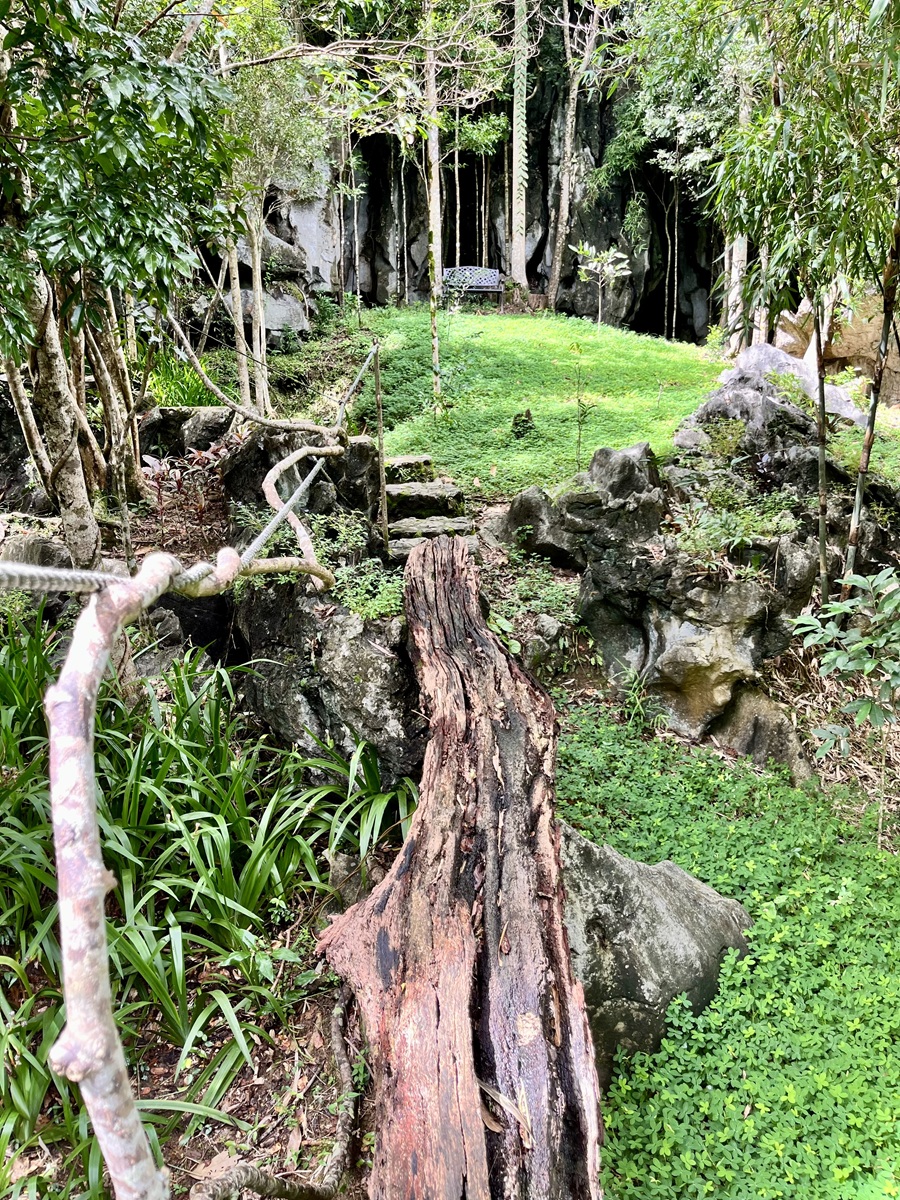
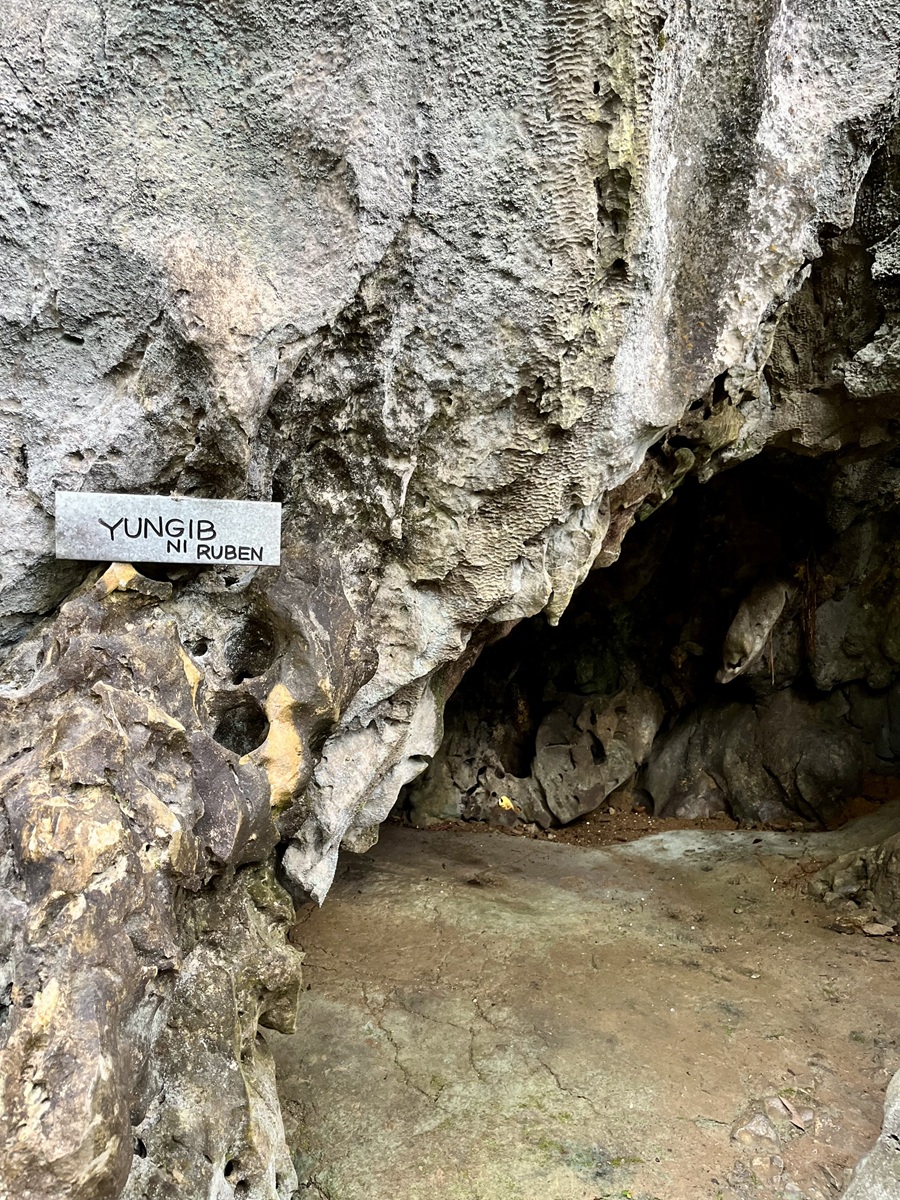
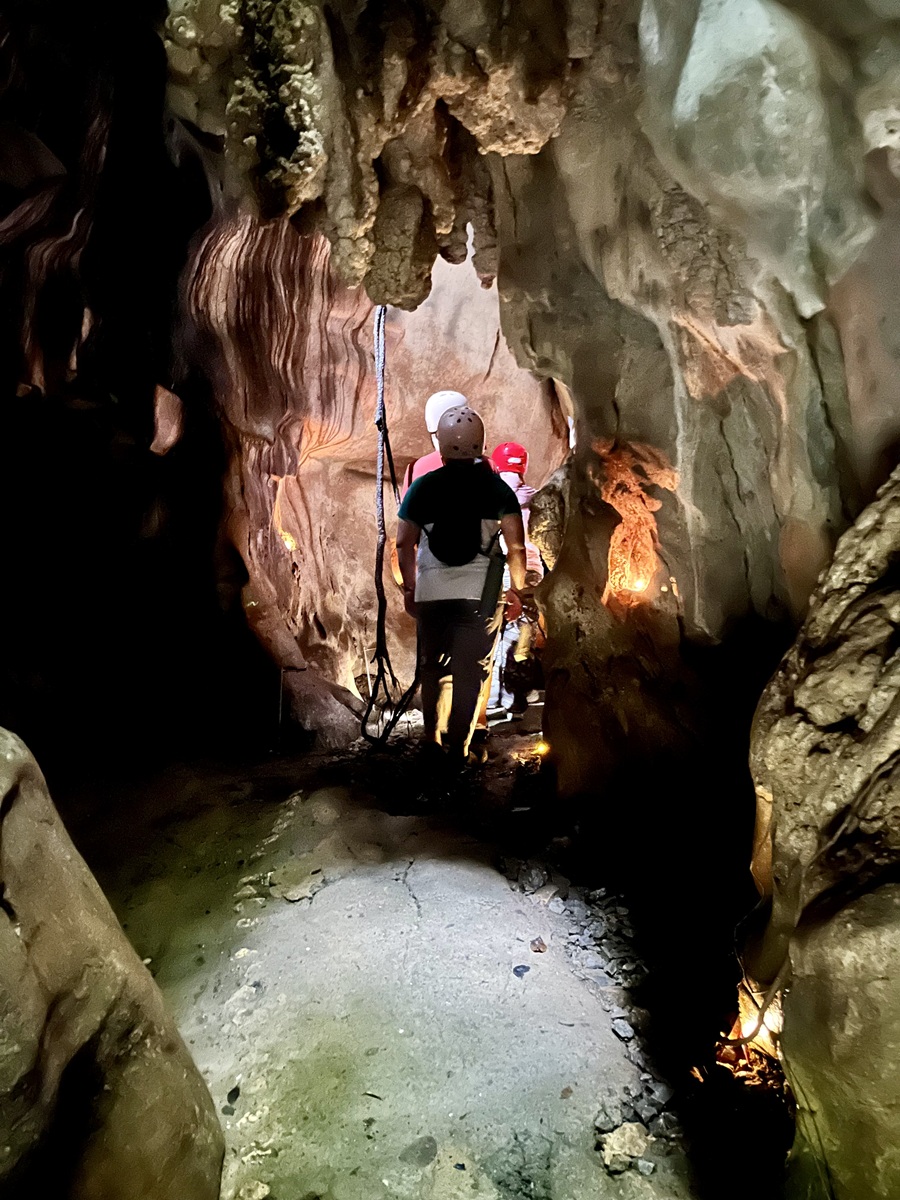
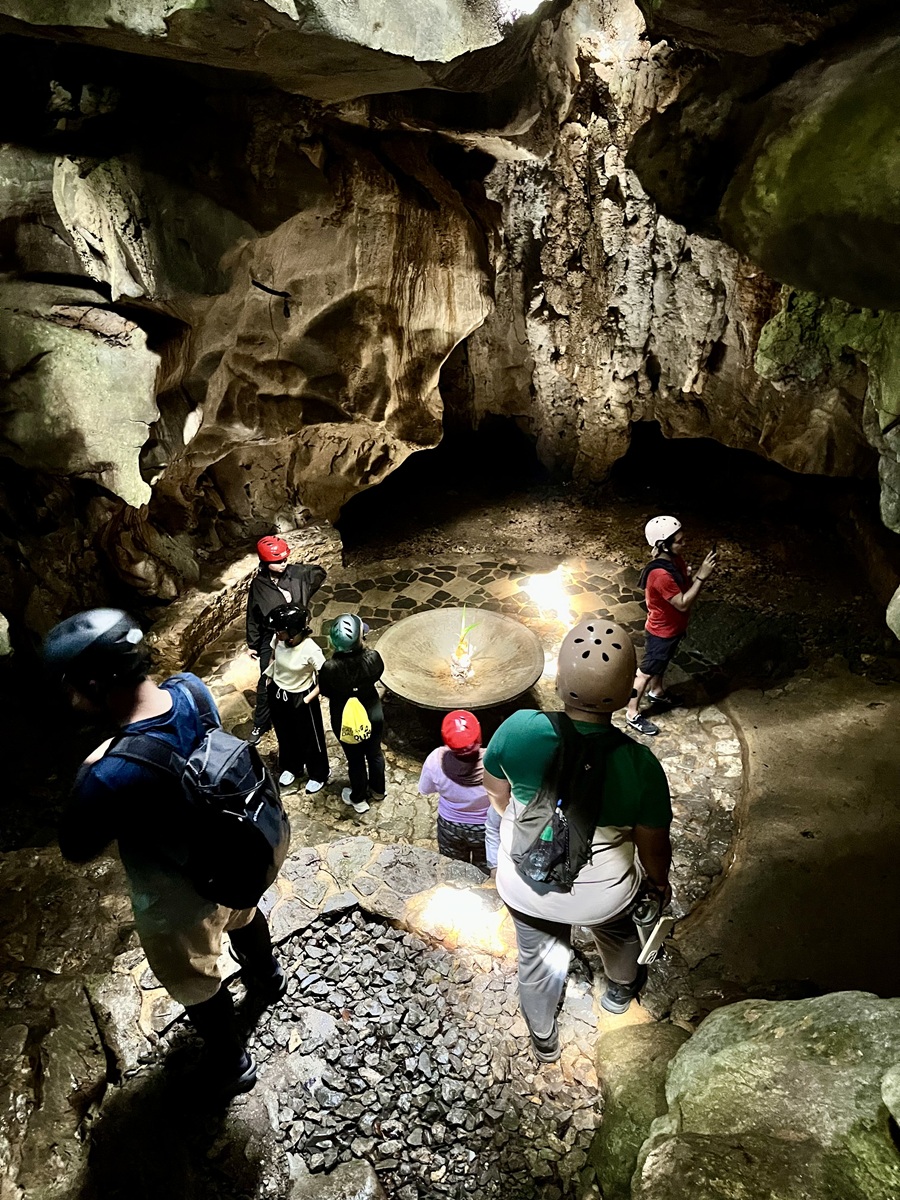
Yungib ni Ruben
After the rope courses, we entered Yungib ni Ruben (“Ruben’s Cave”), the largest cave in Masungi. Inside are natural stalactite and stalagmite formations — a small but impressive natural wonder.
Tatay & Nanay Viewpoints
After a brief rest inside the cave, we hiked a short distance to Tatay & Nanay (“Father & Mother”), the tallest peaks in the reserve.
From here, you can enjoy 360-degree views of lush greenery, limestone formations, and even Marcos Highway in the distance. I didn’t take many photos here — I was too busy soaking in the greenery. A rare sight for someone based in the UAE!
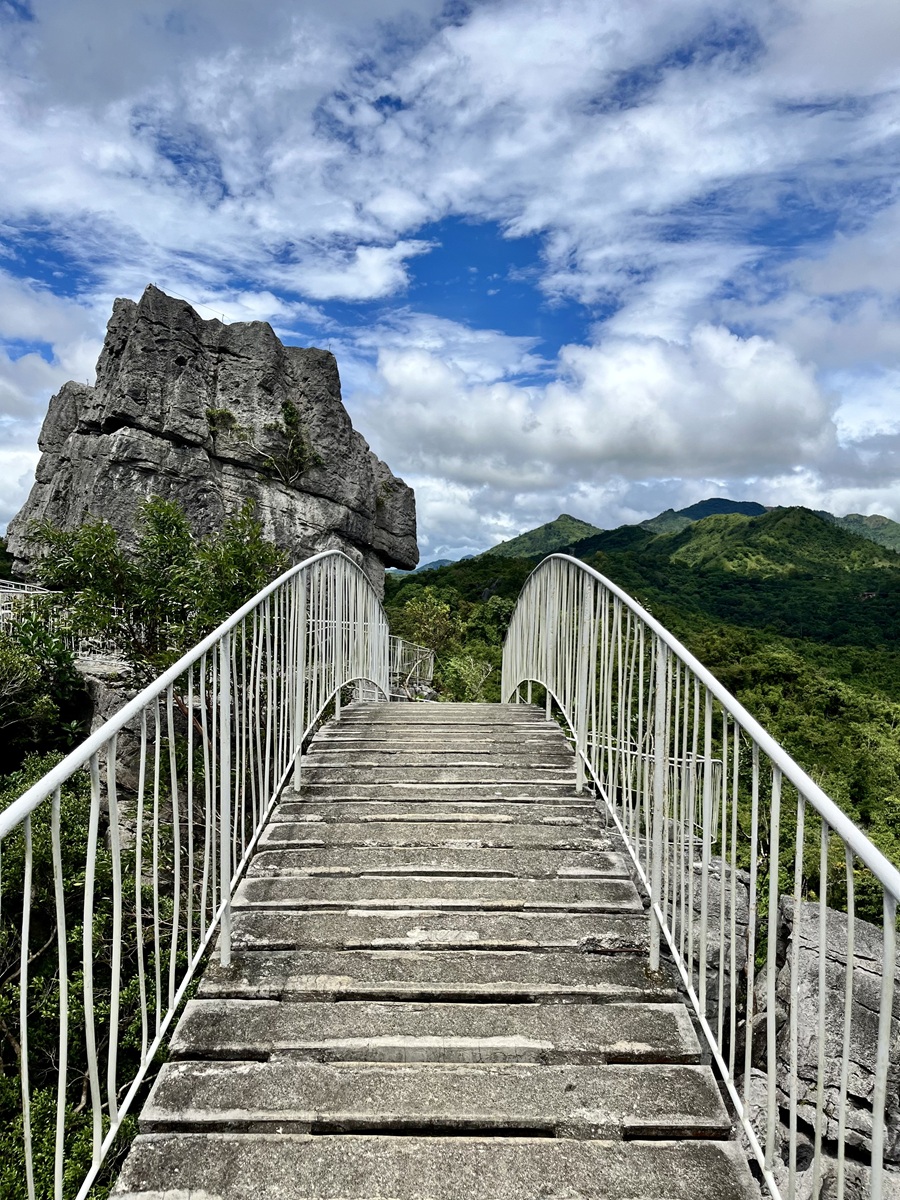
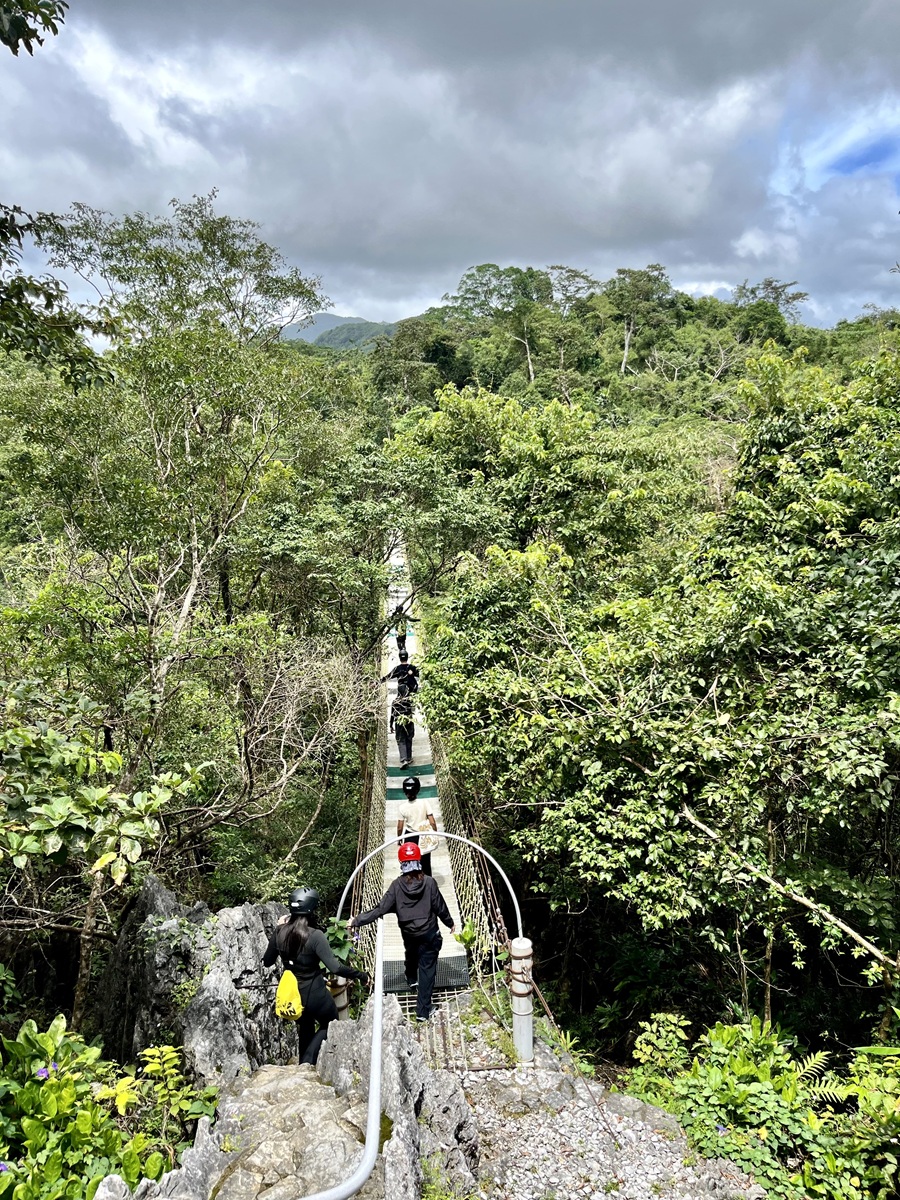
Another hanging bridge follows these viewpoints — and honestly, I lost count of how many bridges we crossed by this point.
Bayawak, Liwasan & Sawa
The last rope course, Bayawak (“monitor lizard”), features a metal base and a steep rope descent over a tall rock face resembling the spine of a monitor lizard. At this point, you can opt out if you're too tired to push and there's a shortcut anyway.
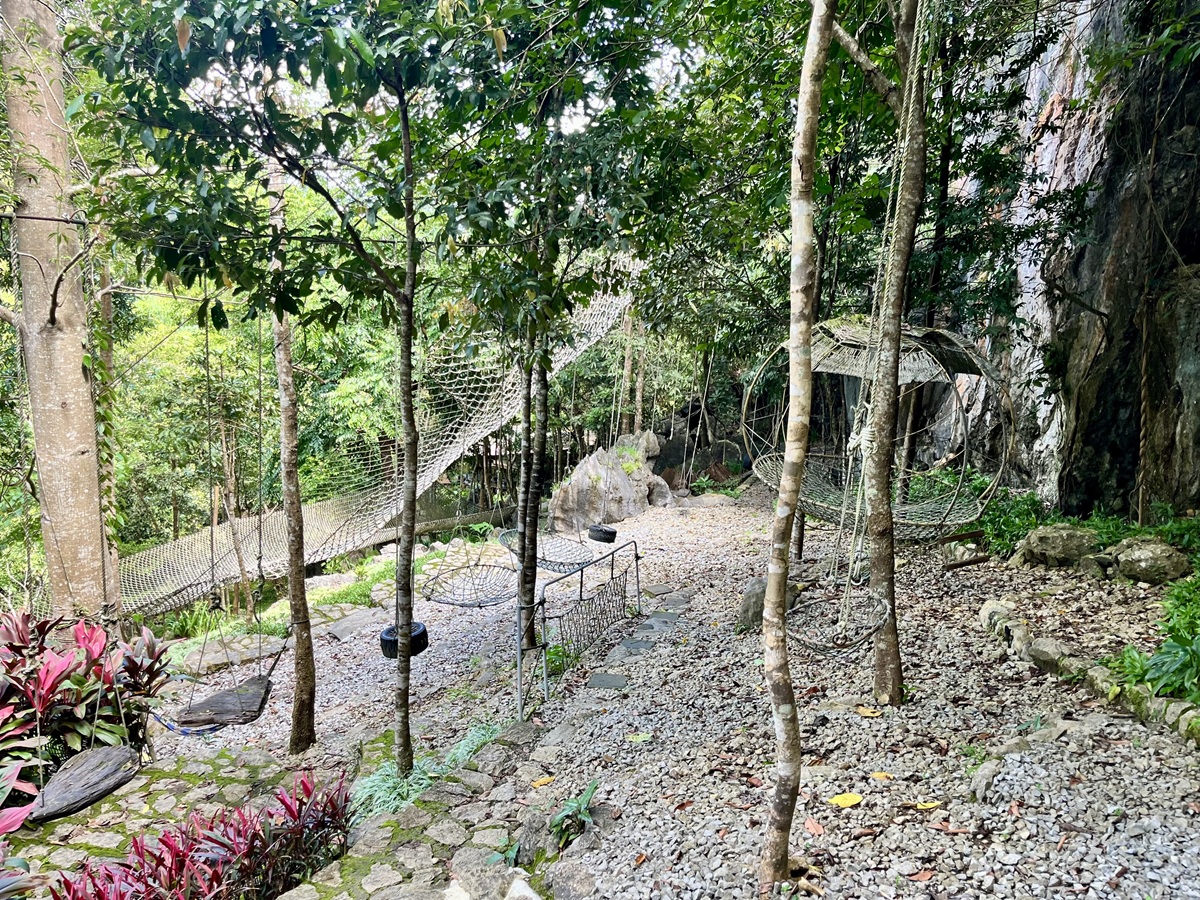
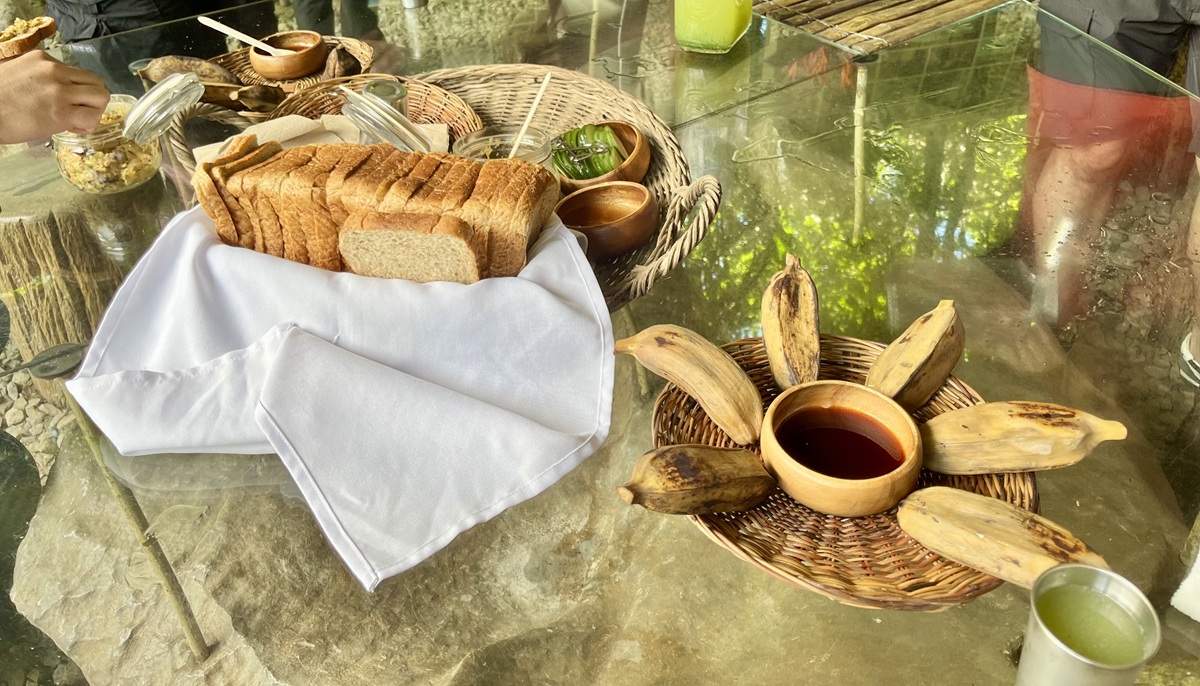
At the bottom is a rest area with different hammocks to lounge on, and a few light snacks at Liwasan (“park”), including a healthy sandwich, saba banana with sauce, and calamansi-cucumber juice — enough to recharge after the morning adventure.
Finally, we crossed Sawa (“snake”), a hanging bridge shaped to mimic a native snake, which leads back to Silungan, officially ending the hike.
As we walked back to the main road, we were lucky to catch a clear view of Metro Manila from Masungi — and of course, I couldn’t resist taking a moment to appreciate it. Surely, I'm a sucker for views!
Day Hike Arrangement & Cost(s):
Since Masungi Georeserve is a protected conservation area, it's not allowed to hike on your own. There are several hiking trails to choose from depending on your interest, and each experience is guided by a park ranger.
The shortest and most popular experience is called the Discovery Trail and costs Php 1,500 on a weekday and Php 1,800 on a weekend. The conservation fees collected go directly toward supporting Masungi’s ongoing efforts in reforestation, habitat protection, and the livelihoods of its park rangers.
To confirm a booking, groups must have a minimum of 7 to a maximum of 14 people. If your group is smaller than 7, don’t worry — Masungi offers a Shared Discovery Trail where you will be joining other hikers to form one group.
We booked through the Shared Trail Program, and the process was very straightforward. I registered our interest four days before our preferred date and received an email the next day with payment instructions to secure our slot.
All in all, our Masungi Georeserve hike via the Discovery Trail cost us the following:
- Conservation Fees: Php 1,500.00
- Transportation Costs: Php 577.50 + Php 75 + Php 319.55 = Php 972.05
Total Cost: Php 2,472.05 per person (for a group of 4)
Personal Thoughts on Masungi Georeserve Hike via Discovery Trail:
As I always say, we all have different adventure appetite or what I call #hikeppetite to begin with. So, a good trail for me might not be a good trail for you, and vice versa. And that’s completely okay — we don’t need to agree with anyone or everyone all the time. Anyhow, here’s what I think about our hike in Masungi Georeserve:
Pros:
- A complete adventure for beginners. The Discovery Trail offers a fun mix of guided hiking and thrilling rope courses — perfect for those who want something exciting but not overwhelming.
- An accessible escape from Metro Manila. Despite being located in Rizal, it’s close enough to the city to be a convenient, doable day trip.
- Your fees support real conservation work. The conservation fee directly funds Masungi’s efforts in reforestation, habitat protection, and supporting the livelihoods of their park rangers.
Cons:
- Not ideal if you want a long or hardcore hike. If you’re training for something big or prefer trails that last 6+ hours, this might feel a bit short.
- Not a place for camping or partying. Masungi is a strict nature reserve, so visitor numbers are limited, and even noise levels are regulated. If you’re looking for a social or festive trail, this isn’t it.
- Costs are higher than typical Rizal hikes. The conservation fee makes this pricier compared to other nearby trails — though the value goes toward a meaningful cause.
While the overall trail was a bit short for my usual hiking preference, it was still a refreshing and worthwhile adventure — especially with my limited time in the Philippines. The rope courses were unique (at least for me!), fun, and surprisingly challenging in some parts. Overall, I really enjoyed our day hike at Masungi Georeserve via the Discovery Trail. And if I get the chance next time, I’d definitely try the Legacy Trail.
And this is all for now, and I'll see you on the next trail and adventure!

Whatever decision you make, always remember to prepare beforehand, stay safe, and last but not least, enjoy the outdoors! #happyhiking!
With lots of love,
PINAYHAKAWATI 💗