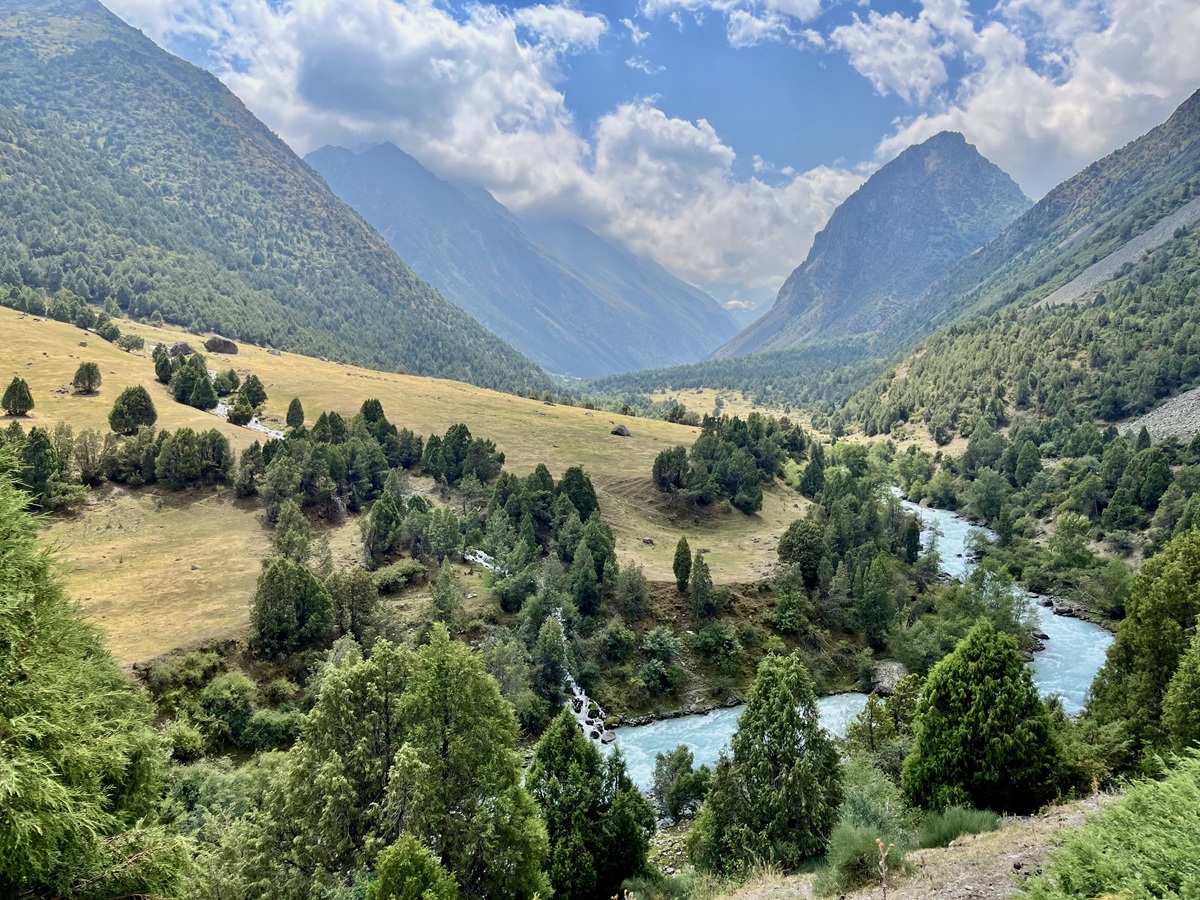
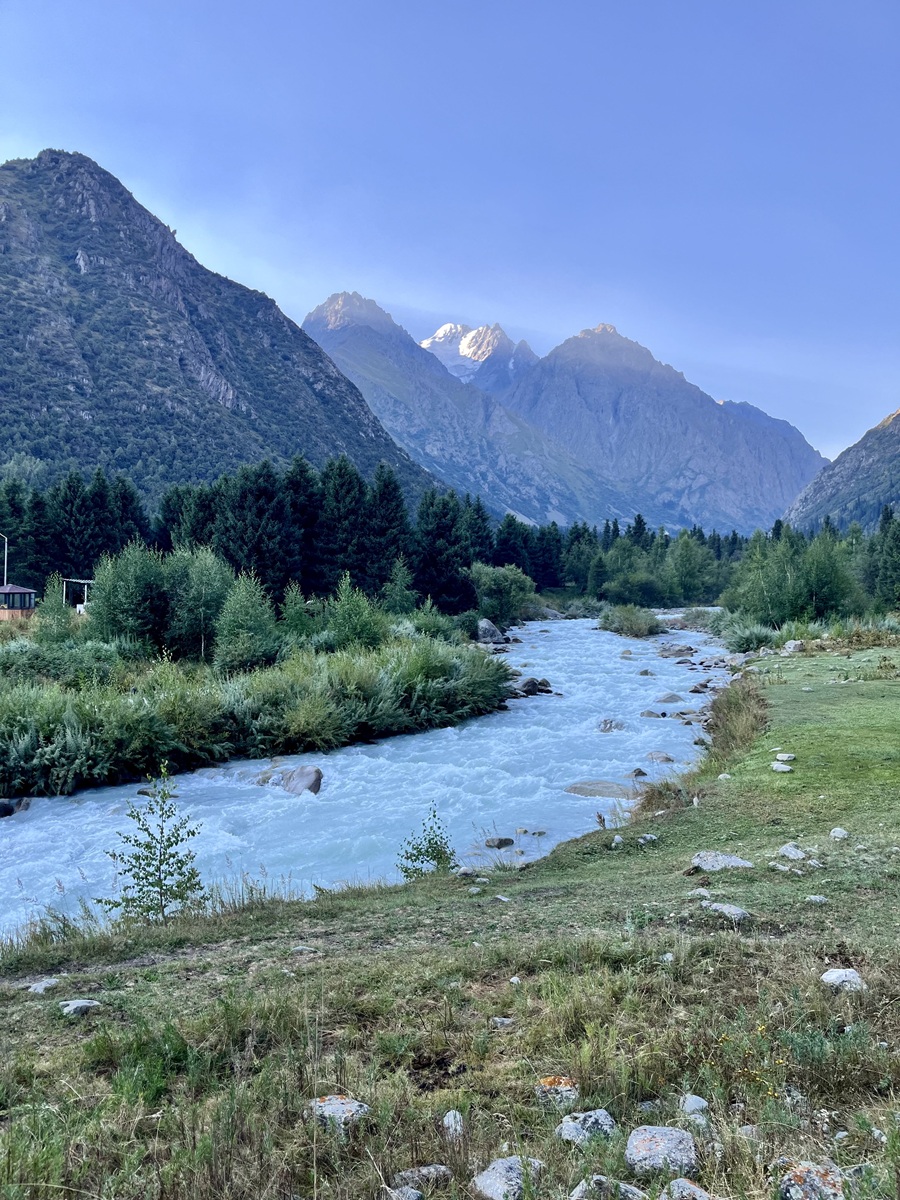
After reaching Ratsek Hut and Komsomolets Peak in previous seasons, this summer’s adventure took me to hike the Adygene Glacier Lake, one of the most stunning hikes in Ala Archa National Park, Kyrgyzstan. This 20 km out-and-back trail rewards hikers with breathtaking views of glaciers, alpine valleys, and a pristine lake tucked high in the mountains. In this complete hiking guide, I’ll cover everything you need to know — from trail details, logistics, and tips to help you prepare your own adventure!
Disclaimer: The lake is officially spelled Adygine on tourist maps, but I’m using Adygene since it’s the more commonly used spelling online. I also follow this version throughout my blog for consistency and uniformity.
💡 Ready for more hiking adventures in Kyrgyzstan? Start exploring these trails now:
- Easiest Hiking Trail: Alamedin Gorge – Hike to Waterfalls or make it a loop for an extra challenge!
- Beginner-Friendly: Ala-Archa – Scenic Hike to Ratsek Hut
- Picture-Perfect: Kol-Tor Lake – A Turquoise Lake in Kegeti
- Epic Challenge: Komsomolets Peak – Conquer a 4000er in one day!
ADYGENE GLACIER LAKE HIKING Trail Overview:
- Route: Adygene Glacier Lake Trail (Out-and-back hike) in Ala Archa National Park
- Distance: 20.08 km
- Elevation Gain: ±1,573 m
- Highest Point: 3,604 MASL
- Difficulty: Moderate to Challenging (3.5/5)
- Time Required: 8–12 hours (I took 13h 26m – I'm on a slower side)
- Best Season: June to September
- Highlights: Glacier views, Alpine valleys, Adygene Glacier Lake
How to Get to Ala Archa National Park from Bishkek (2025 Update)
Previously, I recommended arranging a private transfer or taxi, because taking a marshrutka (minibus) would only get you as far as the main gate. From there, you’d still have to cover another 12 km—either by car or on foot—to reach Alplager (Ala Archa Hotel), the starting point for most hiking trails.
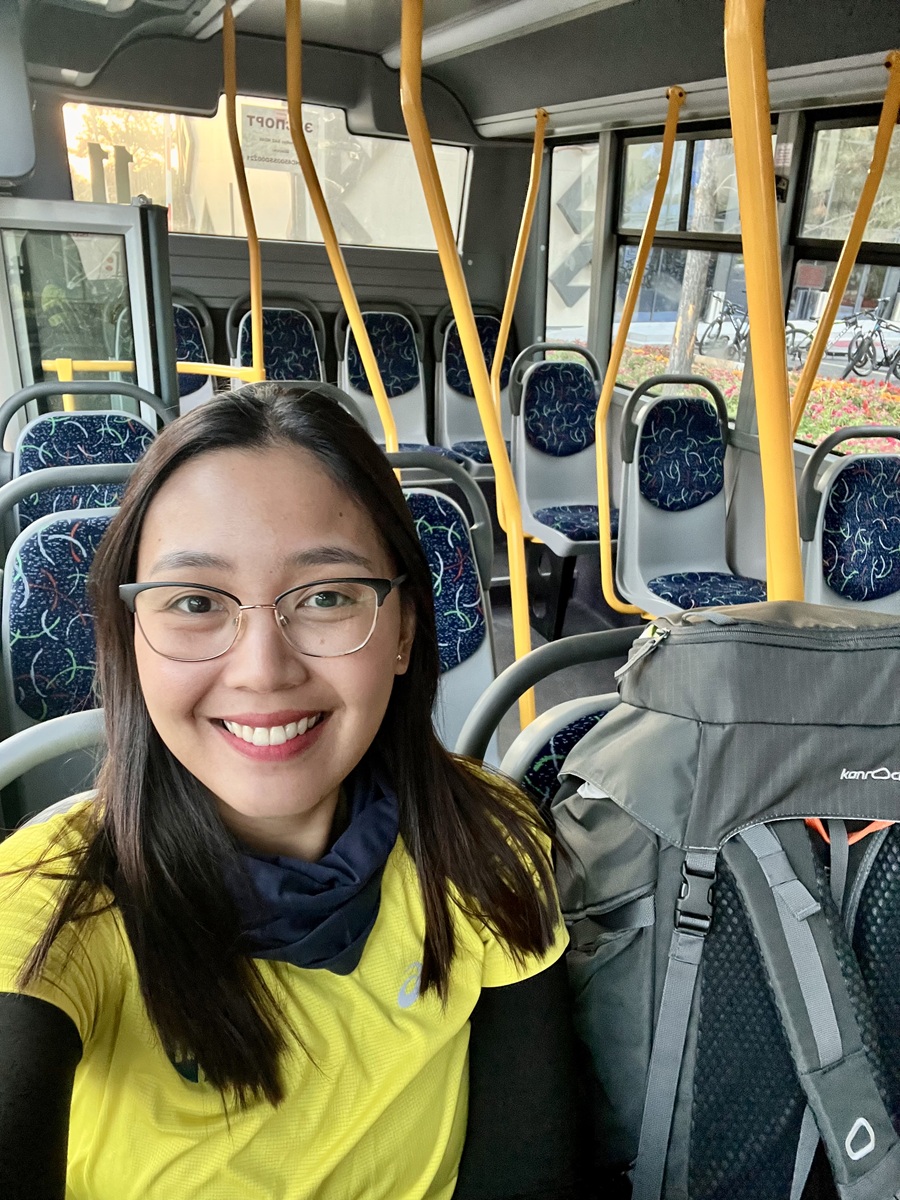
As of August 2025, things have changed for the better! You can now easily book a Yandex taxi directly from Bishkek to the park entrance. From here, free shuttle buses now run from the park entrance to Alplager throughout the day—a game-changer for hikers and budget travelers!
However, for families traveling with their own vehicle, you need to leave your car at the designated parking lot and take the shuttle bus.
There's also a new public bus service from Bishkek with several pickup points, for just KGS 50 per person. It runs directly to Ala Archa’s main gate and operates from 8 AM (first bus from Bishkek) to 8 PM (last bus from the park).
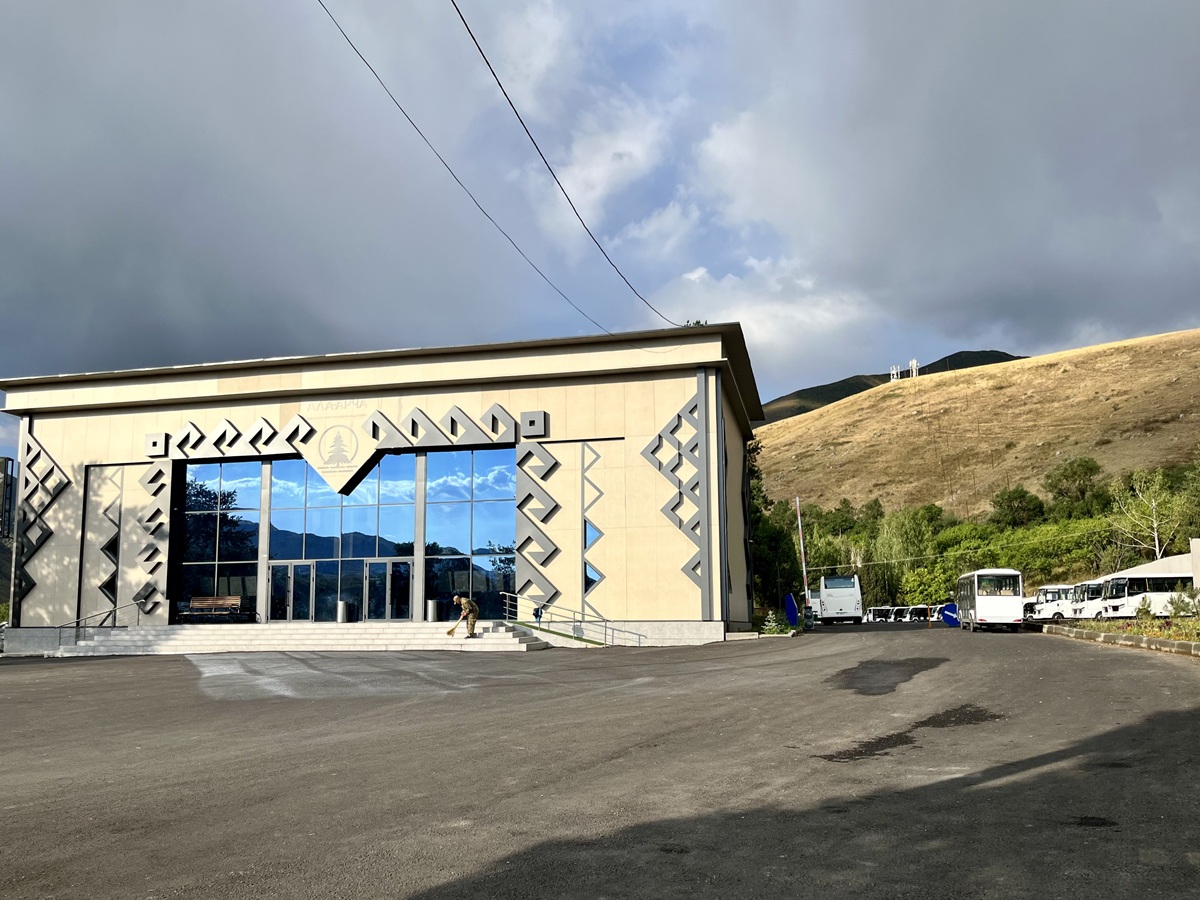
The main entrance has been renovated and is now equipped with card payment machines, eliminating the long single-file queue at the previous entrance.
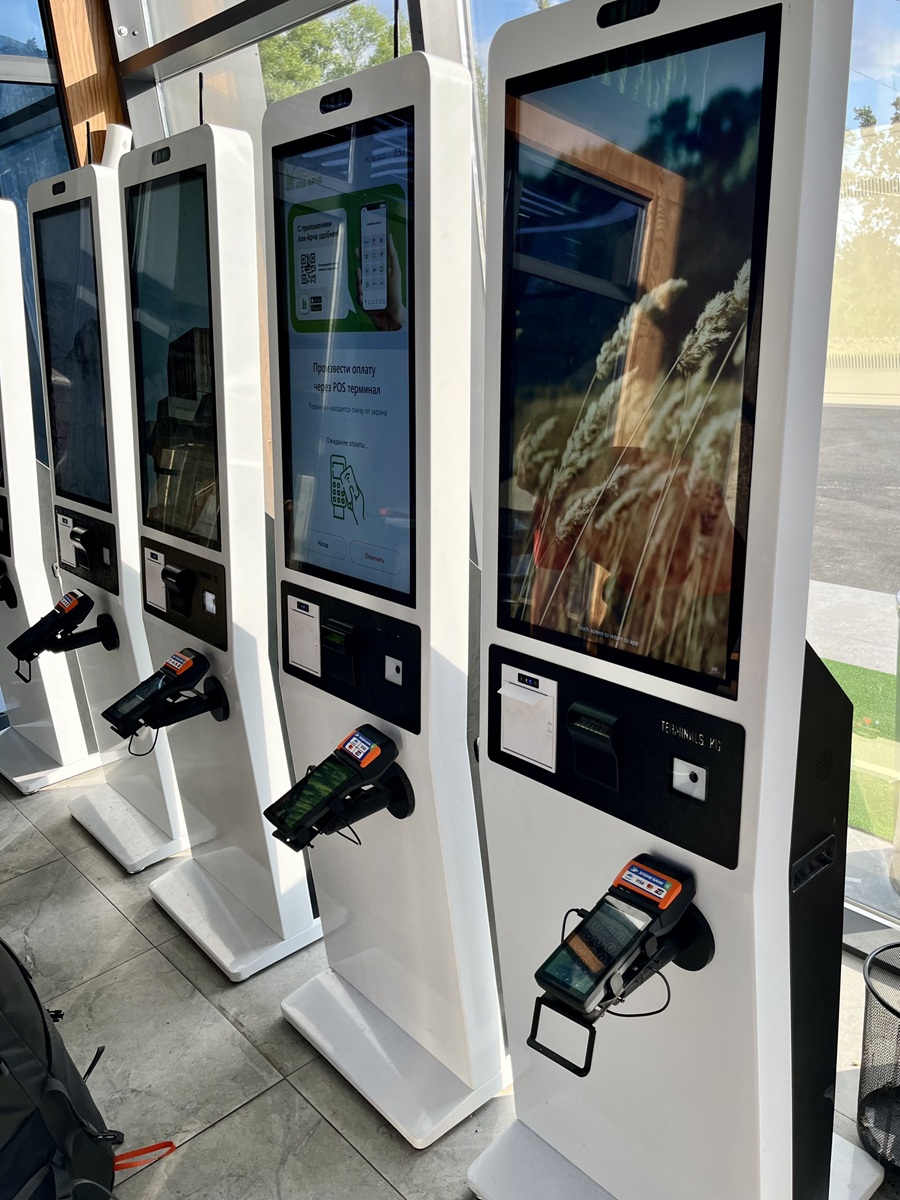
And can we take a moment to admire the new interior design at the entrance building? It honestly feels like walking into a modern alpine museum. They went all in on the upgrade, and I’m absolutely here for it!

Current Costs (2025):
- Entry Fee: 200 KGS per person (previously 500 KGS per vehicle)
- Bus Fare: 50 KGS per person per way
- Taxi Fare: One-way from Bishkek city center now costs 1,500–1,700 KGS, depending on your exact location—much cheaper than before when fares ranged from 3,000 to 4,000 KGS.
Hiking Trailhead in Ala Archa National Park: Where the Adygene Glacier Lake Hike Begins
Unlike trails to Ratsek Hut and Komsomlets Peak, the starting point of Adygene Glacier Lake is about 200 meters before the usual drop-off point at Alplager. Make sure to inform your driver that you’re hiking to Adygene, and most drivers know exactly where to stop.
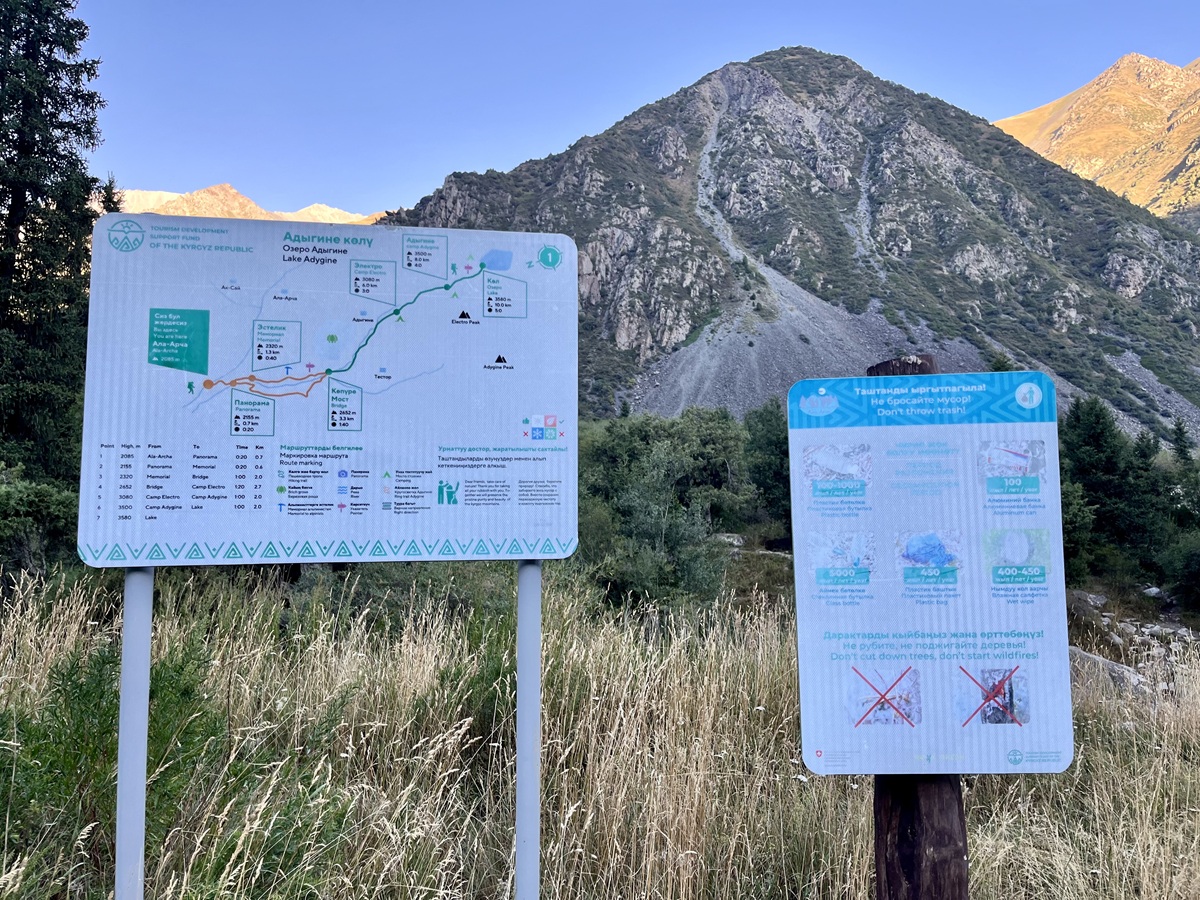
There’s currently construction work at the stop, so it’s easy to miss. Right behind the construction site, you’ll find the official hiking trail map, marking the start of your adventure.
This is an out-and-back or backtrail route, so you’ll start and finish at the same point.
Once you’ve completed your hike, here are your options for getting out of Ala Archa National Park:
- Wait for the free shuttle heading out. From Alplager Hut to the main gate. However, these shuttles can fill up quickly, so seating isn’t guaranteed.
- Catch the shuttle going in. Sometimes, it’s easier to wait for the Main Gate → Alplager shuttle and ride it back out when it turns around. This is what we did, and it is the best choice so far.
- Walk to Alplager Hut and wait there. This increases your chances of getting a seat—but it’s a bit of a walk, and after 20 km on the trail, you may not want to add extra steps!
Hiking Trail Sections:
Now, let’s dive into the main highlight of this guide — the different sections of the Adygene Glacier Lake hiking trail in Ala Archa National Park.
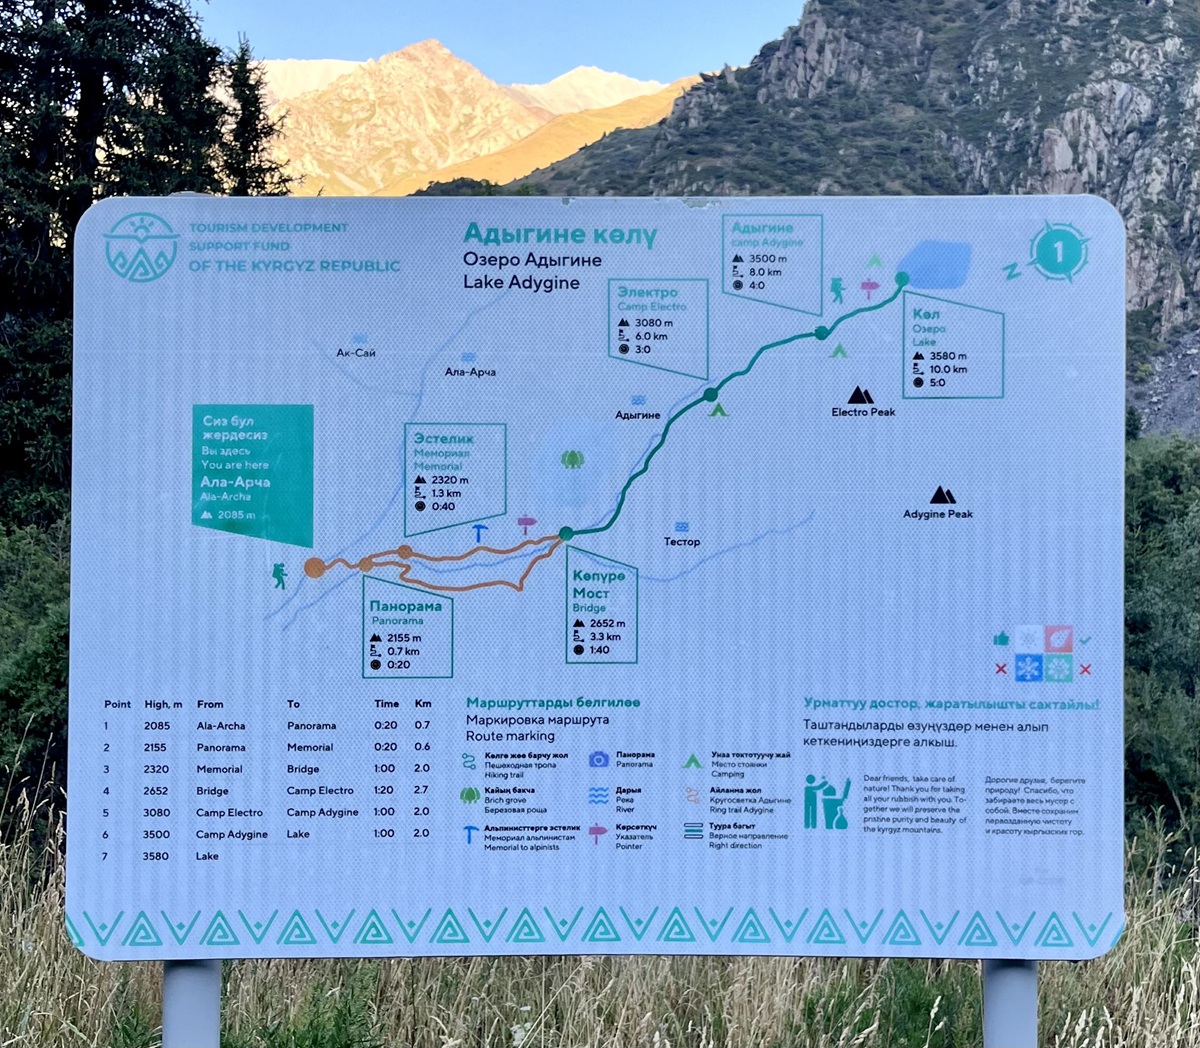
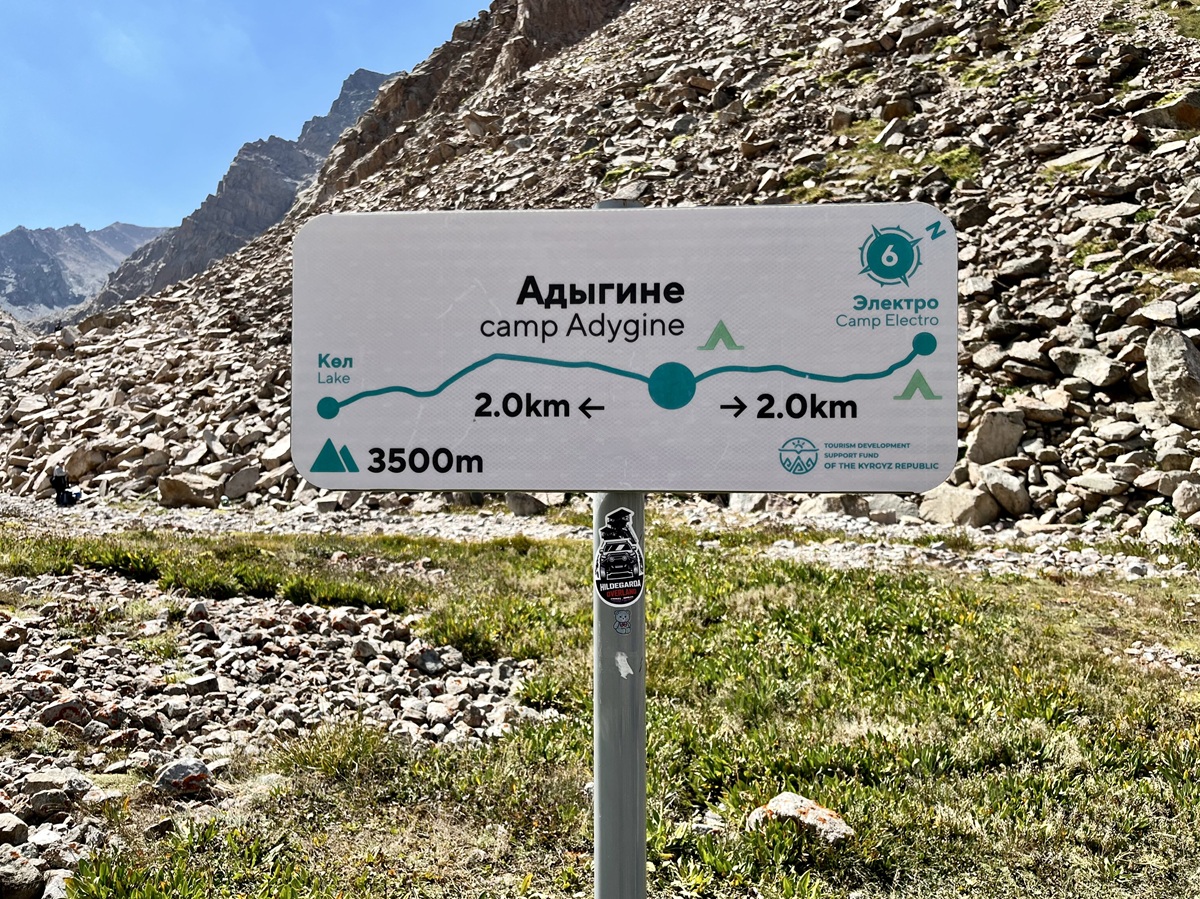
Based on the map provided by the Tourism Development Support Fund of the Kyrgyz Republic, the trail is divided into seven key points:
- Ala Archa River to Panorama
- Panorama to Memorial
- Memorial to Bridge
- Bridge to Camp Electro
- Camp Electro to Camp Adygene
- Camp Adygene to Lake
- Lake
Below, I’ve shared details, photos, and insights for each section to help you visualize the trail and know what to expect along the way.
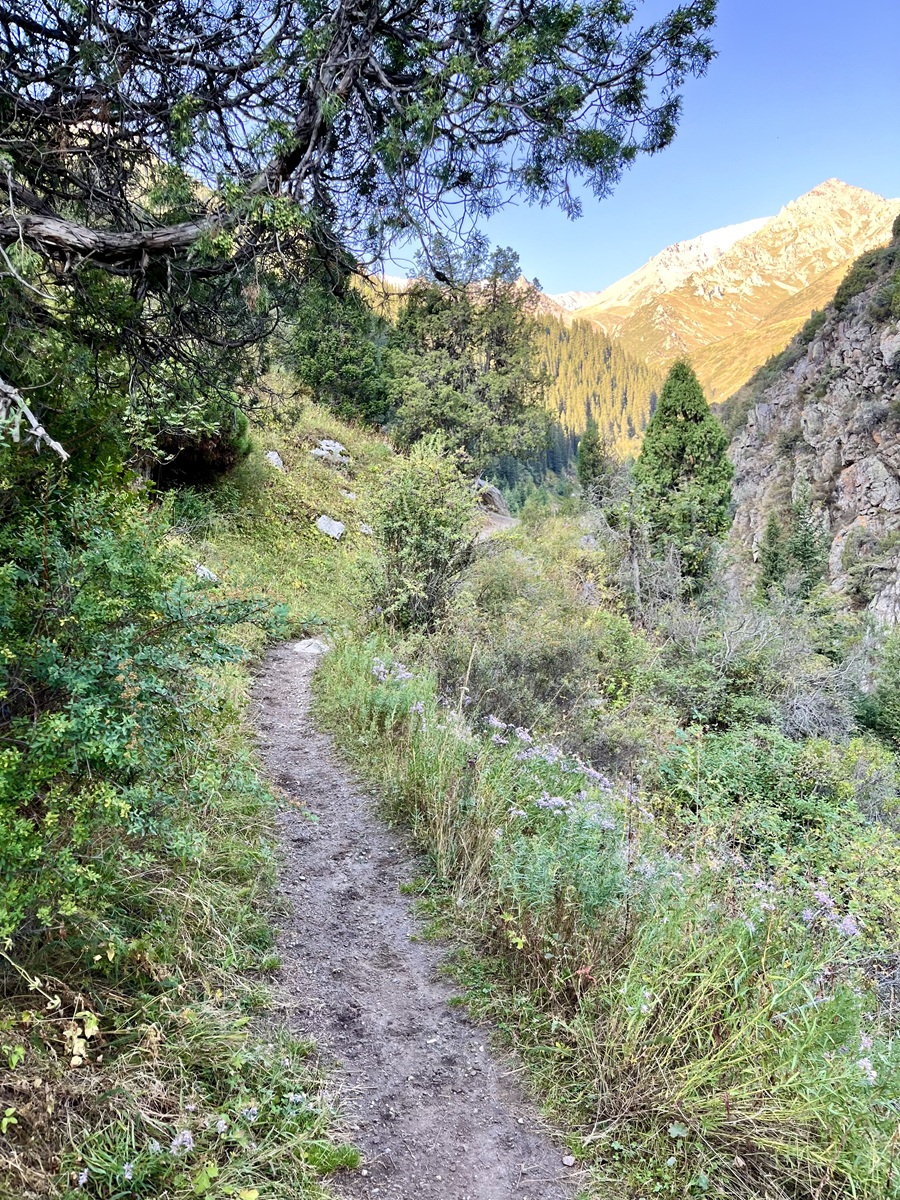
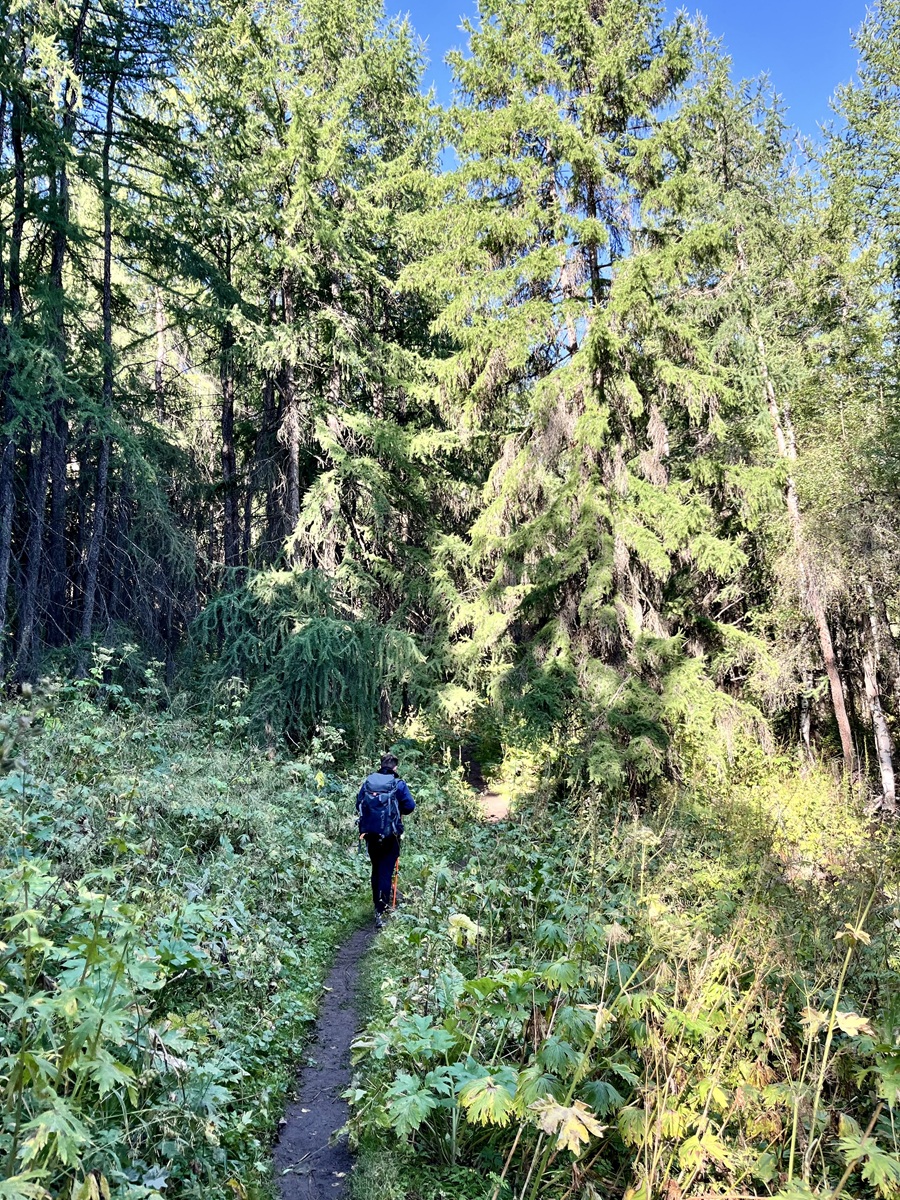
1. Ala Archa River to Panorama
From the main road of Ala Archa National Park, the trail begins by crossing the Ala Archa River via the yellow bridge.
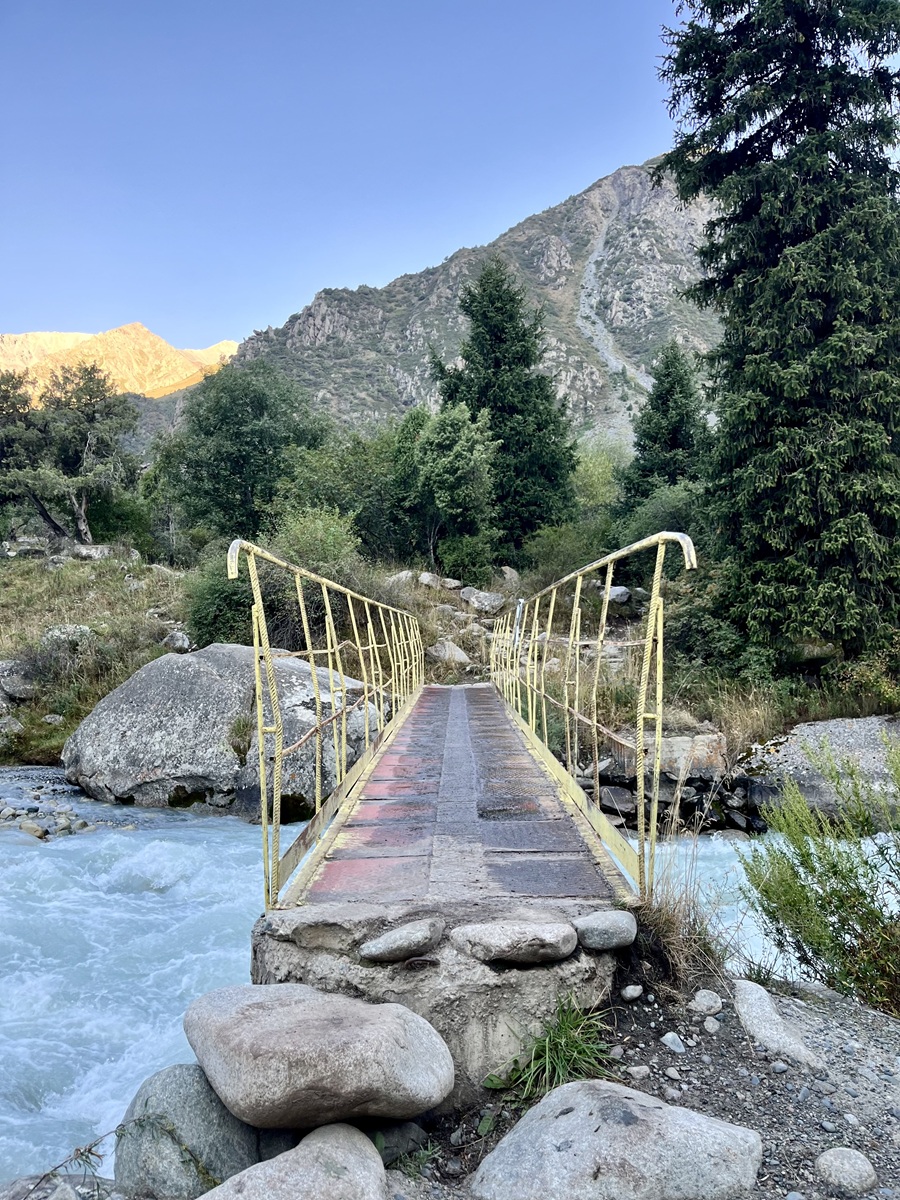
Once across, you’ll enter the forest and walk along a narrow trail that can be a bit steep and slippery. Thankfully, it’s a short stretch — you’ll likely spend no more than 30 minutes here.
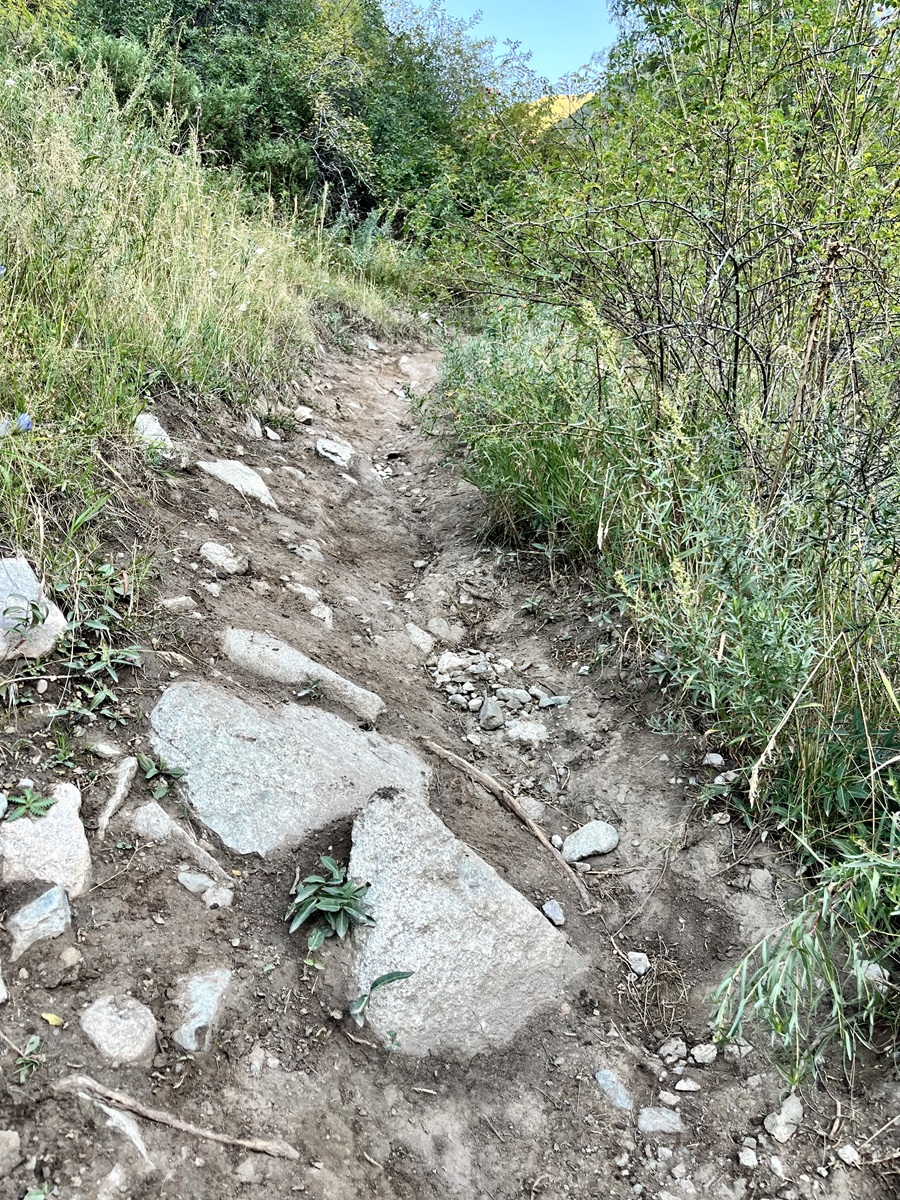
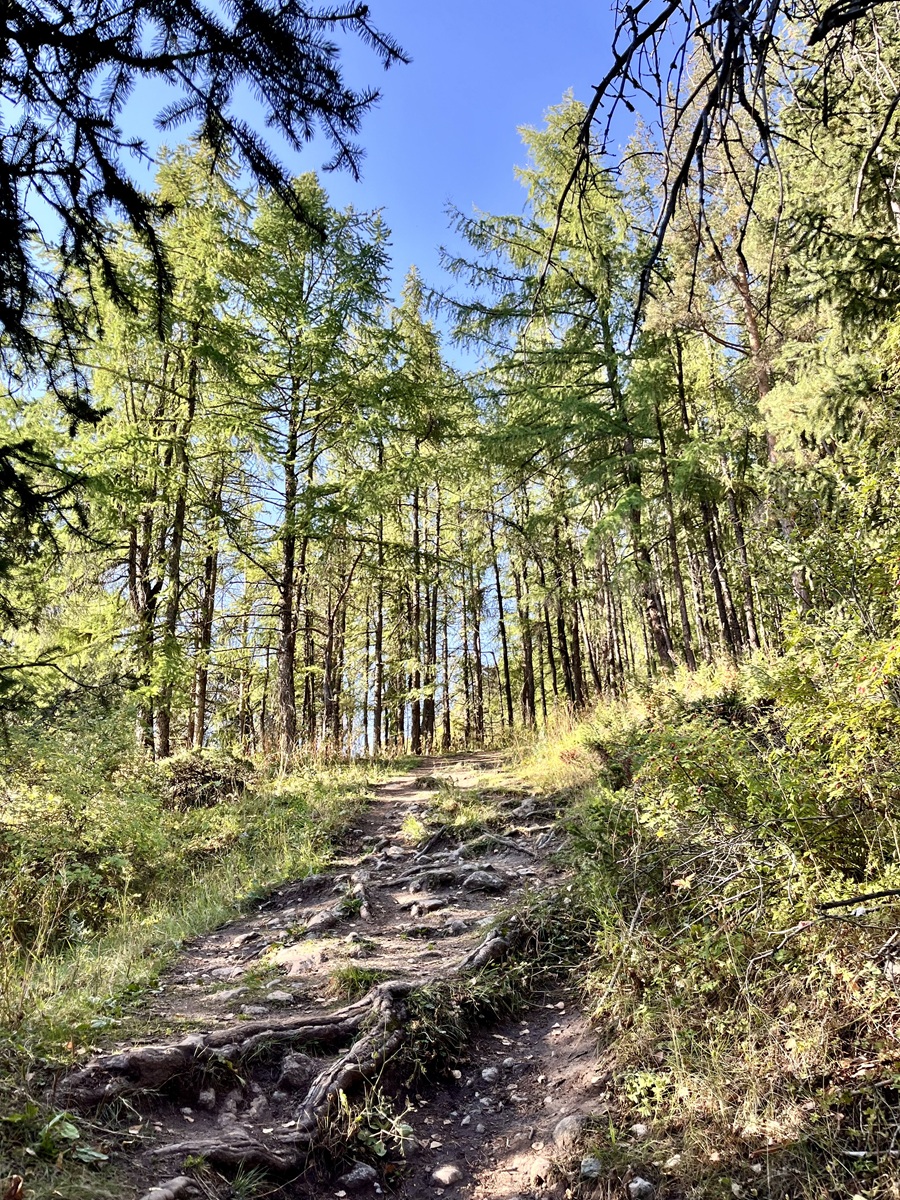
2. Panorama to Memorial
From Panorama, the trail splits into two — left and right.

I assumed the right-hand path would lead to a scenic viewpoint of the gorge (and honestly, it already looks panoramic).
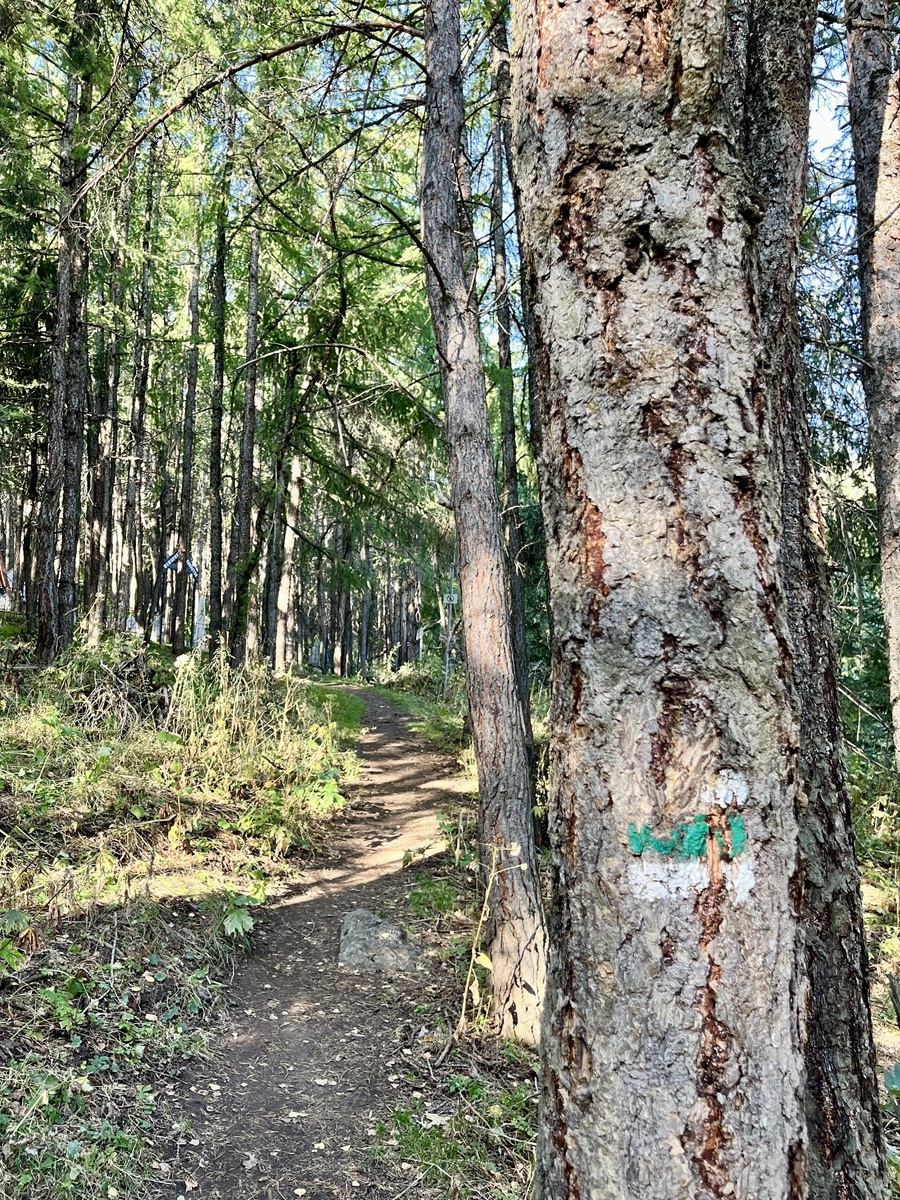
We took the left path, which continues deeper into the forest. Some sections are a little steep, but the firm soil and exposed tree roots make it manageable. Before reaching the memorial, you’ll spot a clear white-green-white trail sign, so it’s hard to miss.
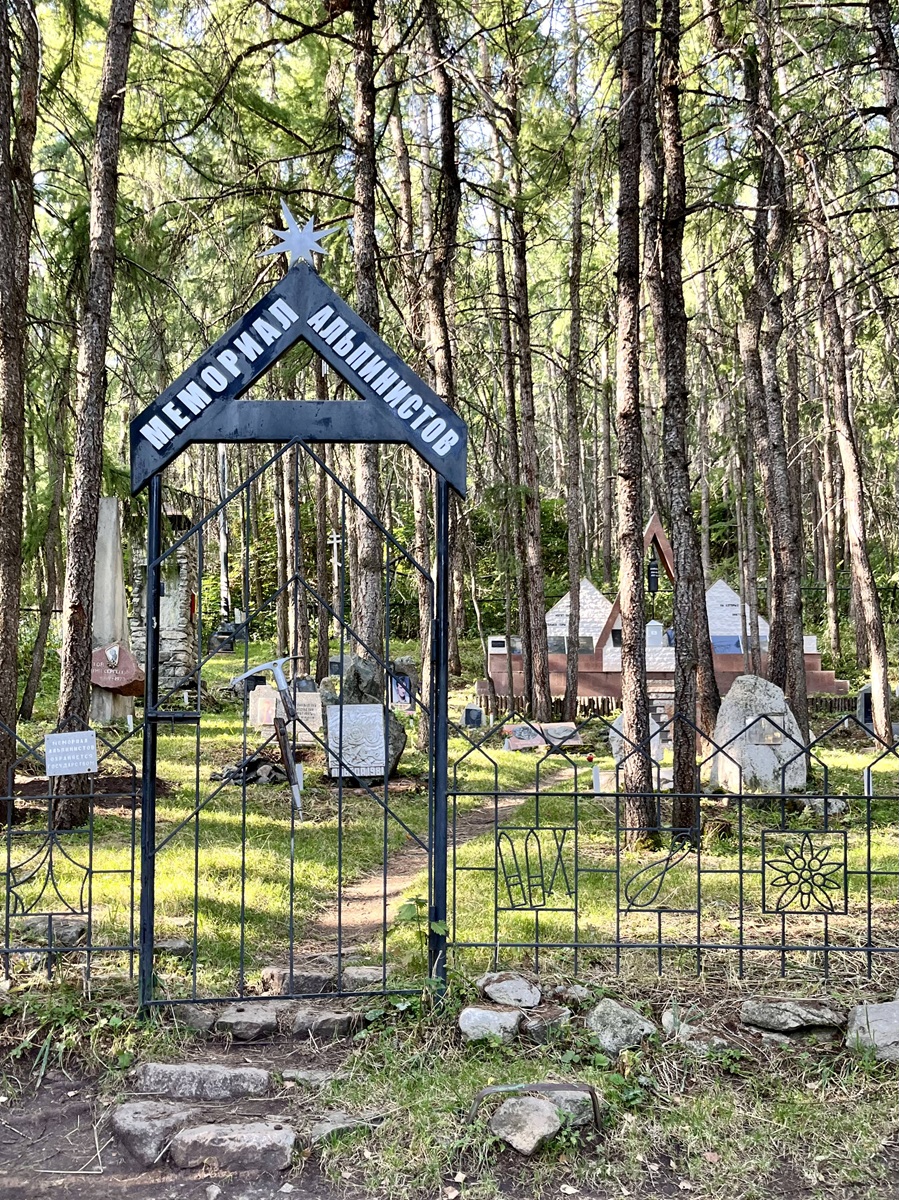
3. Memorial to Bridge
The memorial is a small cemetery, enclosed by a metal gate and fence, built to honor climbers and alpinists who lost their lives in mountaineering accidents.
We didn’t enter the memorial though since we were rushing, but the place had a solemn and peaceful atmosphere. During our descent in the evening, however, it felt a bit eerie as we were the last hikers out and I was sweeping the group — cue my anxious thought: what if someone pulled me from behind? Lol.
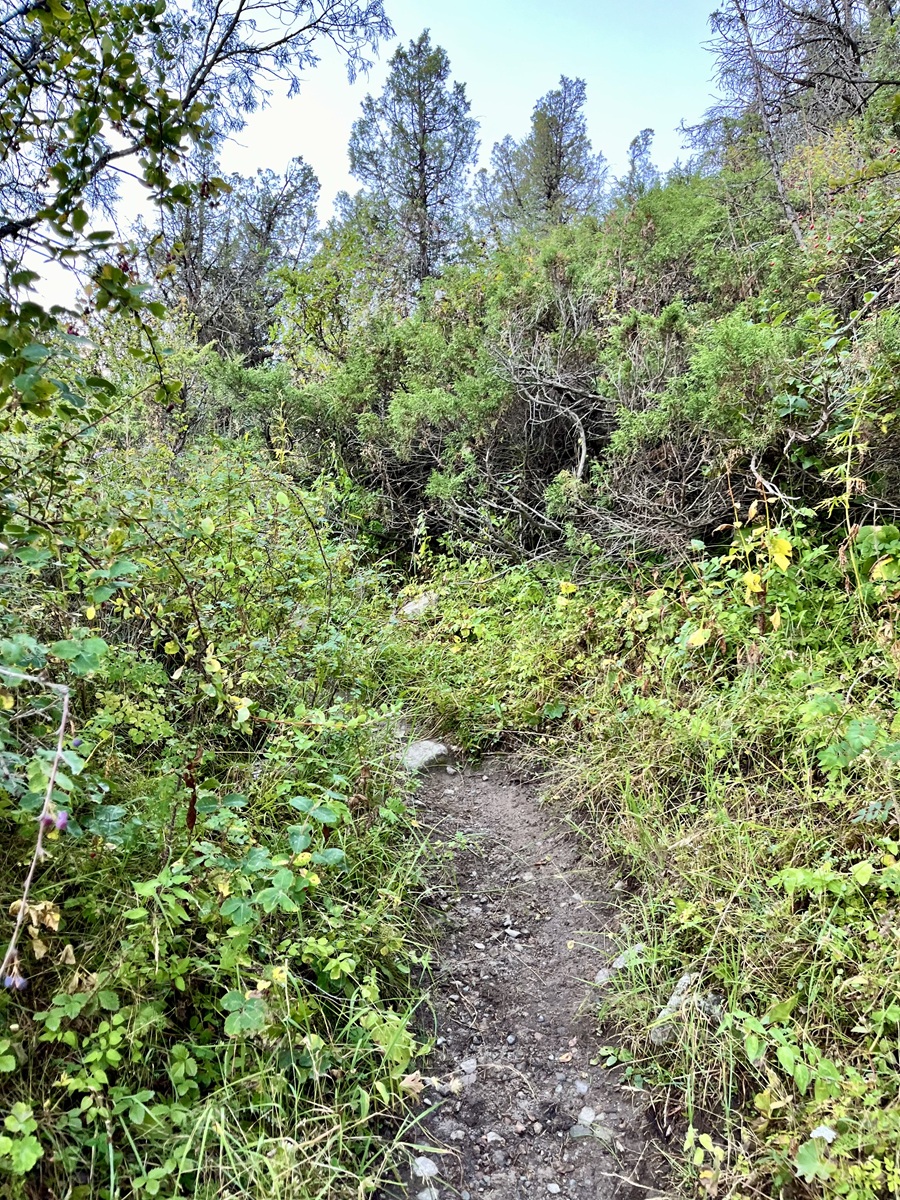
Beyond the memorial, the trail leads through a shady forest filled with tall conifers and dense undergrowth. Because of the abundance of the vegetation, this part felt refreshingly cooler compared to other lower-elevation sections.
Soon after, the forest clears and the path continues along an open slope. From here, you get a stunning panoramic view of the opposite side of the river. The terrain is mostly gradual, with just one short climb before descending toward the bridge.
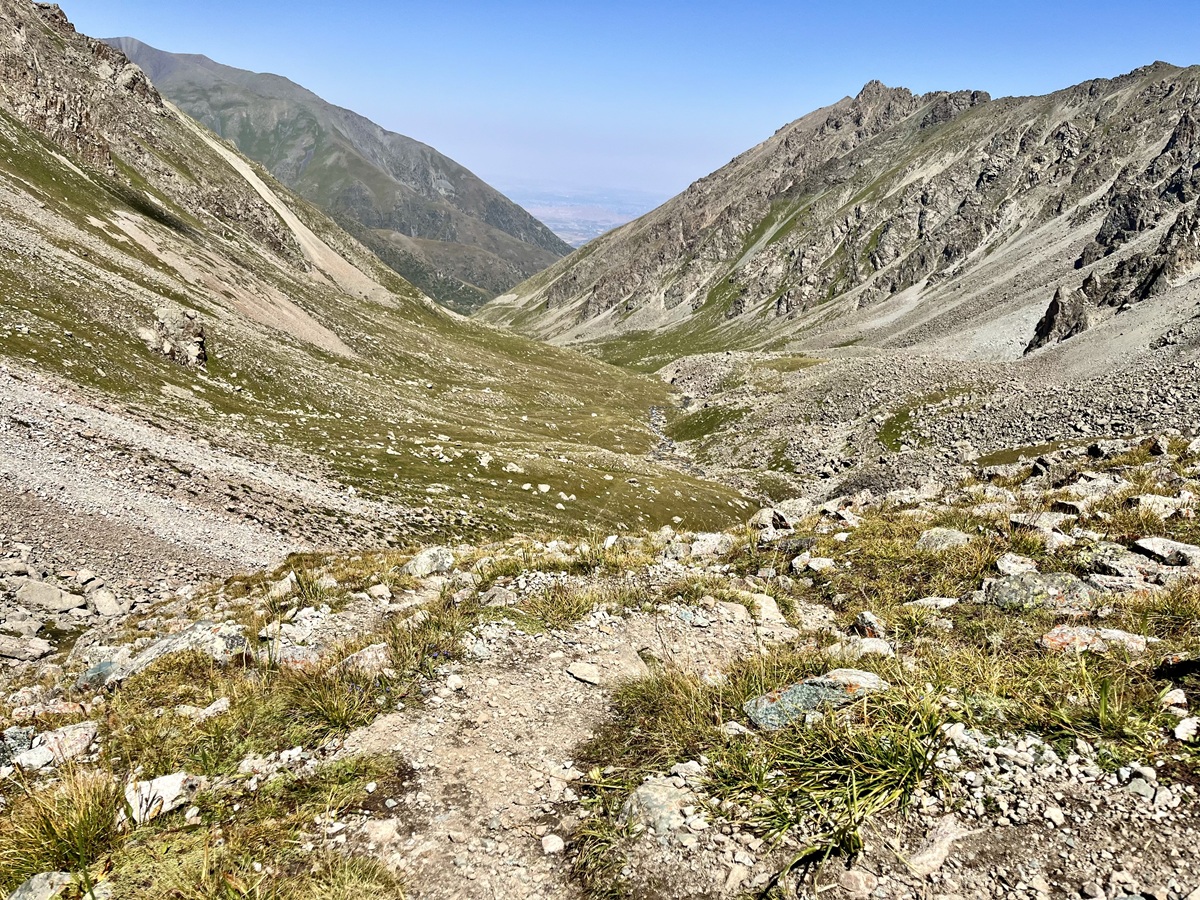
4. Bridge to Camp Electro
Soon, you’ll cross the famous “dodgy” metal bridge to the other side of the gorge. To my surprise, it wasn’t as wobbly as I feared. However, it’s still a thrilling crossing with the roar of rushing water below.
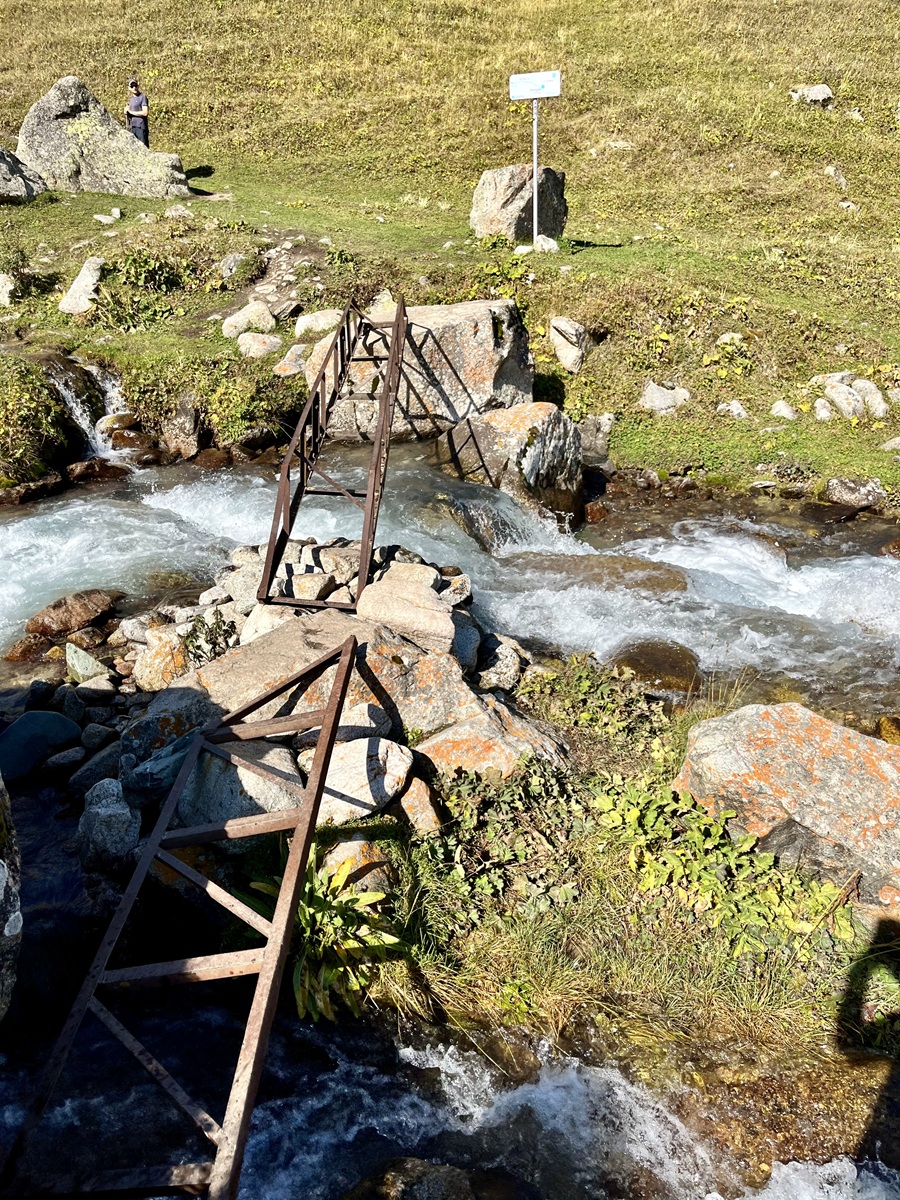
From here, follow the trail along the right side of the gorge. Make sure to remain on the rightmost trail, instead of staying on the left trail, which stays flat and parallel to the river. We missed that distinction and had to climb back up a slope to rejoin the main path later on.
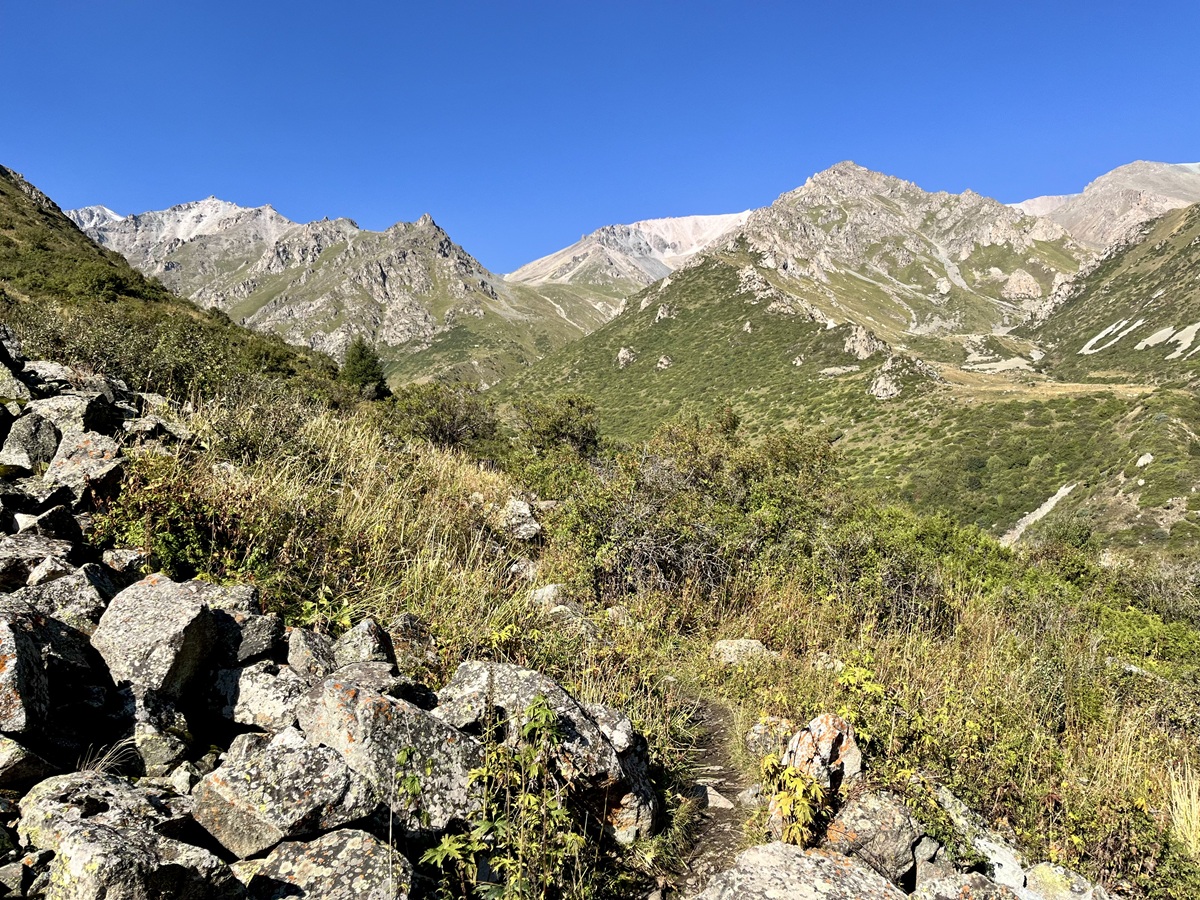
As the gorge curves slightly to the right, the trail begins to gain elevation steadily. I felt the climb here — and this isn’t even half the hike yet! It was a clear sign that the second half of the trail would only get tougher.
5. Camp Electro to Camp Adygene
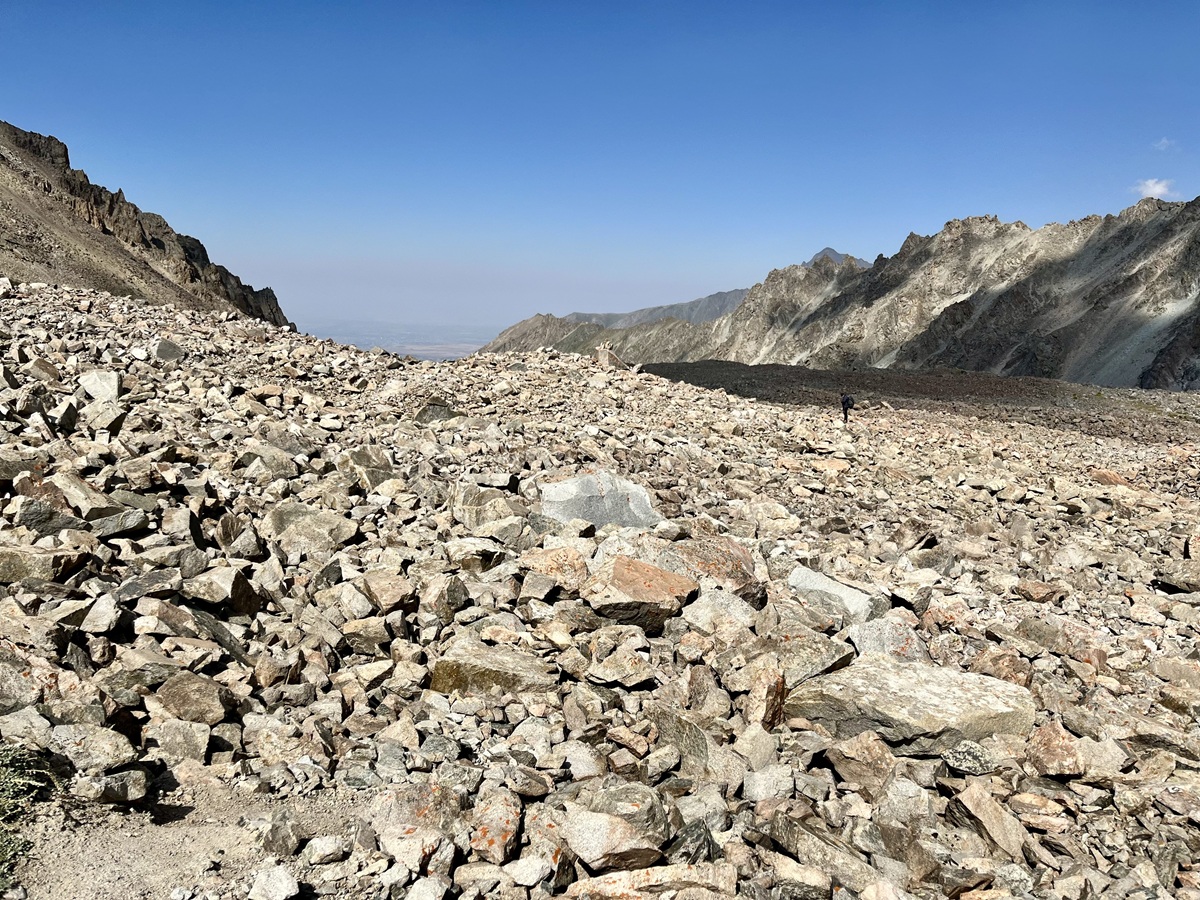
Camp Electro isn’t a proper campsite but more of a backcountry spot for multi-day hikers. It’s not as wide or flat as I imagined. After passing the campsite, the first truly steep section of the trail starts. Zigzag your way up a dry, rocky slope to ease the climb.
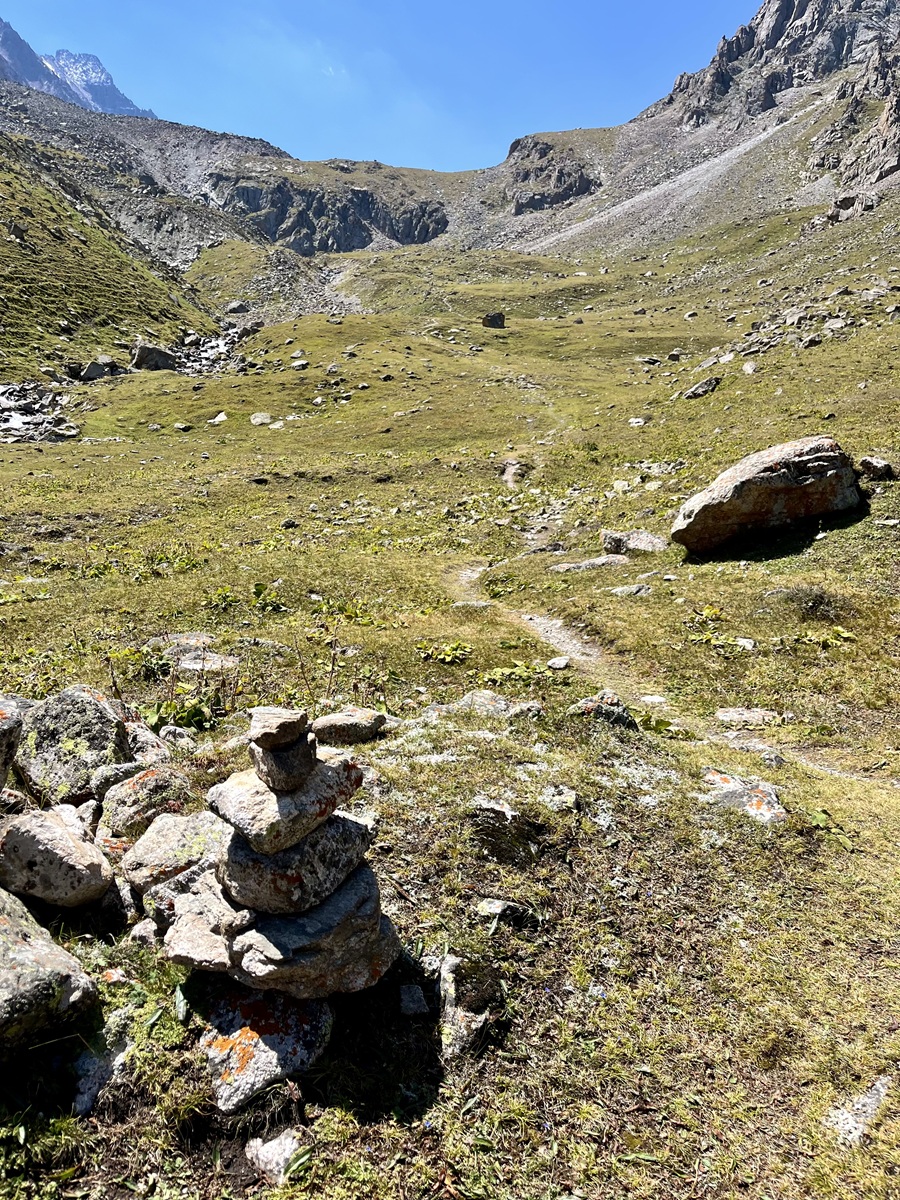
After the incline, the trail dips briefly toward the gorge before leveling out into a rocky alpine landscape. Here, loose stones, gravel, and scattered boulders dominate the path. While it’s not as strenuous as the first climb, the uneven terrain makes sturdy footwear and trekking poles especially useful.

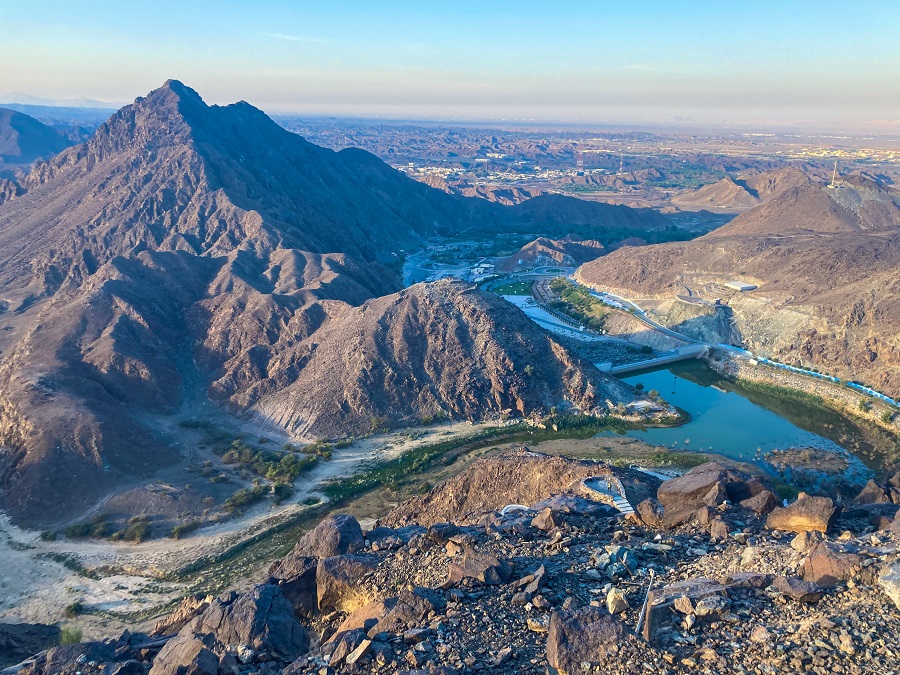
Despite the challenge, this section rewards you with wide-open views of the gorge below. On clear days, you can even spot Bishkek in the distance.
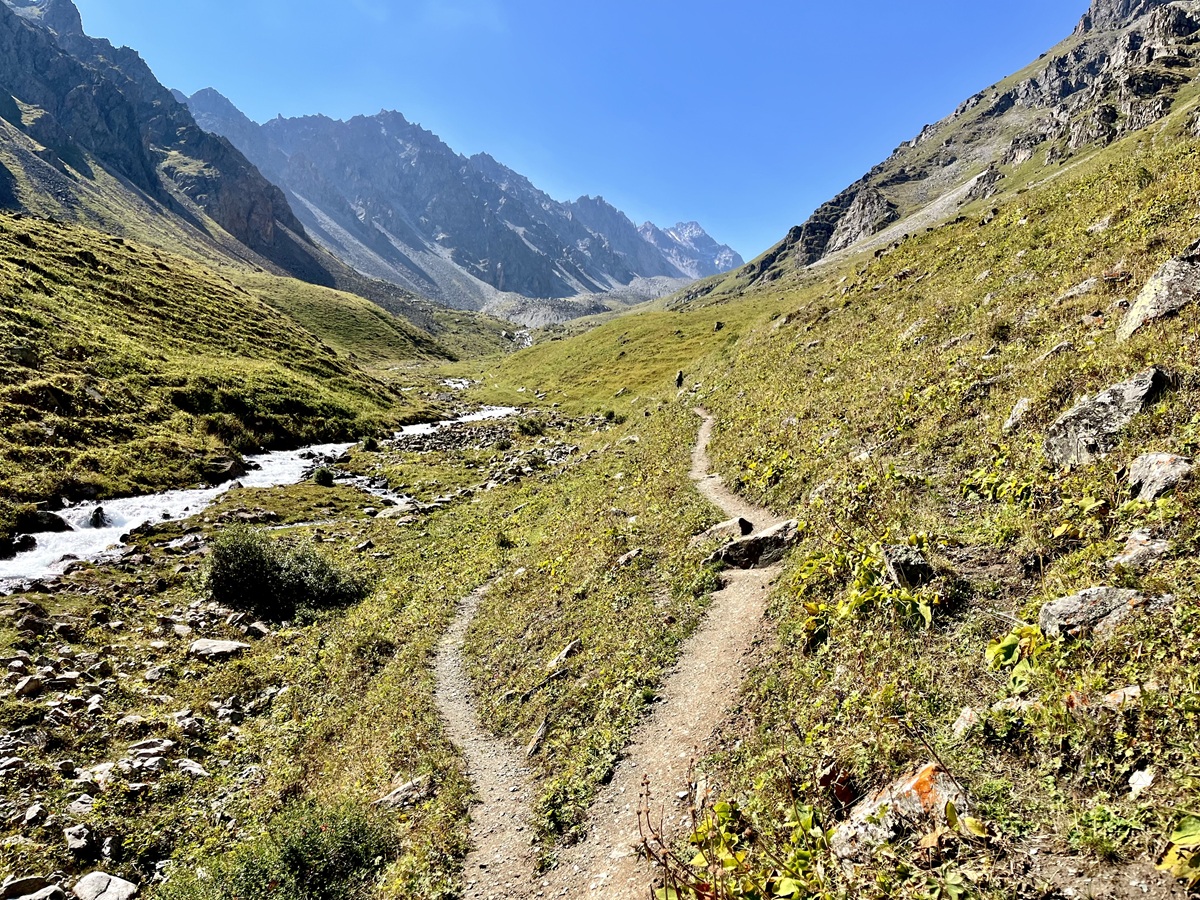
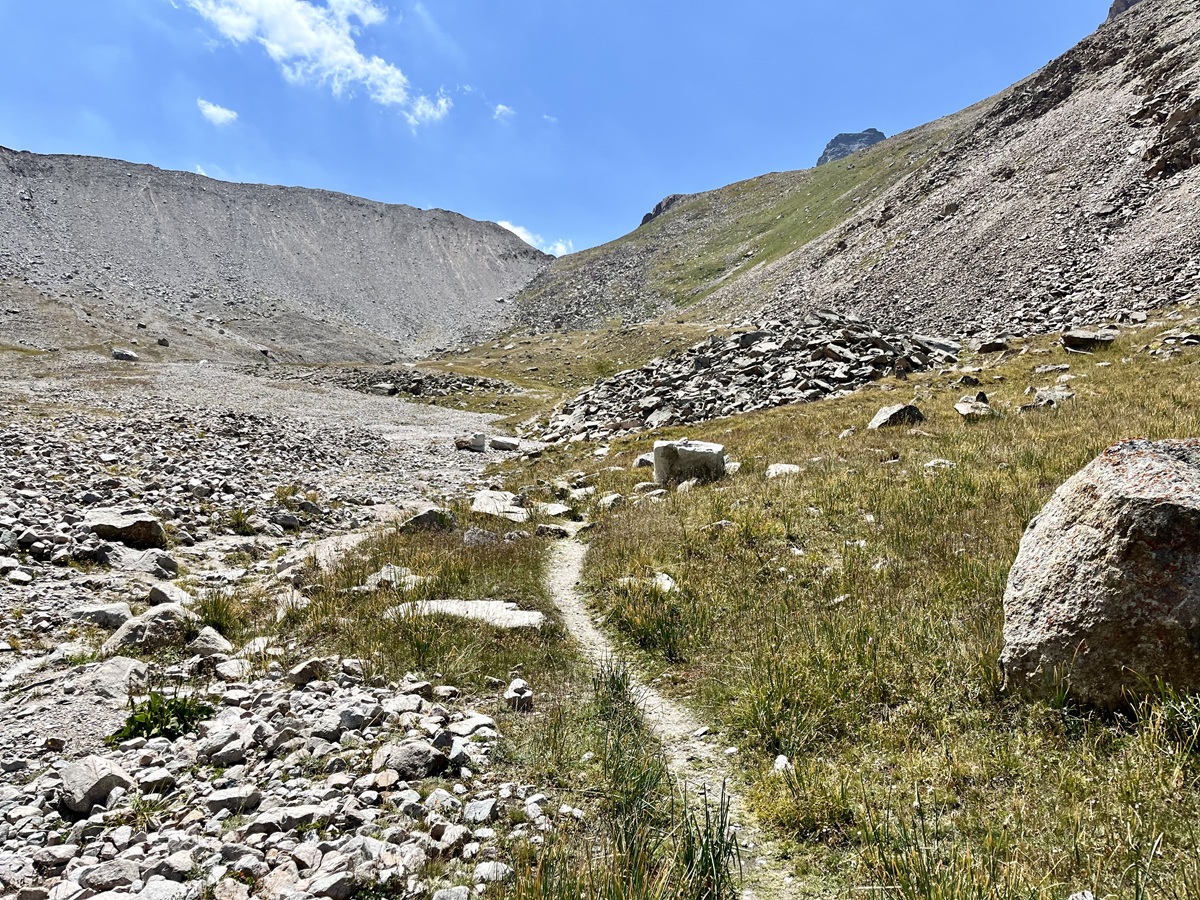
6. Camp Adygene to Lake Adygene
At the top of the slope lies a small plateau, known as Camp Adygene. It’s another backcountry site, likely big enough for a few tents, often used as a base for those heading to nearby peaks. From here, several trails branch off toward Adygene Lake, Adygene Peak, Electro Peak, and Panfilov Peak.
To reach the lake, take the small powdery trail with loose rocks to the left of camp, climbing up toward the moraine. A moraine is essentially a pile of boulders and debris left behind by glaciers. It looks easier than done, as it goes up and down in little “hills,” with no real path.
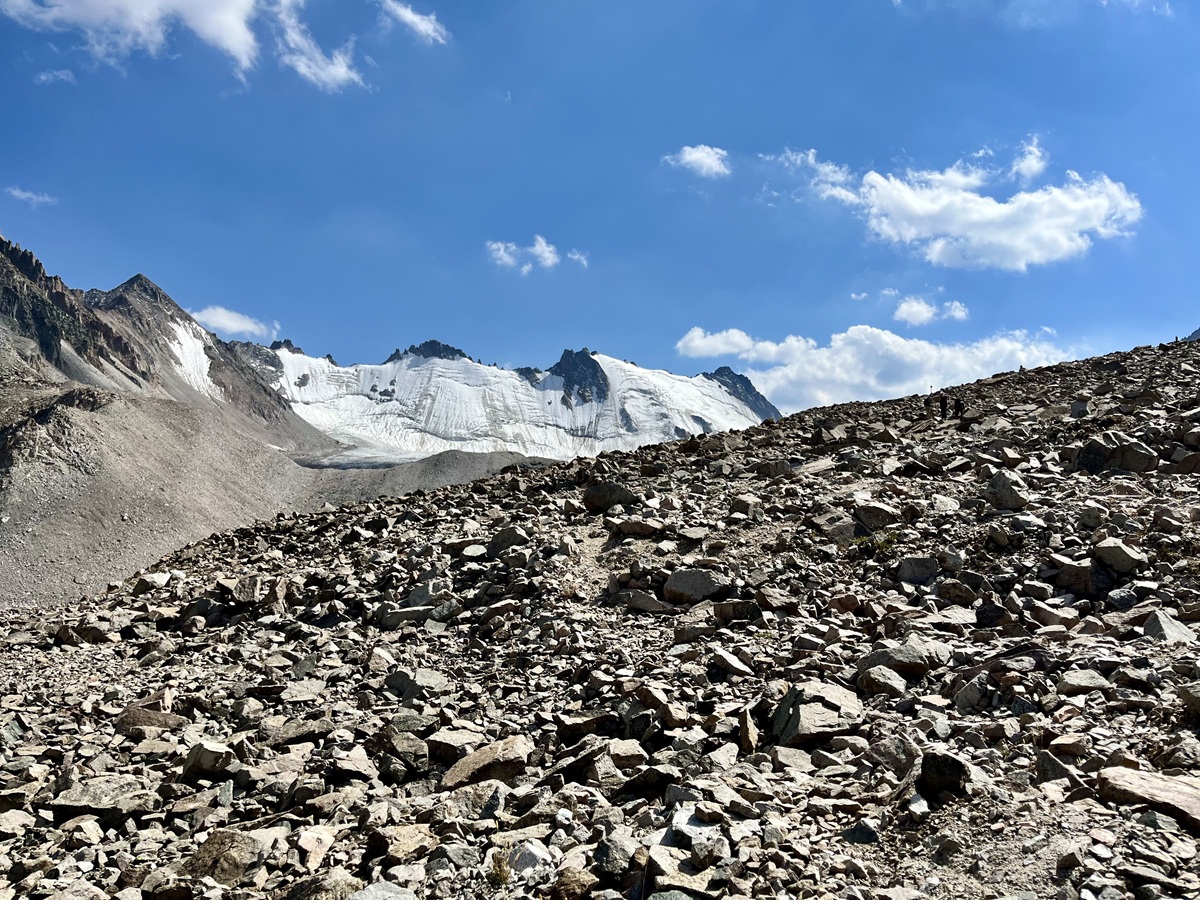
Since we were among the last hikers that day, there weren’t many people to follow, just countless stone cairns scattered in different directions. We were advised to stay slightly right and climb higher, but even then, it was still confusing.
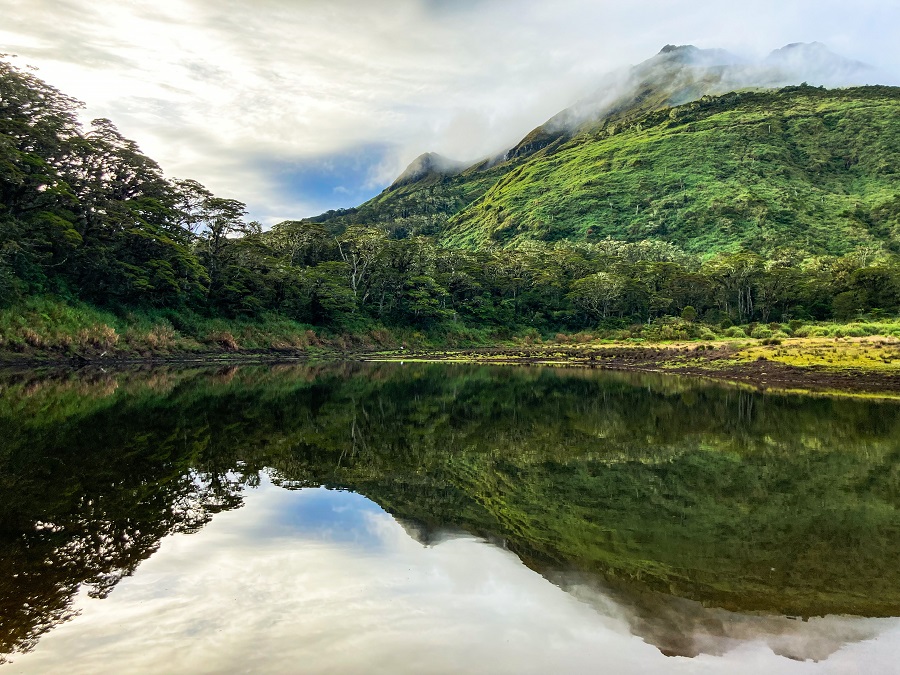
After a long walk, we finally spotted the bright blue hut next to Adygene Lake. It’s used as a base by scientists who study the glacier and the lake, monitoring its movements and natural activity.
One thing to note is that the lake doesn’t always look turquoise like in the photos online. When we came, it was more grayish — a result of what they call glacial melt and sediments mixing into the water. Its color depends on the season, weather, and how much “rock flour” the glacier has carried down, and it is part of the lake's natural cycle.
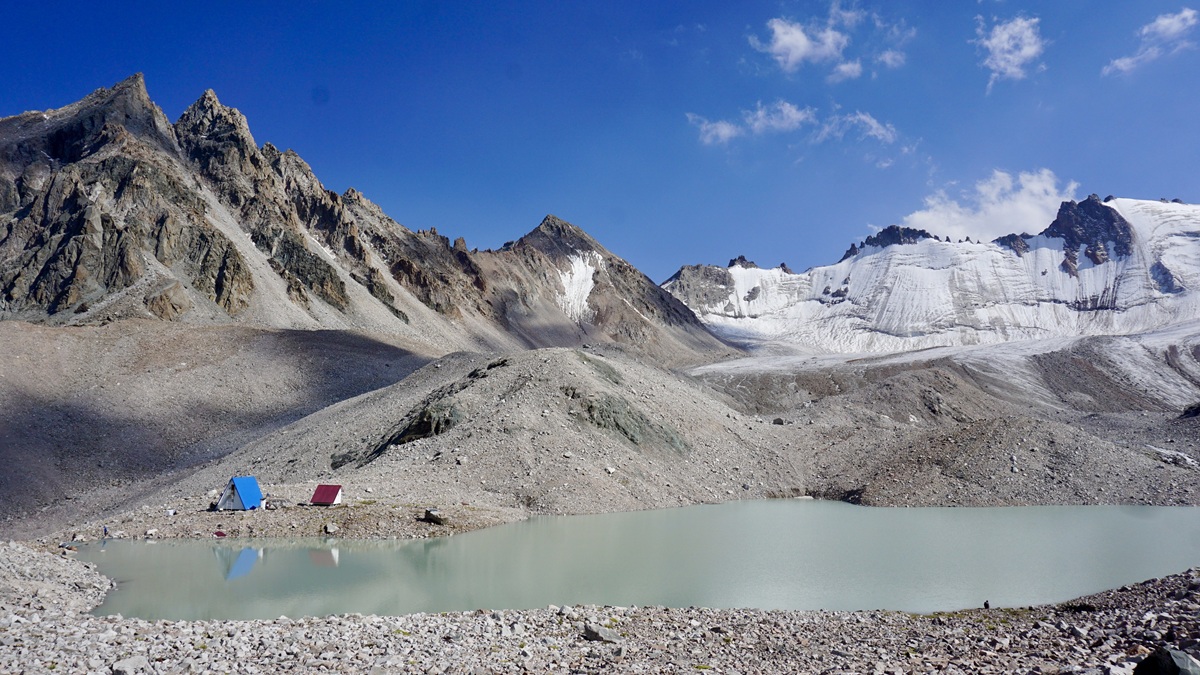
From here, the glacier is visible and even walkable, so you’re free to venture further if you still have the energy and daylight. For us, this was our turnaround point, so ciao!
Hiking Arrangements & Contact Groups:
You can definitely hike this trail on your own since it’s well-established and easy to follow. However, if you prefer hiking with a guide (which I personally recommend), here are some contacts I had a great experience with. The links below lead to their Instagram accounts — feel free to reach out directly:
- Beka @kyrgyzgirl__ from @BeNomad – She can arrange not only a guide, but also transportation and other tours around Kyrgyzstan.
- Guides Jamil & Nurbolot – Both are affiliated with the Trekking Union of Kyrgyzstan. They are professional, knowledgeable, and genuinely made my experience smoother and more enjoyable.
Personal Thoughts on Adygene Glacier Lake Hiking Trail:
As I always say, we all have different adventure appetite or what I call #hikeppetite to begin with. So, a good trail for me might not be a good trail for you, and vice versa. And that’s completely okay — we don’t need to agree with anyone or everyone all the time. Anyhow, here’s what I think about my hike in the Adygene Glacier Lake Trail in Ala Archa National Park:
Pros:
- Being inside Ala Archa National Park, it’s super close to Bishkek, which makes planning and logistics easier than ever.
- Compared to other popular trails in Ala Archa, this one is far less crowded. If you go on a weekday, there’s a good chance you’ll have the trail almost entirely to yourself.
- Although the moraine section can be tricky, the overall trail is well-established and easy to follow. Hiring a guide is not a must — it really depends on your preference and comfort level.
- If you’re training for long-distance hikes or alpine climbs, doing Adygene Glacier Lake in a single day makes for an excellent training ground.
Cons:
- Although non-technical, the hike is long — almost 21 kilometers. If you’re after something shorter, you’ll likely need to turn back before reaching the lake.
- The moraine section can be slow and frustrating if you’re hiking alone, as it’s easy to lose time finding your way.
Much like the Komsomolets Peak hike, I loved the overall challenge of this trail, but the distance felt endless at times. At one point, I almost turned back when we were still in the moraine, as I'm quite exhausted and it's past our turnaround time. Then we realized the lake was only about 150–200 meters away. The thought of logging another DNF (Did Not Finish) pushed me to keep going — and I’m so glad I did.
The combination of its distance, elevation, and difficulty, paired with the breathtaking view of the glacier lake at the end, made it the perfect adventure for me. My only regret was starting too late, which forced me to rush through sections I would’ve loved to savor. Still, this is exactly the kind of hike I’d return to in a heartbeat.

Whatever decision you make, always remember to prepare beforehand, stay safe, and last but not least, enjoy the outdoors! #happyhiking!
With lots of love,
PINAYHAKAWATI 💗
AND AS A GENTLE OUTDOOR ETHICS REMINDER:
LEAVE NO TRACE!